Tag Archives: recipe

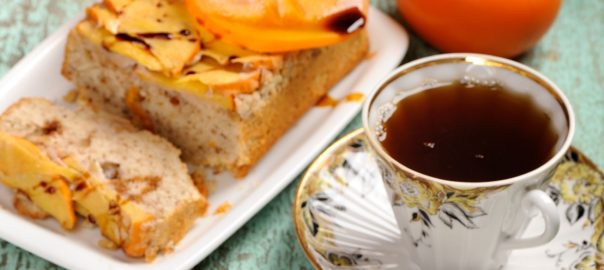
Persimmon Tea For Acid Reflux


Persimmons are a beautiful, fragrant, sweet berry available in the Fall.  Some varieties can be eaten while still slightly firm although most varieties taste best when allowed to ripen to an almost mushy consistency. Dried persimmons are a way to enjoy this delicious treat throughout the year and are available at Asian markets.

Commonly offered after traditional Asian meals as a digestion aid, persimmon tea, sometimes called "persimmon punch," also alleviates the symptoms associated with gastroesophageal reflux disease or GERD. GERD symptoms occur when stomach contents rise into the esophagus, which produces irritation.

Acid reflux sufferers often experience varying degrees of heartburn, a feeling that food remains stuck in the region of the sternum, or nausea and regurgitation after meals. Various factors contribute to GERD including a hiatal hernia or a weakened sphincter between the stomach and esophagus. Certain medications, obesity or pregnancy may also create the condition.

Persimmons are known, not only for their antimicrobial properties, but also contain vitamins A, C, and ten different minerals. The tea, made from simple ingredients consisting of persimmons, ginger, cinnamon, and sugar, offers a number of health benefits that include diminishing flatulence and the discomfort that accompanies GERD.

Making the tea merely requires boiling the persimmons, adding the spices and sugar, and cooling the mixture. Some believe the secret of the remedy lies in the cinnamon and ginger components of the tea.

Cinnamon originated in China and using the bark as a spice and health remedy dates back thousands of years. The popular spice offers anti-inflammatory and antimicrobial properties as well as providing it's antacid properties, relieving excess gas and calming diarrhea. Ginger also has a long history in alternative medicine for relieving nausea and having anti-inflammatory properties.

Persimmon Tea

Ingredients
  

  • 2 quarts water
  • 3 cinnamon sticks
  • 2 tablespoons of fresh ginger root, sliced
  • 1 cup dried persimmons
  • 3 tablespoons evaporated cane juice crystals

Instructions
 

  • Simmer the water, cinnamon sticks and ginger in the saucepan for approximately 45 minutes.
  • Add the persimmons and cane juice crystals.
  • Simmer for an additional 15 minutes.
  • Remove from heat and allow the mixture to steep for one hour.
  • When cooled, strain the liquid, discarding the solid ingredients.
  • Refrigerate the concentrated tea and enjoy as needed, hot or cold.

Many people enjoy drinking the concentrated tea while others add a few tablespoons of the liquid to other beverages, which also provides symptomatic relief. Individuals suffering from acid reflux typically consume three to four ounces of persimmon tea before or with meals and before going to bed. The sweet, spicy flavor of the tea appeals to many and GERD suffers appreciate the beverage's calming effects.

This simple home remedy remains worth a try for people plagued with the discomfort associated with gastric disorders. Some claim that including persimmon tea with an acid reflux diet and lifestyle modifications may reduce the need for prescription medications however GERD patients should consult with their primary care provider before eliminating any prescription medications.


Rowena Kang is a writer and the Outreach Director for the Morgan Law Firm, a firm that represents clients going through a divorce in Austin.

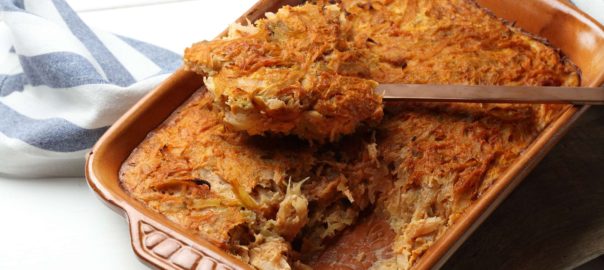
Un-Stuffed Cabbage Casserole

This post, and delicious recipe, are from my friend Robin Horn over at Seasonal Eating.  A foodie from a very young age, Robin lives in Santa Cruz, California, and is a proponent of seasonal eating and CSAs.  

Cabbage is coming into season and there are so many delicious ways to serve it.  While I love stuffed cabbage I confess that the time it takes to make all those little rolls (especially compared to how quickly they get scarfed down) is somewhat of a deterrent.  This seems like a tasty solution, and since it makes 12 servings it would be great for a big family gathering (or for delicious leftovers).

Someday I will make stuffed cabbage leaves, the delicious galumkis that my mother and grandmother used to make…sort of. The family recipe was never written down, so this is a project for when time, patience, and creativity are simultaneously expanded.

In the meantime, working on my cooking goal of exploring my Polish cooking roots, I found a Weight Watchers stuffed cabbage casserole, and set out to make a no-beef, more easily prepared version.

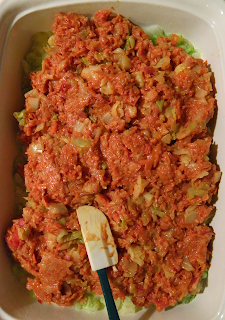
Because the original recipe had a number of cabbage leaves wrapped around one mound of filling, it was tricky to cut and serve—and to fill in the first place. So, I simply chopped all of the cabbage and put half in the filling and half beneath the filling, where all the juices from the filling drip down deliciously.

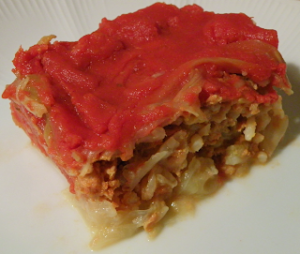
I topped the filling with a thin tomato sauce. Originally I tried a layer of cabbage on the top, but the tomato sauce dried out instead of flavoring the cabbage. So I replaced this layer with a few thin cabbage strips. The meat and rice filling right below the tomato sauce draw the tomato flavor down into the casserole because the uncooked rice is “thirsty.”

While not as time-consuming as stuffed cabbage leaves, there are many steps in this recipe and it must cook for 1½  hours. Just like stuffed cabbage, the leaves must be precooked. Save time by having two people chop veggies, measure and mix meat filling ingredients,  make the sauce, and assemble the layers.

You can use lean ground beef in this recipe if you prefer. I added paprika from my family recipe. You could choose various herbs, garlic powder, and/or a hint of cayenne. If you’re braver than I am, you can blend the meat mixture with your hands, like my Mom did. It’s faster, and if I’d had some latex gloves, I would have tried it.

 
Note from Mira:  I find it's simple to mix meat mixtures like this in my blender.  And since I'm often working with cold ingredients I don't get that chilled effect on my hands which I find unpleasant.


Un-Stuffed Cabbage Casserole

Servings 12

Ingredients
  

  • 2 ½ lbs. cabbage
  • 1 lb. ground turkey
  • 2/3 cup shredded carrot
  • ½ cup minced onion
  • ½ cup brown rice
  • ½ tsp. salt
  • 1½ tbsp. paprika
  • 1 large egg
  • 1¼ cup chicken or veggie broth
  • 24 oz jar tomato sauce
  • 2 tbsp. wine vinegar
  • 2 tsp. sugar
  • olive oil for greasing pan

Instructions
 

  • Bring a large pot of water to a boil.
    Remove 3 outer leaves from cabbage to make the strips of cabbage for the topping. 
    Cut remaining cabbage into quarters without removing core.
    Boil each quarter cabbage in water until tender, about 5 minutes. 
    Drain well and cool. 
    Chop cabbage quarters into ½ inch dice, discarding cores. 
    Boil the 3 cabbage leaves in water 3 - 4 minutes, until tender. 
    Remove with slotted spoon, drain and cool. 
    Cut out rib and make ½ inch strips of soft parts. 
    Dice ribs with quarter cabbages.
  • Preheat oven to 350 degrees F.
  • Put ground turkey into bowl and break up into pieces with wooden spatula. 
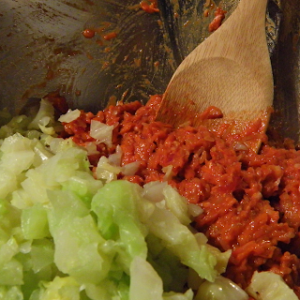
    Mix in carrot, onion, rice, salt, and paprika. 
    Beat egg together with ¼ cup broth till smooth. 
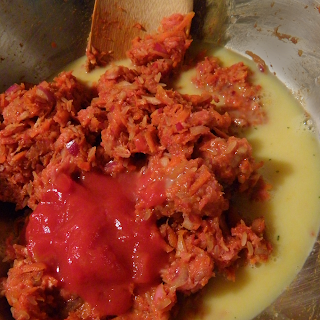
    Add this mixture and ½ cup tomato sauce to meat mixture and beat till evenly blended.
    Mix in half of the cooked chopped cabbage evenly. To make the sauce, combine the remaining tomato sauce with wine vinegar and sugar.
  • Lightly oil a 9” x 14” baking pan. 
    Spread the remaining half of the cabbage in the bottom of the pan. 
    Pour the remaining (1) cup of broth around the edges of the pan. 
    Spoon on the meat mixture. 
    Smooth out with a rubber spatula to make an even layer. 
  • Place the cabbage strips across the top, leaving space between them.
    Pour tomato sauce over top of meat mixture and cabbage strips and spread into even layer.
  • Bake for 1½  hours. 
    Let stand at least 20 minutes before serving so liquid is absorbed.

Detox Bath

Baths versus showers


There are many ways to “clean up” which can include showers or baths. Many of us tend to take showers rather than baths. For some it's a matter of necessity with no tub available, for others showering is seen as faster and more convenient.  

Yet, taking some time and enjoying a bath can be a powerful way to help balance our bodies.  First there is the slow down, taking the time to soak.  A form of hydrotherapy, that relaxing time goes a long way toward counteracting the hectic pace at which most of us lead our lives.  Baths can also, however, be a great way to help us re-mineralize our system.  This is done through the use of something called a detox bath.

Health benefits of a bath


Our skin is our largest body organ, sometimes referred to as the “third kidney.”  What we put on it goes into our system.  This works for both positive and negative ingredients.  Often, we are exposed to many environmental stressors and/or we eat foods that may cause a more acidic body state.  While a bath cannot counteract all of that it can help to balance us.  Many people find that when they take a detox bath, they feel much better and more relaxed.  

It's often recommended to take the bath immediately before bed. In fact one small scale study showed a positive correlation between bathing and improved sleep.  Some participants reported falling asleep faster and researchers noticed that after bathing sleep movement was reduced for the first three hours.

A bath can not only be relaxing but also may have positive benefits for your overall health. These benefits can include improved mental and emotional health, soothe muscle and joint pain, and increase blood flow, thus supplying more oxygen to the periphery areas of the body. One study published in the British Cardiac Society, Heart, found that among middle aged people taking baths was linked to a reduced risk for cardiovascular disease.  All of which adds up to a good reason to include regular baths as part of your self care routine.

What’s in that tub?


Many people, when they think about a bath, think about bubble baths.  Those aren’t recommended due to the ingredients.  A much better option is an epsom salt soak.  And while you can purchase scented bath salt products you need to be careful about what the fragrance is made from, what the ingredients are, plus you may be spending too much. As it turns out you can make a simple detox bath at home for pennies.  

While daily bathing is fine and has a variety of health benefits as mentioned above, it is often suggested to not take a detox bath more than 2-3 times a week so as to not overwhelm your system. 

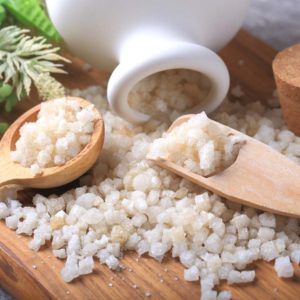
This detox bath recipe includes Epsom salt which helps to soothe inflammation, reduce stress, promote elimination of environmental toxins, and help with re-mineralizing the body with its magnesium content. The baking soda is alkalizing for the skin and many people report the combination to be very soothing.

Detox Bath

Ingredients
  

  • 1 cup Epsom salts
  • 1 cup baking soda
  • 5-7 drops relaxing essential oil (the most relaxing ones are lavendar*, ylang ylang, sandalwod, geranium, and vanilla)

Instructions
 

  • Run a hot bath and add the ingredients
  • Combine the ingredients and add them into the bath
  • Soak for 20 minutes immediately before bed
  • Take the time to invest in you and your health with a relaxing detox bath.

Notes

Note: Hot baths and sauna bathing are not recommended if you are pregnant, nursing, or have a health condition which might be negatively affected by immersion in high heat.


[expand title="Sources"] 

Family Medicine. Four reasons to take a bath. Cleveland Clinic.

Ukai, Tomohiko et al. "Habitual Tub Bathing And Risks Of Incident Coronary Heart Disease And Stroke". Heart, vol 106, no. 10, 2020, pp. 732-737. BMJ, doi:10.1136/heartjnl-2019-315752. 

Kanda, Kiyoko et al. "Bathing Before Sleep In The Young And In The Elderly". European Journal Of Applied Physiology And Occupational Physiology, vol 80, no. 2, 1999, pp. 71-75. Springer Science And Business Media LLC, doi:10.1007/s004210050560. 

[/expand]

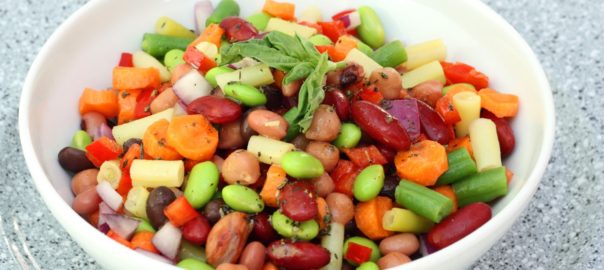
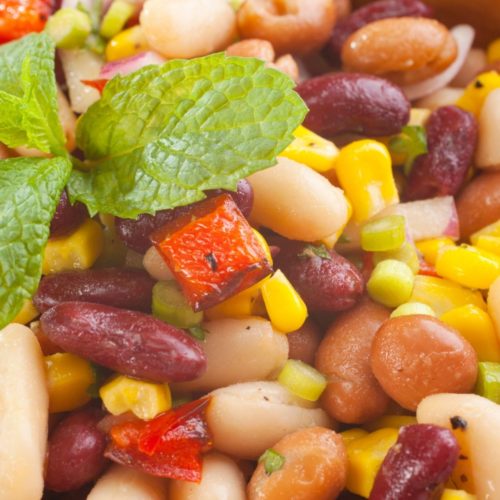
Three Bean Salad

This is a guest post by my Aunt Haya who recently shared a very sweet story about food, connections and memories.  I love food stories.  I like hearing where food came from, how it's changed, and the associations we make with our food; those moments that join us together.  I agree with my Aunt that in this overstimulated fast-paced world it's nice to have these kinds of connections to make us stop a moment and reflect on the various ways that our food comes into our lives. I also love how so many recipes, when shared, keep the name of the person who gifted them to us.

This evening my congregation will be hosting a group of 32 members of a congregation in Maryland who are on a 10 day tour of Israel with their Rabbi. After many guided tours to historical sites they are looking forward to sitting and talking with folks who live here. I have been asked to contribute my three bean salad to the meal.   I am always glad to make and share it.  While assembling the ingredients I stopped to think about it's entry into our lives. 

Nowadays, three bean salad is well known all over the US and multiple variations are on the web. But while living in Houston (in the late 1960s), my husband and I made sure that each of us would have some private time each week, with each of our children.  On one such outing I went with our son Daniel to attend an outdoor performance of an abridged version of some Gilbert and Sullivan operetta out on a lawn of The University of Houston. I think that it was the Pirates of Penzance, but am not sure. 

I did not recognize anyone sitting near us in the audience but Daniel soon picked up a conversation with a boy near his age. I introduced myself to his mother and learned that they were in Houston for the summer while her husband, a school teacher, took summer classes at U of H, in order to eventually qualify to become a school principal in their home town somewhere I think in Arkansas or Alabama. He was often busy attending those summer program classes or working in the university library on his homework, so she and their son were exploring Houston on their own. 

I invited them to join our family picnic the next week in Herman Park on the 4th of July--speeches, fire works and all. They were glad to accept and she brought three bean salad that she'd made. We'd never tasted one before. We all enjoyed it so I asked for her recipe. She wrote out on a piece of paper which I copied on to a file card after I returned home. I added her name Eula Ross.  We got together only once or twice more during that summer, but three bean salad became a staple in our family's favorite summer recipes; particularly as a contribution to buffets and picnics.

Here in Israel the recipe has changed somewhat. I add diced fresh rosemary needles (that I pick fresh from the shrubs) to the chopped parsley in the original recipe and often use chickpeas for the third bean. 

Today I found that I needed to purchase more chickpeas so used red beans as I have no red onion and wanted to add color other than the chopped sweet red pepper to the salad.  I use less sugar in the dressing that Eula Ross recommended and the minimum quantity of oil.  But each time I prepare this dish, whether or not I check the details on the old file card or fly free with improvisations, I think a special thanks to Eula Ross where ever she is now. 

I am sharing this story with you because in this day and age of instant communication, information from people whom one never meets, an entire rainbow of recipes for any dish for which one could possible conceive of hankering, this older, slower, deeper time of meeting a stranger who became an acquaintance and shared her recipe and it's evolution to fit my current location and dietary preferences, pleases me a great deal.

Eula Ross' Three Bean Salad

Ingredients
  

  • 2 cups each green string beans, yellow string beans, red beans or pinto beans
  • 2 stalks of celery cut into cubed shape pieces
  • 1/2 red union diced
  • 1 cup chopped fresh parsley
  • 1/2 cup chopped bell peppers
  • 1/2 cup vinegar
  • 1/3 cup sugar
  • 1/4 to 1/2 cup oil
  • 1 1/2 teaspoons salt
  • 1/4 teaspoon fresh ground black pepper

Instructions
 

  • Whisk the five dressing ingredients together and pour over the vegetables.
  • Mix together cover and chill in fridge.
  • Keeps for 10 days

Notes

Aunt Haya's changes: 
  • 1 Tablespoon of chopped fresh rosemary to the parsley
  • I used frozen cut yellow and green beans which I steam over boiling water just until they thaw, so that they are still a bit crisp
  • I sometimes substitute chick peas for the red or pinto beans – I soak which ever of the three that I use overnight, then cook them myself, drain them before adding to the salad. (I find commercial canned beans of all three types, over cooked (too soft) and too salty)
  • I use only 1 teaspoon of salt
  • About 1/3 cup of oil
  • Reduce the amount of sugar
  • I like to use apple cider vinegar

Zoodles And Sausage

It's zucchini season, that means LOTS of zucchini and a distinct need for more recipes. And while zucchini bread is really delicious, there's only so much of that that you can eat in one season.

Below is a dinner that I made recently using zucchini noodles or zoodles. One of the great things about this dish, aside from using up more zucchini, is that it's quick, easy, and very tasty. It's an assembly-style dish. You cook each of the layers individually and when you get to the last layer dinner is done.  Most of the time is spent in prep-work, the actual cooking doesn't take too long.  I do keep the dish in the oven in between layers (set to 250 degrees) to make sure everything stays warm.


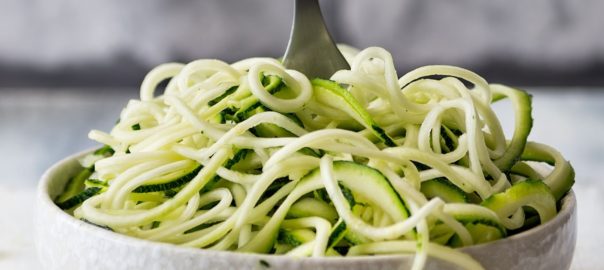
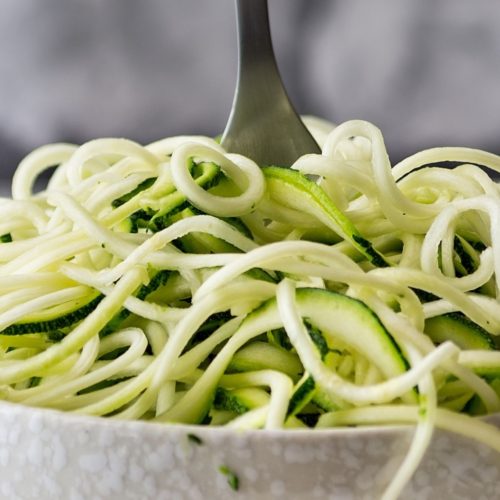
Making Zoodles


These days with so many people eating gluten-free that means no pasta. The challenge is that there are so many delicious recipes out there that use noodles as a base.  My favorite solution is to make zoodles. You can even use the oversize-on-their-way-to-baseball-bat sized zucchini.  Of course, you can use the smaller, more tender ones too, really, in this case, any zucchini will do.

Previously the best way to make zoodles was to use a vegetable peeler, carefully peeling each side. This meant you had a leftover core with lots of seeds in it.  Sure you could cut up the core and throw it into your recipes, but somehow it always seemed to get just a little gloopy. Nowadays some genius has invented a zoodler that does it for you. Not only can you make noodles from zucchini, using this amazing device you can "zoodle" a whole bunch of different vegetables like carrots, beets, and more.  It's a fabulous way to add more veggies to your diet.  

So grab your zoodler and let's get going...

Zoodles And Sausage

Ingredients
  

  • 1 package pre-cooked, chicken cilantro sausage
  • 1-2 zucchini, turned into zoodles
  • 3 tablespoons olive oil
  • 1 large sweet onion, diced
  • 2 cloves garlic, minced
  • 1 large tomato, diced
  • 1 green pepper, diced
  • 1 tablespoon tomato paste
  • 1/2 cup minced cilantro
  • sea salt and pepper to taste

Instructions
 

  • Add 2 tablespoons olive oil to the skillet
  • Add 1/2 of the diced onion and the garlic
  • When the onion starts to soften turn down the heat slightly and add the zucchini
  • Toss and cook the zucchini for approximately 5 minutes until it is coated in oil and warmed through
  • Place zucchini and onions into a serving dish
  • Add 1 tablespoon olive oil to the skillet
  • Add the rest of the onion
  • When onion starts to soften add bell pepper, tomato, and tomato paste
  • Saute until bell pepper starts to soften
  • Add salt and pepper to taste
  • Spoon mixture over zucchini noodles
  • Place sausage in the skillet and heat until browned on the outside
  • Remove sausage from skillet and slice into bite sized pieces
  • Sprinkle sausage pieces on top of dish
  • Garnish with cilantro

Notes

If necessary you can make this dish ahead.  Simply reheat in a 300 F degree oven for about 20 minutes until all of the ingredients are warmed through

Gluten Free Lemon Muffins

I needed to make something to bring to an event that I was attending recently. Knowing that the hostess was sensitive to gluten and dairy I wanted to make sure that I made something that fit her nutritional plan.

Casting around for ideas I spied a pile of fresh Meyer lemons that I had recently been gifted with in the fruit bowl.  These are my absolute favorite lemons. Immensely fragrant they add fabulous lemon-y flavor. I have a small tree that is now making 6-8 lemons a year.  I am eagerly awaiting the day that I get bags full of lemons like my friends.  Fortunately, those same friends are very generous and share.

I had thought about making a lemon quick bread but decided to make muffins instead. The best thing about muffins is that they are so easy to throw together. In just a few minutes you can have all of the ingredients mixed together and into the pan.  Because muffins are so small they bake rather quickly. 

I love lemon-flavored baked goods. Quick breads, scones, muffins, they are all so tasty when they have the added brightness of lemon added to them.  I'm not sure why lemon baked goods don't often make an appearance, more people seem to go for chocolate, or other flavors.  Sometimes sticking with a simple flavor is the best, imho.

I wanted my muffins to have a little crunch to them so I decided to add some millet which would give a slight pop.  I've used millet before in other baked goods and like the crunch and texture it adds.  

I often play with a recipe multiple times before it's ready for prime time, but this one seemed to come together really well so I'm sharing it as is.  I made it in mini-muffin tins and got three dozen.  They were well received at the event, all of them were eaten and I went home with crumbs.  This is definitely a recipe that's a keeper.  Something not-too-sweet but definitely tasty, perfect with a cup of tea to brighten up a cold, grey, winter morning.

Lemon Millet Muffins

Ingredients
  

  • 1/2 cup coconut oil
  • 1 cup sucanat
  • 1/2 cup evaporated cane juice crystals
  • 1 lemon
  • 2 eggs
  • 1/2 cup almond milk, approximately
  • 1 cup gluten free flour mix (I used a combination of oat, rice, buckwheat, tapioca)
  • 1/4 cup fresh ground flax seeds
  • 1/4 cup (heaping) millet seeds
  • 1 teaspoon baking soda
  • 1/2 teaspoon sea salt

Instructions
 

  • Preheat oven to 350 F
  • Grease three mini-muffin pans (or one regular muffin pan)
  • Zest the lemon
  • Juice the lemon and put juice into a measuring cup
  • Add almond milk until there is 2/3 cup liquid
  • Beat together coconut oil and sugars until fully combined
  • Add eggs, one at a time until well mixed
  • Add lemon zest, baking soda, and the salt
  • Alternate adding flour and curdled milk, making sure they are well mixed
  • Spoon by tablespoonfuls into muffin cups
  • Bake 15 minutes
  • Let cool 2 minutes in the pan
  • Finish cooling on a wire rack

Persimmon Raisin Muffins

It's persimmon season!  I love these tasty little fruits, with their rich fragrant scent and amazing flavor. Luckily for me, there is a pick your own place not too far away.  Each year I go and pick pounds and pounds of them.  I eat as many as I can before they get so ripe and so soft that they are in danger of sliding out of the fruit bowl and off the counter.  They have to be pretty soft before they are ripe enough to eat so this window is pretty small.

When I get to this point I turn the rest into pulp to store in the freezer.  This allows me to make cakes, cookies, and other persimmon delights for as long as the supply lasts. Apparently you can make jam from persimmons but I somehow never seem to get around to doing that.  I'm also not sure if I would use it as I'm currently the only one in the house who likes persimmons.

One of my favorite things to bake with persimmons are these muffins.  They're a great treat with a rich dark flavor that is so reminiscent of the crisp fall weather.  I'm sure they would freeze well but somehow they've never lasted long enough for me to test that theory.

Persimmon Raisin Muffins

Ingredients
  

  • 3 cups white whole wheat flour
  • 1 teaspoon cinnamon
  • 1/2 teaspoon nutmeg
  • 1 teaspoon baking soda
  • ½ teaspoon baking powder
  • 1 teaspoon sea salt
  • 1 cup persimmon pulp
  • 1 egg
  • 1 cup sucanat
  • 1 tablespoon vanilla
  • 1 cup raisins
  • 1 cup chopped pecans

Instructions
 

  • Preheat oven to 375°F
  • Grease loaf pans
  • Sift together flour, cinnamon, nutmeg, baking soda, baking powder and salt
  • In a separate bowl beat egg, add persimmon pulp and sucanat
  • Add vanilla, raisins and pecans
  • Add sifted ingredients and mix well
  • Spoon into greased muffin tins
  • Bake 15 minutes or until tops spring back when tapped
  • Remove from oven and cool in tins 3-4 minutes before moving to wire rack
  • Finish cooling on wire rack

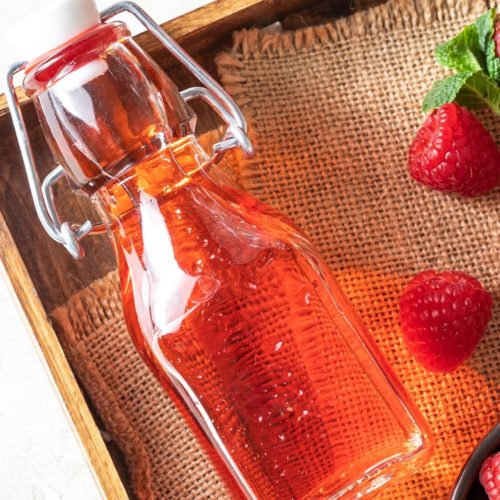
Raspberry Vinegar

Raspberries are coming in to season.  Their fragrant luscious aroma greets me every time I walk into the produce section of my local grocery store.  And their plump juicy red fruit temps me.  I love raspberries and truly miss the raspberry bed I had in Connecticut.  It was stocked with four different varieties each bearing at a different time pretty much ensuring a summer full of fresh flavorful berries.

Sadly the drought here in Texas has done a number to my fruit bushes.  The trees seem to be holding their own but the elderberries, raspberries, blackberries, blueberries and goji berries are all shriveled and I'm not sure they're going to make it.

Raspberries are such a wonderful fruit because not only are they tasty, they're so versatile.  They go great in fruit salads, eaten fresh, baked into scones or crumbles, on top of oatmeal, in a smoothie, the list goes on.  Plus a little as one half a cup provides 4 g. of fiber, over 25% of your daily value for vitamin C and just over 20% of your daily value for manganese. One of my favorite, extravagant ways to use raspberries is to make a raspberry vinegar.  This way I can enjoy that fragrant summer flavor all year long.

This is my favorite recipe using raspberries from Fancy Pantry which is one of my best-loved preserving cookbooks.

Raspberry Vinegar

By Fancy Pantry cookbook

Ingredients
  

  • 8 C. raspberries, cleaned, rinsed and drained
  • 3 C. white wine vinegar

Instructions
 

  • The recipe calls for the raspberries to be used in two portions.  You can freeze 4 C. for later.
  • Crush 4 C. raspberries and place them in a sterilized, heatproof 2 quart jar
  • Add vinegar and and cover the jar
  • Set the jar in a deep saucepan and fill with water to come halfway up the jar
  • Set over medium heat and bring the water to a boil
  • Reduce the heat and keep the water simmering for 20 minutes
  • Remove the jar and set aside, uncovered to cool the contents
  • When cool, add a lid to the jar and set it aside
  • Shake the jar every day for 2 weeks
  • Strain the jar to remove old raspberries, it is okay to lightly press the berries to extract all the juice
  • Crush 4 C. raspberries and pour infused vinegar over them
  • Repeat the scalding as done above
  • Let the vinegar rest for two weeks, shaking every day
  • Strain the vinegar discarding the fruit, it is okay to lightly press the berries to extract all the juice
  • Line a funnel with an unbleached coffee filter and place in a sterilized bottle
  • Filter the vinegar into the bottle
  • Cap or cork the bottle and store in a cool dark pantry

Notes

The vinegar may develop sediment as it stands, this is okay but the vinegar can be re-filtered if you wish

black bean

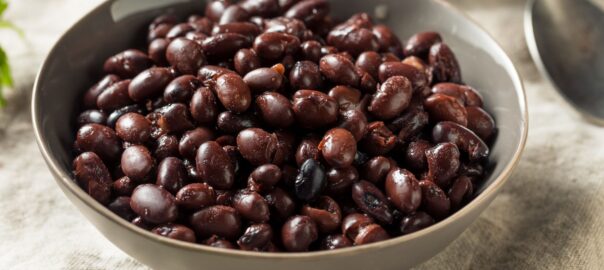
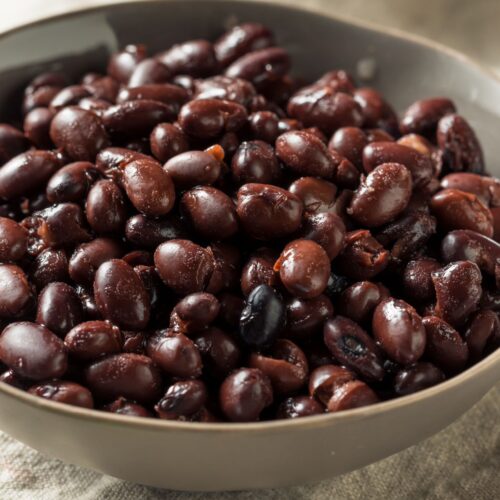
Black Bean Casserole

I previously posted a Meatless Monday menu of black bean casserole, roasted asparagus, spring onions, cauliflower, and cauliflower greens. It was a delicious dinner. I received a request for the recipe and decided to post it over here on the blog.

Benefits of Black Beans

I love oven roasting veggies; it's such a simple way to prepare them and makes fabulous leftovers. Black beans are a great flexitarian choice; they're tasty, easy to prepare, and go well with many different types of dishes.

Adding beans to your diet, if you don't already eat them, is such a healthy thing to do because not only are you getting protein, but you're also getting lots of fiber. One cup of black beans provides 15 grams of fiber and 15 grams of protein. A pretty good deal in my book. Even better, you're also getting many B vitamins, primarily thiamin and folate, plus iron, copper, magnesium, phosphorus, potassium, and manganese.

Recipe Adjustments and Preferences

This black bean casserole is one of my favorites because, with the addition of the corn tortillas, it makes a complete protein. The original recipe I developed calls for a generous sprinkling of shredded cheese on top; however, due to my new dietary restrictions, I am avoiding cheese. I've discovered that rice cheeses and other "fake" cheeses are unpleasant for my palate, both in taste and texture, so I've been feeding what I bought to the dogs (who are thrilled) and just leave out the cheese altogether. But if you're a cheese fan and can eat it, use about 3/4 cup.

Ingredient Choices

Being where we are in the growing season at the moment, with tomatoes so very expensive (and my garden burned to a crisp due to drought), I've turned to my favorite Pomi Chopped Tomatoes, which come in a box rather than a can, so there is no BPA. When tomatoes are in season and not hideously expensive, I definitely prefer them and use about four in this recipe.

black bean

Black Bean Casserole Recipe

Ingredients
  

  • 2 tablespoons olive oil
  • 1 large red onion, chopped small
  • 2 cloves garlic, minced (more if you like lots of garlic)
  • 2 ribs celery, chopped small
  • 1/2 of a 26 oz box of chopped tomatoes
  • 2 cups cooked black beans
  • 1 teaspoon cumin
  • 6 medium-sized corn tortillas, cut or ripped in half
  • 2 tablespoons minced cilantro
  • 1 tablespoon lime juice
  • 2 spring onions, chopped
  • Sea salt and pepper to taste
  • Hot sauce (optional)

Instructions
 

  • Preheat oven to 350°F.
  • Lightly grease a medium round pie dish.
  • In a pan, heat olive oil and sauté onion until wilted.
  • Add celery and garlic and sauté until celery is wilted.
  • Add black beans, tomatoes, and cumin, and cook until heated through.
  • Remove from heat and add salt and pepper to taste.
  • In the pie pan, layer 4 corn tortilla halves with 1/3 black bean mixture (the top layer is where the cheese goes if you're using it).
  • Repeat layers, ending with the bean mixture.
  • Cover and bake for 30 minutes.
  • Remove from oven, and sprinkle with spring onions, cilantro, and lime juice.

Like this recipe? Join our exclusive private membership for access to a growing collection of delicious and nourishing recipes for members only!

Dive into our collection of programs, eBooks, and live monthly classes designed to support your holistic health journey and nourish your body.

Unlock a world of inspiration and healthful living by becoming a member today!

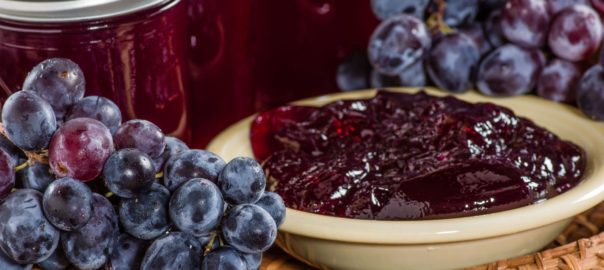
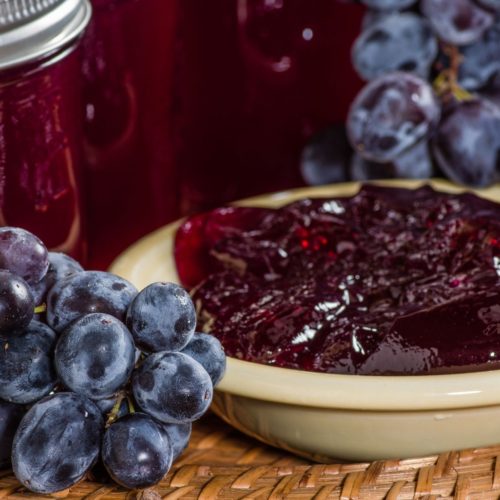
Grape Jelly

Warning: rant ahead!

I'm so aggravated I cannot even tell you.  This morning I went to the grocery store for a few items.  One of them was grape jelly, requested by my daughter. It's her favorite flavor. Since we've moved away from Connecticut we no longer have the same access to wild grapes so I'm no longer making grape jelly.

The grapes that I've managed to find here in Texas have, for the last two years, been very thick-skinned and dry due to the lack of rain so no grapes there either. I did plant grapes in my garden but they're table grapes not jelly grapes so I'm not sure they'd work well.

My frustration? NOT ONE SINGLE jar of grape jelly at the grocery store came without HFCS. Several even had HFCS as the number one ingredient. Seriously? That number one ingredient means that the majority of the jelly isn't even grapes, it's HFCS. That is insane.

First of all grape jelly is incredibly easy to make. Grapes are very high in pectin. Throw them together with a little water, the right amount of sugar, heat to the correct temperature, and voila! Grape jelly!

Even more upsetting to me is the fact that many of the grape jellies at the grocery store come with artificial flavorings.  I'm not exactly sure why as to my mind grapes have a pretty distinctive taste all their own.

Needless to say, I did not buy any grape jelly (luckily she also likes orange marmalade so that's what she got) and I'm going to have to work a little harder to find a good source of either muscadines or concord grapes to start making my own jelly again.

For those who have access to good grapes for jelly making here's a great recipe from the book Preserving Memories: Growing Up in My Mother's Kitchen. In the interest of full disclosure, I'll tell you that this book was written by my mom. I'm not recommending it because she wrote it (honestly). It really is one of my favorite canning/preserving books and my first go-to when I'm looking to make something. 

To get all of the great commentary, hints, and tips you'll have to get the book, but here's the recipe:

Grape Jelly

Ingredients
  

  • 10 C. or more Concord grapes (approximately 8 lbs.)
  • 1 apple (optional)
  • 2 C. water
  • Sugar

Instructions
 

  • Wash the Concord grapes.
  • Cut the apple into quarters -- peel, core, and all -- then chop coarsely.  Set aside.
  • Put a couple of cups of grapes int a large stainless-steel pot, then crush them with a potato masher of the bottom of a clean glass jar.  this provides a small amount of juice and prevents scorching.
  • Add the water.
  • Add the cut-up apple.
  • Heat the fruit mixture slowly to the boiling point, reduce the heat, and simmer until the seeds come free from the pulp.
  • Line a large colander with several layers of damp cotton cheesecloth.  Set the colander over a large pot or bowl and carefully pour the grapes and liquid into it. Allow the free-run juice to drip through the cheesecloth.  You may also use a chinois or jelly bag.  Do not press down on the fruit.
  • Measure the free-run juice.  Process into jelly 4 cups of juice at a time - a smaller batch means the jell point is reached more quickly, resulting in better flavor.
  • Taste a little bit of the juice.  For every 1 cup of reasonably sweet grape juice, measure out 2/3 cup of sugar.  If you used a greater percentage of under-ripe grapes and the juice is on the tart side, you can use 3 or 3 1/2 cups of sugar to 4 cups of juice.
  • Bring juice to a boil then add the sugar.  Boil to the jell point.
  • Fill and process prepared jars.