Monthly Archives: July 2022

summer salads

Summer Salads

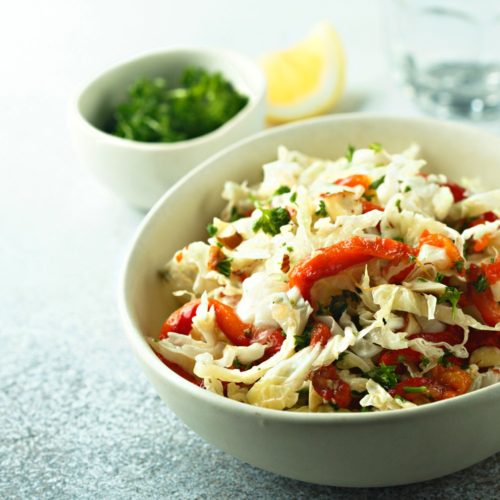
Summer is a great time for eating lots of fresh veggies. Summer salads are a fabulous way to enjoy those veggies, it’s one of the reasons I deeply appreciate this season. Let’s be clear though, salad, in this case, doesn’t mean iceberg lettuce with some tomato and cucumber.

One of my favorite things to do in the summer is to have several different salads on hand. It helps to make mealtime quicker, and easier, and I know I’m getting a lot of veggies into my diet.

With multiple salads on hand you can have a quick meal ready at a moment’s notice. That’s because it’s super easy to make a composed plate with a protein and two to three different salads to round out a meal. It’s light, refreshing, and oh so delicious.

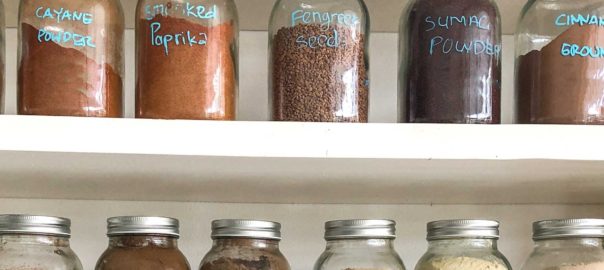
Below are a few of my favorite summer salads and you’ll notice not a single shred of lettuce in any of them. These particular salads are also pretty versatile.  Steamed, cooled, broccoli or cauliflower could be a great addition. Zucchini, jicama, salad turnips, just use your imagination and see what you can create and how many veggies you can add to your plate.

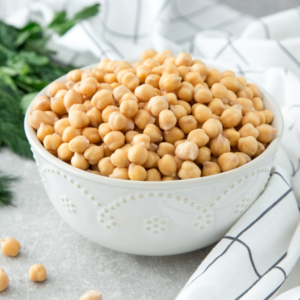
One of my favorite ways to eat this delicious root is in an Oriental Salad. The tops of the root, the fatter part, tends to be milder in flavor so I use that when making this salad. The bottom of the root is great for pickling or stir-frying. I make this using the julienne blade on my Cuisinart.
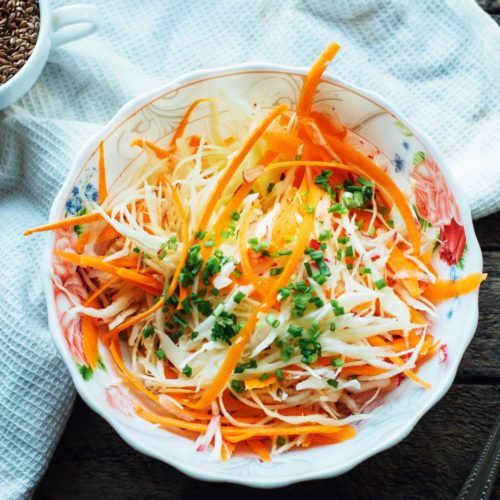
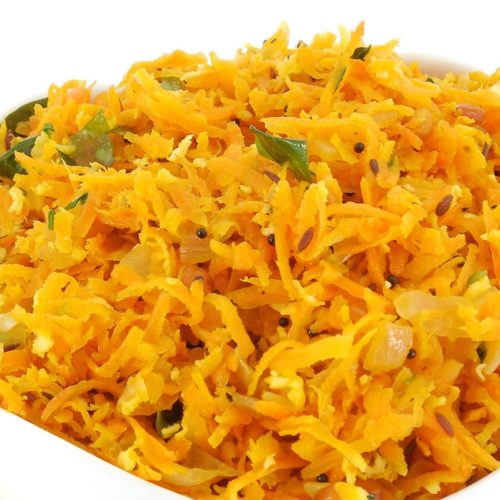
Daikon-Carrot Salad

Ingredients
  

  • 1 C. julienned daikon root
  • 1 C. julienned carrot
  • 1 t. fresh grated ginger
  • 1 T. rice wine vinegar
  • 2 T. vegetable oil
  • 1 t. sesame oil
  • 1 t. tamari sauce
  • 1 T. sesame seeds, toasted
  • 2 t. ground nori (optional)

Instructions
 

  • Whisk together the vinegar, tamari sauce, sesame seeds, nori, and ginger.
  • Slowly whisk in the oils
  • In a separate bowl toss together daikon and carrot
  • Pour dressing over the vegetables and toss gently
  • Marinate 30-45 minutes
  • Can be served cold or at room temperature
    Enjoy!

Wanting to make something fresh and different I rummaged around in my pantry and put together this amazingly delicious rice salad.

One of the great things about this dish is that it makes use of fresh vegetables and fresh herbs.  I love salads like this, often preferring them the next day after the flavors have had a chance to meld and blend.

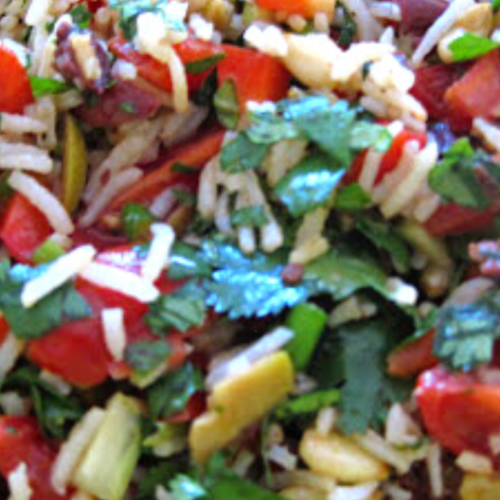
Mediterranean Rice Salad

Ingredients
  

  • 1 cup cherry tomatoes, quartered
  • 1 red sweet bell pepper seeded and diced
  • 4 spring onions, diced
  • 3 ribs celery, diced
  • 1 cup assorted olives, diced
  • 1/4 cup sun dried tomatoes in oil, drained and diced
  • 1/2 cup pine nuts
  • 1 bunch parsley, de-stemmed* and minced
  • 1tablespoon minced basil leaves
  • 4 cups cooked basmati rice
  • 2 tablespoons olive oil
  • 1 tablespoon red wine vinegar
  • sea salt and fresh ground pepper to taste

Instructions
 

  • Mix all ingredients together, toss well, let sit 2-3 hours for flavors to develop.
    Delicious!

Notes

*When I de-stem herbs like parsley or cilantro I've learned a little trick that makes it very easy:
  1. Leave the herbs bound together, wash well to clean and shake dry
  2. Holding the stems use a chef's knife and chop at the leaves in a short brisk fashion moving down the stems
  3. Rotate the stems and repeat on another side until all sides have been shaved
  4. Remove band holding the stems together
  5. Throw the stems in your compost bin
  6. Pile chopped leaves together and mince
It probably took longer to write that than it takes to do it.  Once you do this you'll wonder why you ever de-stemmed leafy herbs any other way.

A black rice with a rich delicious flavor, this is a whole grain and provides an antioxidant punch.

It provides a particular antioxidant called anthocyanin (which is also found in blueberries and blackberries) believed to help prevent inflammation, diabetes, and reduce or limit cancer-caused DNA damage.

Regardless of the health effects of the antioxidant properties there is no disputing the fact that this is a tasty way to add more whole grains to your diet.

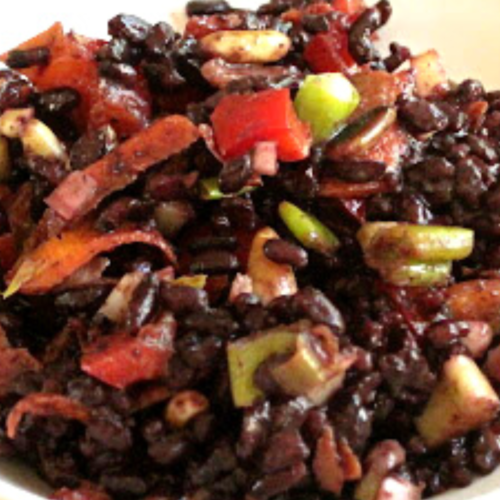
Forbidden Rice Salad

Ingredients
  

  • 1 cup black rice
  • 1 3/4 cup water
  • 1/2 teaspoon sea salt
  • 1/3 cup pine nuts
  • 1 large carrot
  • 1 rib celery leaves included
  • 1 red bell pepper
  • 3 spring onions
  • 1 cup edamame
  • 1 tablespoon olive oil
  • 2 tablespoons walnut oil
  • 1 tablespoon water
  • 1 teaspoon dijon mustard
  • sea salt and pepper

Instructions
 

  • Put rice, water and salt into a pot and bring to just under a boil on the stovetop
    Cover, reduce heat and cook until rice is done 20-25 minutes
  • While the rice is cooking, toast pine nuts in a dry pan until just starting to turn brown
    Remove from heat and let sit
  • Dice the vegetables except the edamame
    Note1 :  I use the large shred on my box shredded to get large slivers of carrot rather than a dicecombine the vegetables together in a bowl
    Note 2:  unfortunately I discovered I am out of edamame, the recipe really is better with them in there
  • In a separate container whisk together the oils, vinegar, water, mustard, salt and pepper
    Note:  I like to use walnut oil because it compliments the nutty taste of the rice and the flavor of the pine nuts
  • When the rice is done uncover it, remove from heat and let it sit 10-15 minutes to cool off and to stop steaming
    Combine all ingredients together, toss well and refrigerate for 2-4 hours before serving

Salads are so wonderful in the warmer months, keeping a couple on hand in the fridge means you always have something for lunch or dinner.  

If you don't happen to have fresh sprouts on hand you many grocery stores now carry them although they're certainly easy to make and I think it's better to get them fresh, it's certainly easy to do.

Curried Carrot Sprout Salad

Ingredients
  

  • 6 large carrots, topped and shredded
  • 1 C. fresh *bean sprouts
  • 1/4 C. dried currants
  • 1/4 C. raw sunflower seeds
  • 1/4 C. chopped walnuts
  • 1/2 C. mayonnaise
  • 1 t. curry powder
  • salt to taste

Instructions
 

  • Mix all ingredients together
  • Let sit in fridge for at least two hours to chill and for flavor to settle

Notes

Homemade Bean Sprouts
  • 1/2 C. assorted dried beans (I like adzuki, mung, lentil and black beans)
  • Sort through beans and rinse
  • Put in a metal pot, cover with water and set in the oven overnight (oven is off)
  • In the morning drain and rinse the beans well
  • Return to the oven
  • Repeat until beans have 1/2″ long tails
 
1. Rinse and eat
2. May be stored in the fridge but make sure they are fully dry before you do that to avoid spoilage
 
Note:  when making your sprouts it is helpful to put a note stating “sprouts” on the oven door so that people don't preheat the oven without looking and accidentally cook your sprouts.  Just saying…
 

summer salads

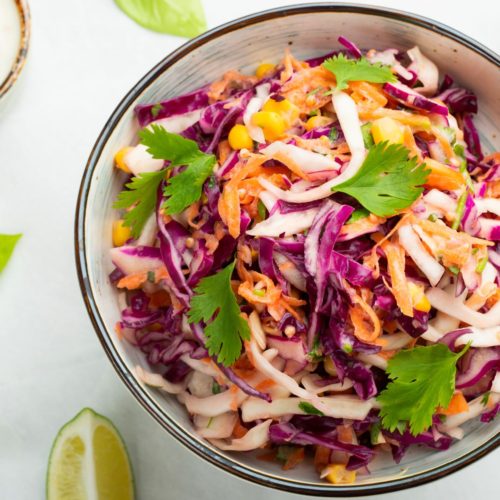
Salad With Tahini Dressing

Ingredients
  

  • 2 Persian cucumbers, diced (about 1 cup)
  • 1 carrot, grated (about 1 cup)
  • 1/2 head radicchio, diced (about 1 cup)
  • 2 cups shredded green cabbage
  • 1/2 cup diced celery — tip I always simply cut through the entire bunch of celery. It’s faster and easier than dicing up the ribs
  • 1/4 cup minced green onion
  • 1/4 cup minced cilantro
  • 1/3 cup raw cashews, minced

Instructions
 

  • Toss with *tahini dressing and enjoy!

Notes

Tahini dressing
  • 1/4 cup tahini
  • 1/4 cup water
  • Juice of one lemon, about 3 tablespoons
  • One clove garlic, minced
  • 1/2 teaspoon sea salt

Related: Should You Clean Your Organic Fruits And Veggies?

properly organize spices

How To Properly Organize Your Spices

Spices are tricky for many people. It’s easy to buy something for a recipe and then it languishes in your kitchen forever. The next thing you know you’re trying to get what you need for a recipe and there’s an explosion of little containers when you open the door.  Keeping your spices organized and being mindful about them can help you have less clutter in the kitchen.

I recently realized it’s been over a year since I went through and re-organized all of my spices. I try to do this on a yearly basis to keep things more efficient and organized. 

What's the difference between herbs and spices

Before we get started let’s address the definition of spices. For the purposes of this article I am going to refer to both herbs and spices simply as spices. They are, however, distinctly different.

Herbs are those items that come from the leaves of the plant such as basil, mint, sage. It can also refer to things like chives or garlic scapes.  Herbs can be used both fresh or dried.

Spices are those things that are not the leaves of the plant. For example seeds such as nutmeg or fennel. Spices can also be made from the roots, systems, bark, or the stalk of a plant. These are typically used dried and may often be powdered for culinary use.

Top tips for organizing your spices

1. It’s important to remember that spices do have a shelf life.

Just because they’re dry does not mean they last forever. Dry, leafy, or ground herbs and spices like basil, oregano, and rosemary can last as long as 2 to 3 years.  Whole spices such as nutmeg, peppercorn, and cloves, can last up to five years.

2. Spices do best when stored in a cool dark space.

Not in direct sunlight and not regularly exposed to heat, i.e. on that little ledge on top of your cooktop.

3. Keep the spices you use most often when cooking near  your stove top (not on it).

For me that’s salt, pepper, parsley, Paleo Powder Pink, and Pluck. Everything else is labeled and organized elsewhere. 

4. Organize and group your spices together in a way that makes sense for you.

Organizing by use is one idea that can be helpful. For example,  I have a baking cupboard. My most common baking spices, nutmeg, allspice, ginger, cream of tartar, pumpkin pie spice, etc are in the baking cupboard. You’ll notice that list does not include cinnamon. That’s because I use cinnamon more often than simply for  baking so it’s in my regular spice storage area.  It’s OK to store spices in different areas of your kitchen depending on what they are and how you use them instead of trying to keep all the spices in one area.

 5. I am a big fan of door mounted shelves if you have room for that inside the pantry or inside a cupboard.

These are very efficient for spices because they tend to be narrow so you can easily see what’s on the shelf. It can also be helpful to have bins that allow you to group your spices by type or category.

6. Save money by purchasing your spices in the bulk section of the store.

This does require that you bring them home, put them in a glass container, and label them, but it is much less expensive this way.  I rarely buy spices in the spice aisle at the grocery store. I much prefer to buy them from the bulk bin. Bulk buying spices is not only available at the grocery store.   In my area there’s a store across the street from one of my farmers markets that has bulk herbs and spices. Ethnic stores may also often have bulk buy bins.

7. For certain spices consider buying them whole and grinding them as you need them.

This is wonderful for things like nutmeg and cinnamon plus for some seeds it can be great. You can use a mortar and pestle to crush them and you will have much more aromatic flavor from them as the oils are released when you crush them.  This would include cardamom, fennel, and that sort of spice.

8. One other money saving tip is to consider making your own blends instead of buying the expensive ones at the grocery store.

Although it is possible to buy some blends from the both by bins, certain blends may not be available. You may find that you enjoy making up a batch of taco seasoning mix when you need it instead of keeping it around forever until you need it.  Making your own spice blends is also great for things like salad dressings, which are inexpensive and easy to make it home. This way you get the flavor profile you want without added preservatives and other ingredients in salad dressing.

9. Rather than running to the store last minute to buy spice here are a few good substitutions.

Obviously the flavor profile will change a little bit, however these spices tend to be similar enough that it should not be unpleasant, merely different. Who knows you may find you like it better.

    • Allspice - Nutmeg or cinnamon or mace
    • Anise - fennel
    • Cardamom - ginger 
    • Marjoram - Rosemary 
    • Vanilla - maple syrup 

Take the time once a year to go through and re-organize all of your spices. Relabel them if necessary. As always, throw out anything that’s expired.


chicken cabbage salad

Chicken Cabbage Salad

As part of my season eating summertime strategy, I love having delicious salads on hand as a side dish.  Making a composed plate of three to four salads can be a wonderful way to have a nutrient dense veggie rich meal.

This particular salad is crunchy, refreshing, and perfect for the season.  I think it's even amazing as a meal all by itself. 

The tahini dressing is fabulous; it can easily be doubled or tripled and stored in the refrigerator to have on hand for any salad.

chicken cabbage salad

Chicken Cabbage Salad

Ingredients
  

  • Tahini dressing:

    2 T cup tahini,stirred

    2 T water

    4 tsp fresh lemon juice

    1 small clove garlic, minced

    ½ teaspoon sea salt

  • Salad ingredients:

    2 cups diced cooked chicken – dark or white meat

    4 cups green cabbage, chopped

    1 red bell pepper, diced

    2 spring onions, diced

    sea salt to taste

    minced cilantro for garnish

Instructions
 

  • Mix together tahini, water, lemon juice, garlic, and sea salt until well blended
  • In a large bowl place cabbage, bell pepper, onions, and diced chicken
  • Toss dressing with the ingredients in the bowl
  • Salt according to your preference
  • Garnish with minced cilantro and serve
    Enjoy!

hummus

What Is Hummus?

One of the easiest and healthiest snacks you can make is hummus. High in protein, fiber, vitamin 6, and manganese, it tends to be served either with pita bread, crackers, or with vegetables. Not only is hummus delicious and high in protein, it has a huge fan following.

There are songs/music videos (this is just one of them),  movies, and even culinary competitions, all devoted to this humble condiment.

Originating in the Middle East with the earliest known recipes appearing in the 13th century, hummus has become popular worldwide. Traditionally it’s made from cooked chickpeas which are ground up and then mixed with lemon juice, olive oil, salt, and garlic. Purists also call for the addition of tahini, a sesame seed paste, when making traditional style hummus. It tends to be served as an appetizer or a dip. Sometimes it can also be served as a side dish with things like falafel, grilled chicken or fish, or as part of a meze plate

Where to get hummus

Want to know where my favorite place to buy hummus is? The best place on the planet to get it (in my humble opinion)? It’s a tiny little out-of-the-way, hole-in-the-wall place in the Old City in Jerusalem called Abu Shukri. I’ve been fortunate enough to eat there twice, both times with my wonderful Aunt Carol. 

The first time she took me there, in the mid 1990’s, it was a revelation of how amazing hummus, and the falafel and pitot that accompanied it, could taste. Quite frankly it spoiled me for falafel, hummus, and pita for years. You think I’m kidding, but I’m not.  It took a very long time for the memory of that dish to fade to the point that I could eat that again anywhere and not mourn that it wasn’t from Abu Shukri.

The second time was fifteen years later when I went back to Jerusalem. Aunt Carol asked me what was on my list of places to visit. I told her I needed to go back to, “that amazing hummus and falafel place.” I had forgotten the name by then but not the taste. She laughed and said, “Do you mean Abu Shukri?” I said I thought that was it.

So one fine day we made our way to the Old City. After getting lost a couple of times (there’s lots of twisty turns and not well marked alleyways all over the Old City) we eventually found it. To my delight it still looked just as hole-in-the-wall-ish. The intervening years had done nothing for the décor. And their reputation, although still solid, had not encouraged the owners to “fluff it up” and try to make it more appealing to tourists. They have a good thing going and they obviously know it. 

The place even smelled just like I remembered (although I didn’t remember that until I smelled it again). I was salivating before we even got to the counter to place our order. We had a lovely lovely meal together, enjoying the food, each other’s company, and delightful conversation.

Sadly Abu Shukri is pretty far from where I live. I plan to get back there again eventually, but for now I remember it fondly and content myself with making my own hummus at home.  I’ve actually gotten better at making it over the years. I do wonder if part of the flavor at Abu Shukri has to do with the setting and the company (I’m pretty sure it does).

Buying Hummus

Hummus has become so popular that it’s easily available at the grocery store. There are a number of different companies that make it. It even comes in a wide variety of flavors. On a recent trip to the grocery store I was astounded to see the following varieties of hummus in the refrigerated case. Seriously, they had a whole lined up selection:

  • Traditional
  • Mediterranean
  • Greek Inspired
  • Roasted Red Pepper
  • Roasted Pine Nut
  • Jalapeno
  • Siracha
  • Sun Dried Tomato
  • Caramelized Onion
  • Roasted Garlic
  • Chocolate
  • Sea Salt Caramel
  • Cake Batter
  • Chickpea Nutty
  • Lemon Meringue

I confess I was a little puzzled by the Mediterranean style as I was pretty convinced hummus already was a Mediterranean food, but I guess it’s the spices that make the difference.  And I’m really not a fan of the dessert varieties. I confess I did try a chocolate one once (after all…chocolate) but it didn’t really impress me. I have no interest whatsoever in trying the other sweet varieties, probably because I love plain hummus so much that it just doesn’t appeal to me to have it as a dessert.

One of the problems with many commercial varieties is the ingredients. Things like the use of soybean oil instead of olive oil are not a great choice. The olive oil is a healthy monounsaturated fat which is a great source of vitamin E and highly anti-inflammatory. 

Soybean oil, on the other hand, is highly genetically modified.  Even if the variety used in the hummus you are buying is non-GMO, it’s still probably highly contaminated with glyphosate (sprayed to keep down the weeds), is high in omega-6 fatty acids, and consuming it may, over time, contribute to inflammation.

Another issue with commercially made hummus is the added preservatives. The ones that are most commonly used are citric acid, which may be genetically modified, and potassium sorbate. These are not good choices to have in your foods and I do recommend avoiding them.

Making it at home

Hummus is actually very easy to make at home. There are two strategies for making your own. The first is to seriously start from scratch and begin with dry chickpeas, sometimes called garbanzo beans. Rehydrating chickpeas is not difficult, it just takes a little time. One of the benefits of rehydrating chickpeas is that there are no added preservatives, it’s just the chickpeas. Another benefit is that you can make extra and freeze them. If you’re not into the idea of rehydrating chickpeas you can always use the canned variety.


Rehydrating Chickpeas

Ingredients
  

  • 2 cups dried chickpeas
  • 6 cups water
  • 1 teaspoon salt

Instructions
 

  • Pick out stones or foreign matter from chickpeas
  • Rinse well and drain
  • Put into crock-pot with water and salt
  • Cook on high 3 hours
  • Remove crock from cooking element and pour chickpeas into a colander to drain
  • Rinse well
  • Chickpeas are now ready to use

Notes

Note: The rehydrated chickpeas will keep in the refrigerator for 2-3 days. If you’d like you can let them dry more and then freeze them.  Frozen chickpeas will keep for up to 6 months

Homemade Hummus

Ingredients
  

  • 2 cups cooked, or canned, chickpeas
  • 1/4 cup water or whey
  • 2-3 tablespoons lemon juice (depending on your preference)
  • 1 1/2 tablespoons tahini
  • 2 cloves garlic, crushed
  • 1/2 teaspoon salt
  • 2 tablespoons olive 
  • garnish: extra olive oil, paprika, and fresh chopped parsley

Instructions
 

  • Combine chickpeas, water/whey, and lemon juice in a food processor
  • Blend together, slowing adding olive oil to the mixture until it starts to stick together
  • Add remaining ingredients
  • If needed add a little more olive oil to make it smooth
  • Spoon hummus into a serving bowl or dish
  • Drizzle with olive oil, garnish with a dusting of paprika and a sprinkle of fresh chopped parsley

Other ways to eat hummus

Whether you choose to buy your hummus pre-made (being sure to read the label and avoid negative ingredients) or make it at home, it’s a quick and easy way to add this delicious dish to your diet. 

Don’t forget that it can be more than just a snack with pita bread or veggies. Here are a few suggestions for other ways to eat this wonderful dish:

  • Use it as a salad dressing - it may need to be thinned just a little with olive oil 
  • It’s a fabulous marinade - perfect on chicken, let it marinate for 2 hours before grilling
  • Instead of mayonnaise - it’s a great way to add flavor to any sandwich or lettuce wrap
  • Eggplant roll ups - made with hummus instead of ricotta is a fabulous dairy-free option
  • Raw-fredo - instead of using a cream sauce try hummus on your pasta or noodles
  • On apples - instead of nut butter and apples, try hummus, you’ll be surprised how good it is
  • Condiment - adding a dollop of hummus on top of scrambled eggs is very tasty
crackpot breakfast casserole

Crockpot Breakfast Casserole

Overnight breakfast success

I love using my crockpot for all different kind of recipes.  And really, there's no reason not to. Crockpots are simple to use easy to clean up, and an energy-efficient way to cook. But as great as they are for dinners and snacks, breakfast is where a crock pot really rocks.
 
There's nothing better than coming downstairs to a nice hot breakfast, ready and waiting. But you didn't have to cook it. Because you made it in the crockpot. After all, if you're willing to leave it on all day to make dinner, why not leave it on overnight to make breakfast? Especially when you're cooking for a crowd. After all if you've got a house full of guests that's the time you don't want to be stuck in the kitchen cooking anyway. So let your crockpot do all the work and you'll look like a kitchen star.
 
This casserole is a family favorite. While it takes a little bit of prep time it's delicious and totally worth it. 
 
Sweet potato crockpot breakfast casserole
Print
Ingredients
  1. Slow Cooker Breakfast Casserole
  2. 2 large sweet potatoes, washed and shredded
  3. 1 onion, chopped
  4. 1 bell pepper, chopped
  5. 2 cloves garlic, minced
  6. 3 tablespoon coconut oil
  7. 1 pound cooked meat - organic and preservative free
  8. 1 cup shredded cheese - we prefer white cheddar
  9. 1 dozen organic eggs
  10. 1 cup whole organic milk
  11. 1 teaspoon herbs of choice - suggestions include oregano, basil, chives, thyme, but you can use whatever you prefer
  12. 1/2 teaspoon sea salt
  13. 1/2 teaspoon fresh ground pepper
Instructions
  1. Grease inside of crock
  2. In a pan saute potatoes in 2 tablespoons coconut oil until starting to brown, remove and set aside
  3. In remaining 1 tablespoon of coconut oil saute onion, peppers and garlic until warmed through and starting to soften
  4. Layer in the crock 1/3 potatoes, 1/3 vegetables, 1/3 meat, 1/3 cheese, repeat layers, top layer will be cheese
  5. Mix together eggs, milk, herbs, salt and pepper
  6. Gently pour egg mixture over layers in crock
  7. Cook on low 8-10 hours (or overnight) until eggs are set
Notes
  1. Delicious served with a little salsa on top
The Ingredient Guru, Mira Dessy https://theingredientguru.com/
For more great crockpot recipes: