Tag Archives: baking

Gluten Free Sourdough Baking Class

Recently I was invited to take part in a gluten free sourdough baking class. Taught by Kasey Lobb, a registered dietician nutritionist, the class promised to teach us how to make a delicious gluten free sandwich loaf from scratch. We would also go home with a starter of our very own in order to replicate the process in our own kitchens.

I confess I love cooking classes.  It’s super fun to teach them and I certainly enjoy doing that, but it’s also great when you have a chance to take a class and learn from someone else. Kasey was a wonderful instructor.

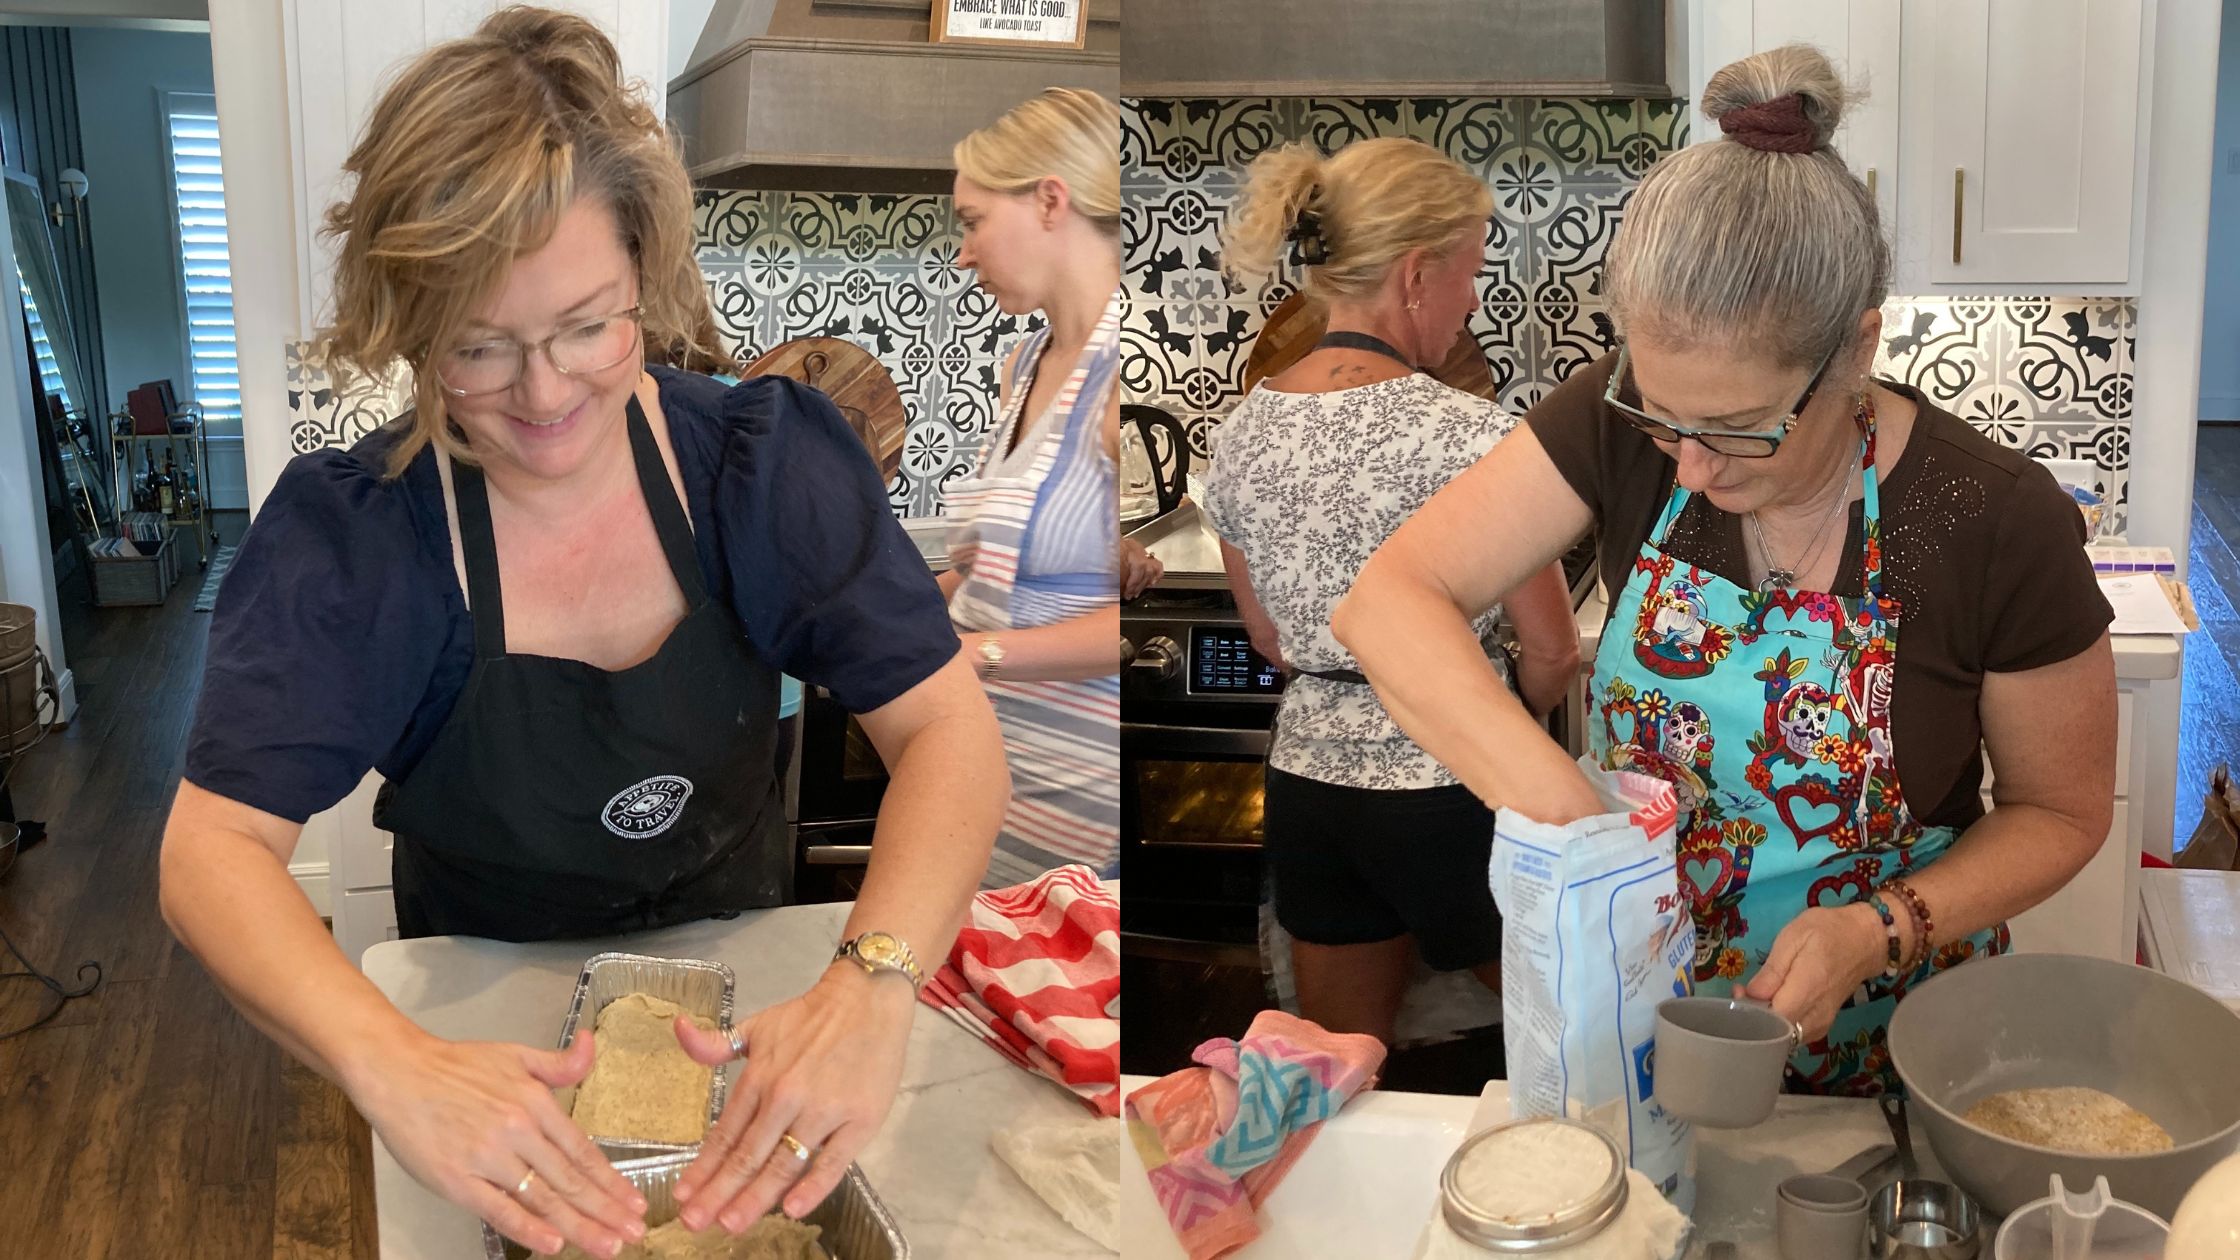
The class was held at a friend’s house and there were 10 of us, each paired up so we could share one of the Kitchen Aid mixers.  Taking us through the process of what we were doing and a breakdown of the ingredients, Kasey, did a great job of explaining everything.

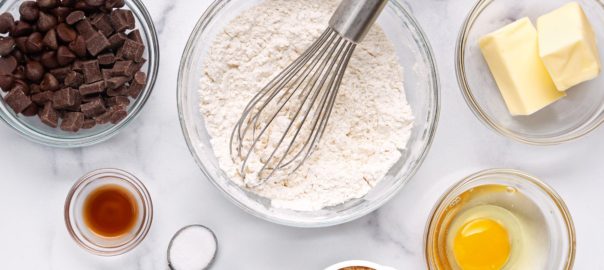
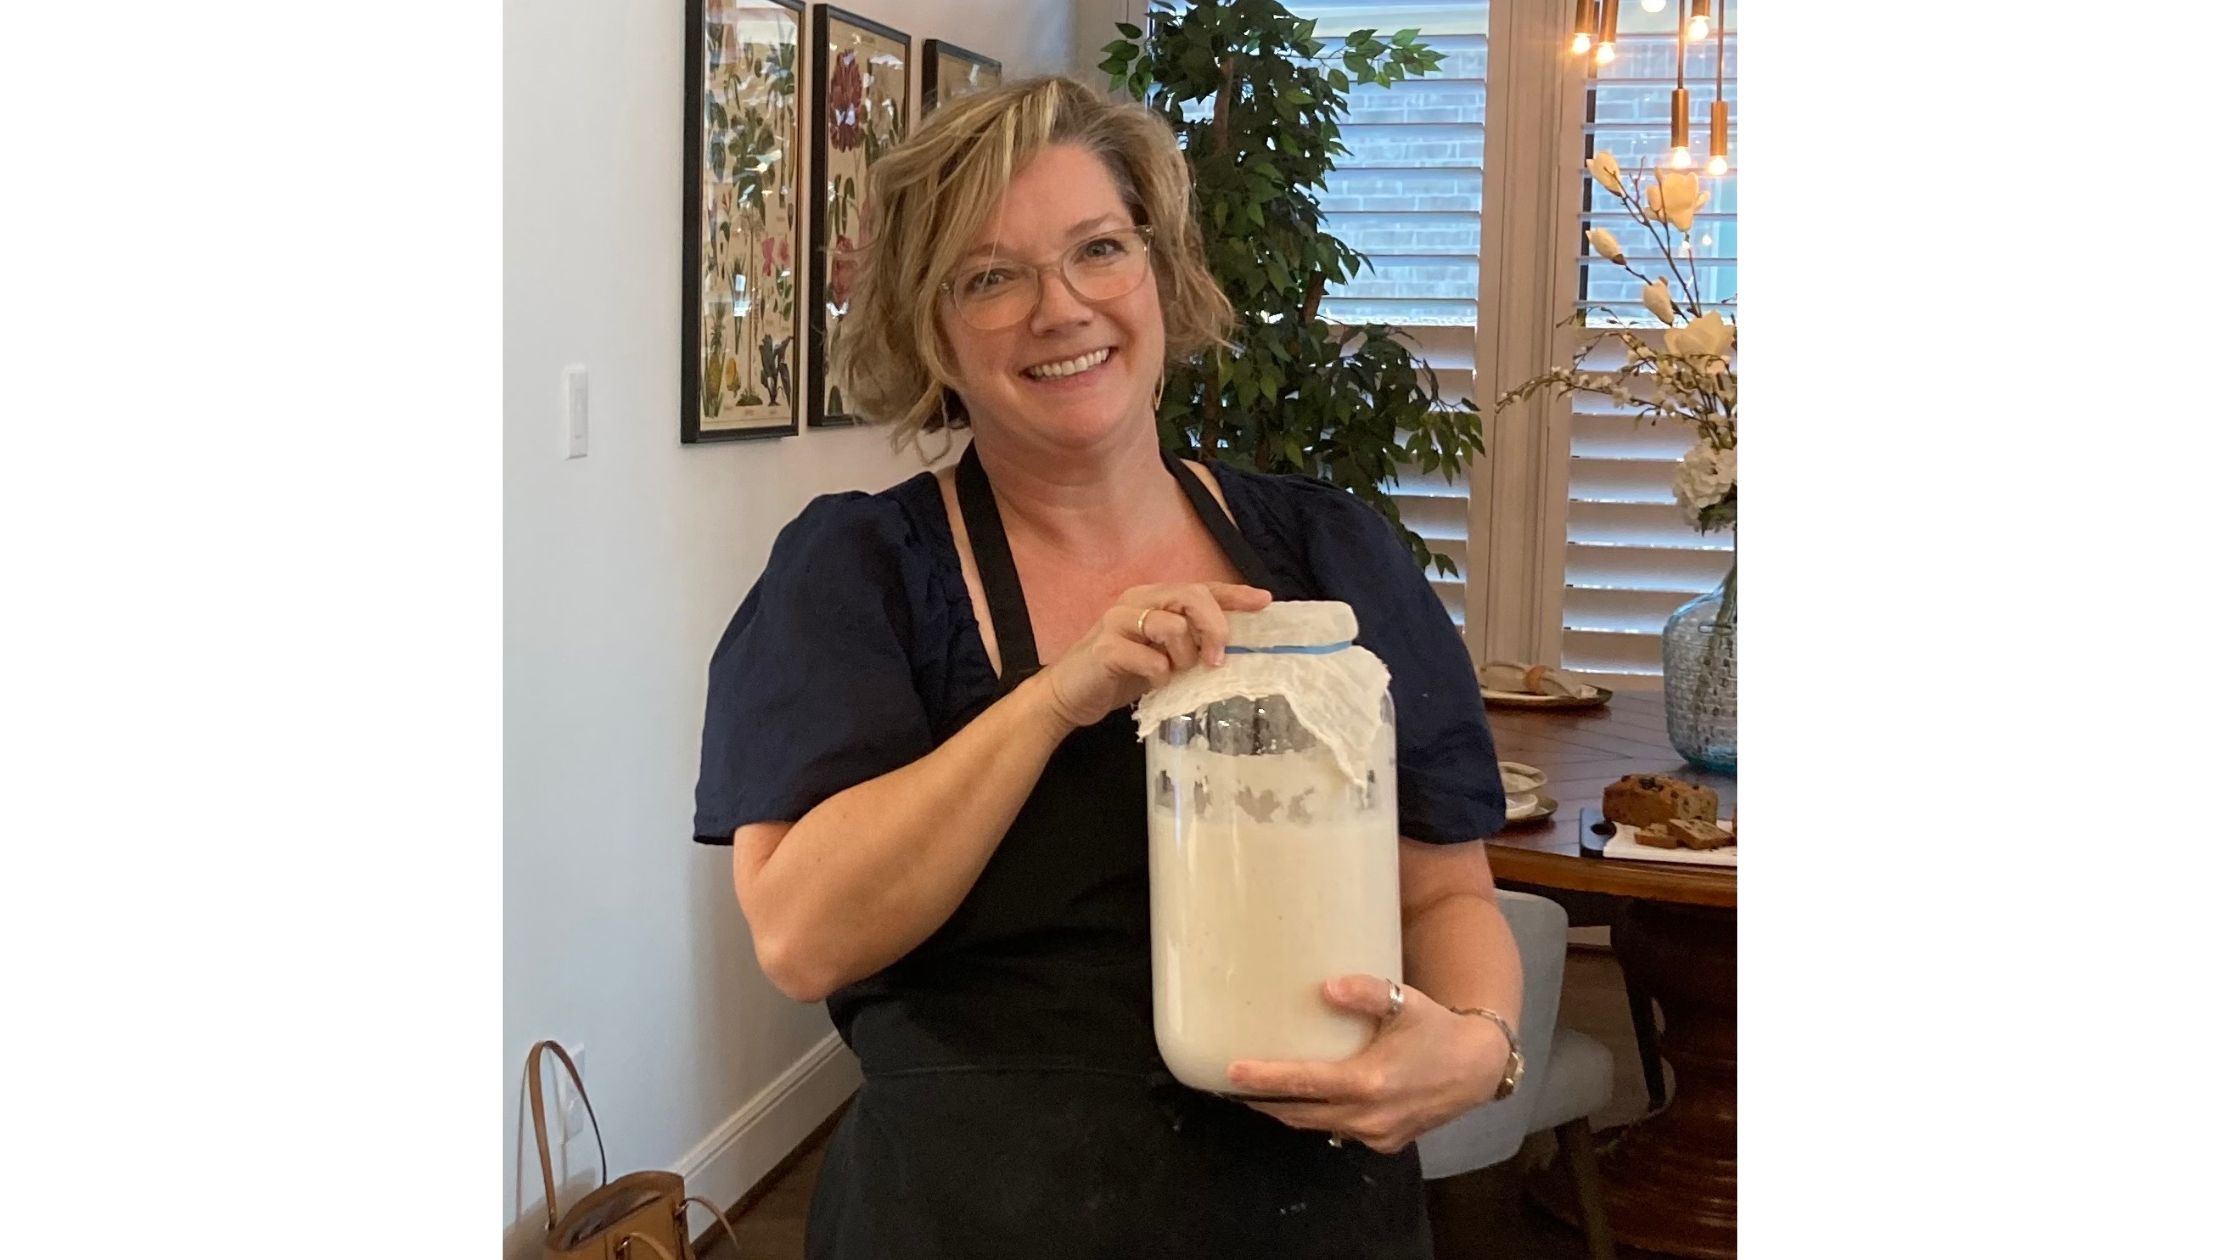
We started with the liquid ingredients, which included some starter from an impressively large jar.  She’d been feeding it for days in order to have enough for the class.  It was bubbly and fragrant in that fabulous way that starter is supposed to be. 

One of the things that I appreciated about the class is how Kasey apparently has a similar mindset when it comes to food labels. She carefully explained each ingredient, why she’d chosen the ones she did, and how everything worked together to support the dough.  In addition to the gluten free sourdough base we used egg, sugar, yeast, water, GF baking blend, nutritional yeast, ground flax seeds, and psyllium husk fiber.

After mixing the liquid ingredients we mixed together the dry ingredients and then put them both together.  At each step of the process Kasey would demonstrate what we were supposed to be doing and then come around offering assistance if people needed it. She wanted us to not only hear, but also see  and understand why it the batter needed to look and feel the way it did.

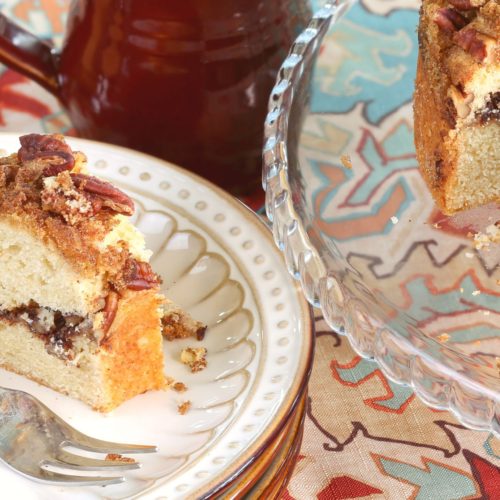
Eventually we had our beautiful loaves tucked into their loaf pans and from there into the oven.  At which point we were able to enjoy a snack that Kasey had prepared of the sandwich loaf we were making that she jazzed up with soaked fruit and seeds.  It was mouthwateringly delicious. This bread was so fabulous…how fabulous was it?... everyone wound up going back for a second slice. Nicely dense with a good level of hydration it wasn’t dry like most commercial gluten free breads.  Best of all it didn’t have excessive plant gums.   It’s one of those breads that doesn’t need anything else, it’s amazing all by itself. 

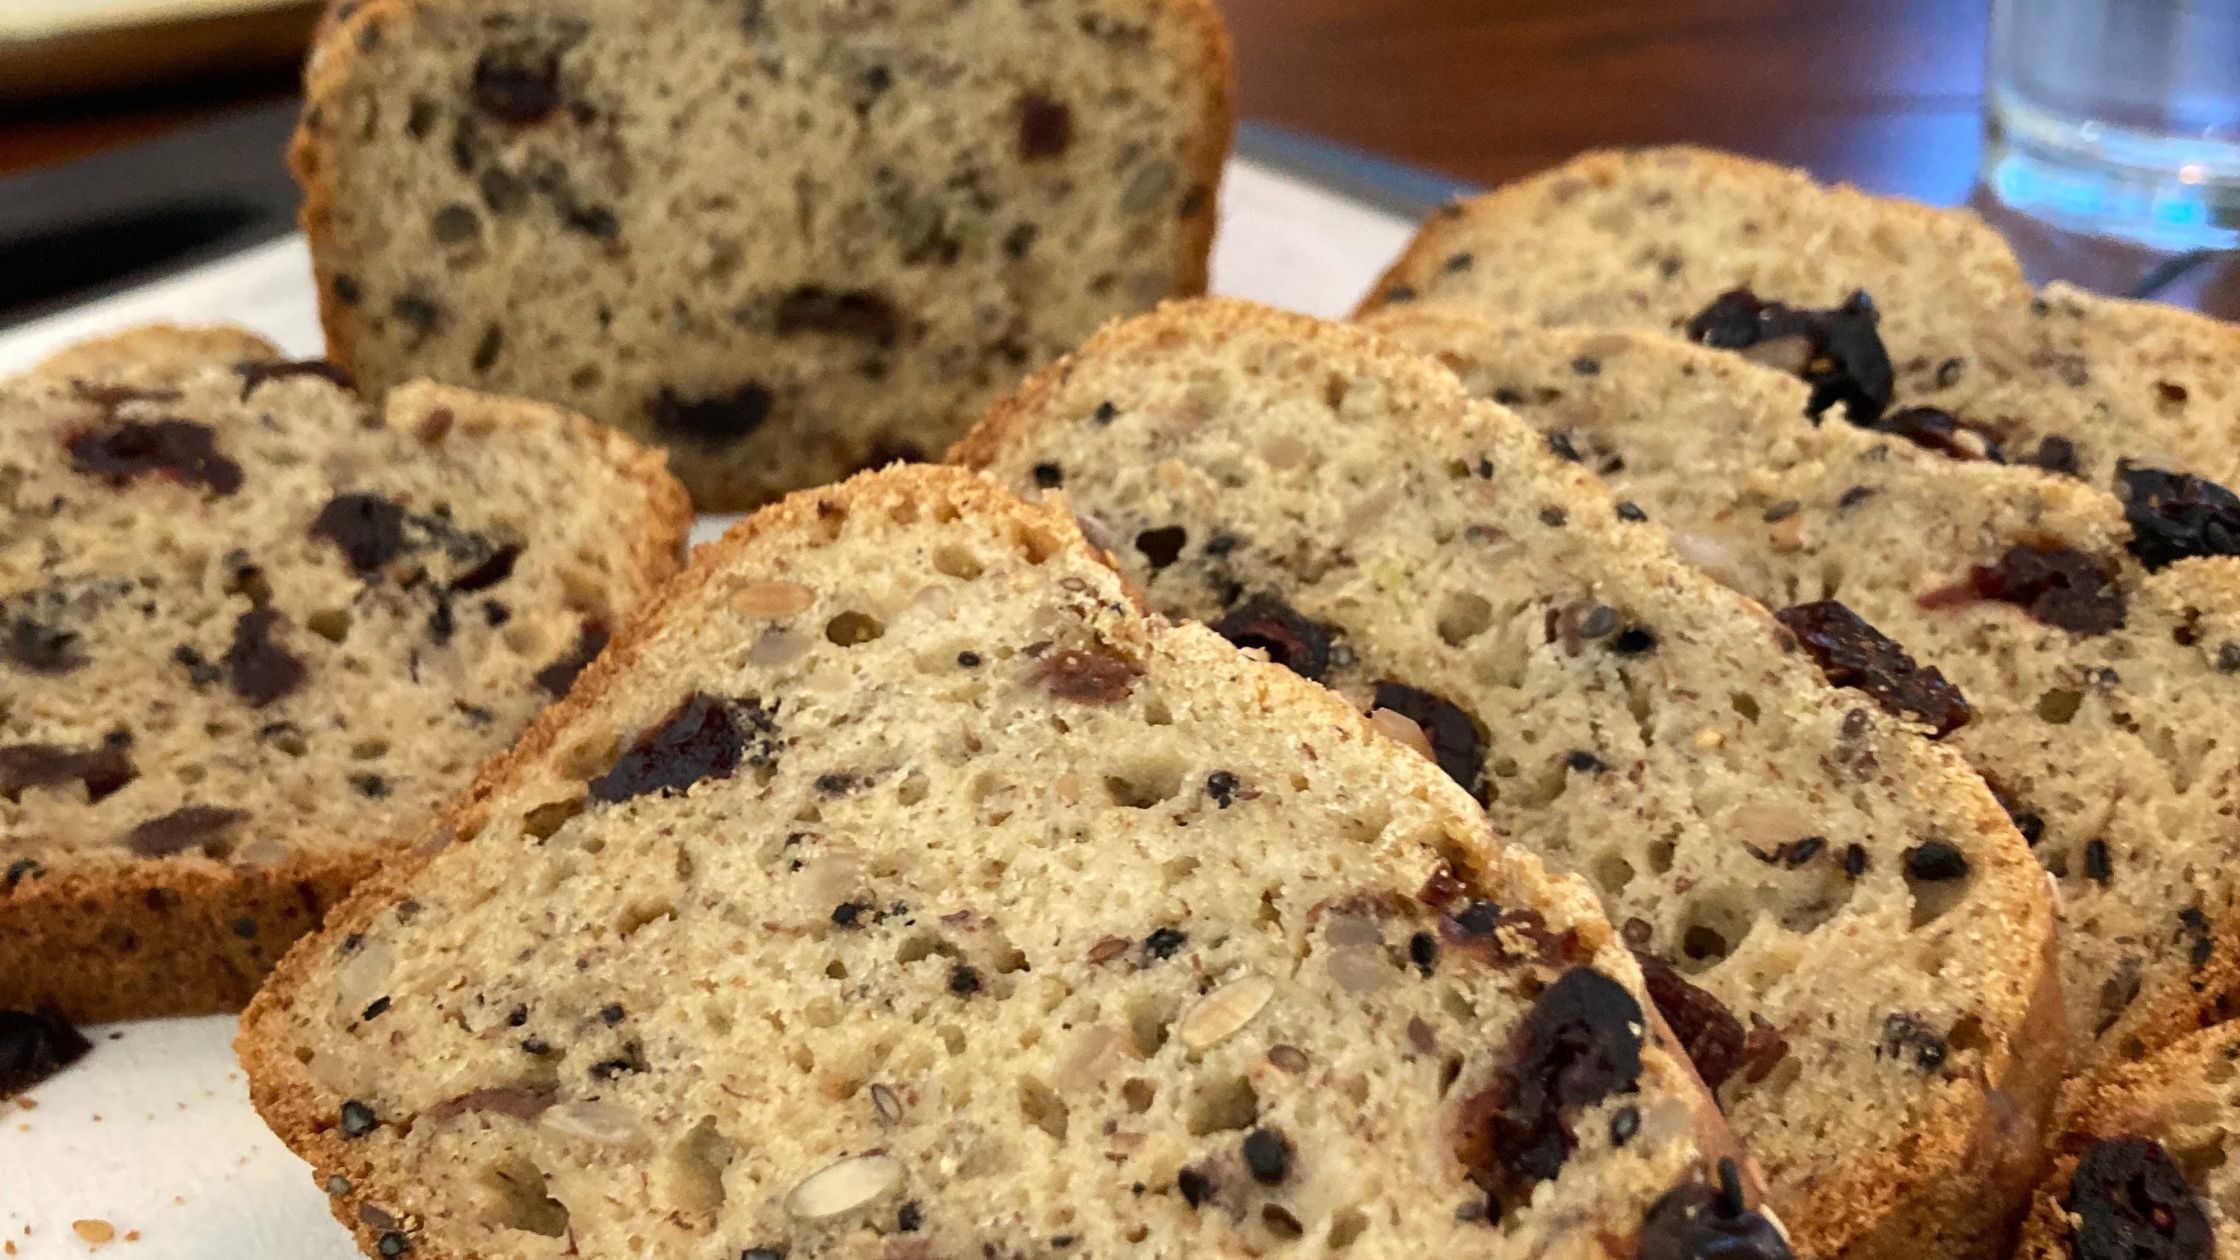
Luckily we were all given the recipe, plus a couple of others to take home with us.

That evening I carefully fed my starter and set it up to make sourdough pancakes for breakfast the next day.  My starter is obviously a new one so it’s not super bubbly, however the pancakes were delicious with a hint of sourdough tang.

Now it’s been fed, put to bed, and is waiting for the next baking adventure.

One of the best things about this class for me was learning about a new kind of baking pan that is much better for batter style breads than regular baking pans.  It gives the loaf more form so that it can rise higher and will be better for sandwiches.

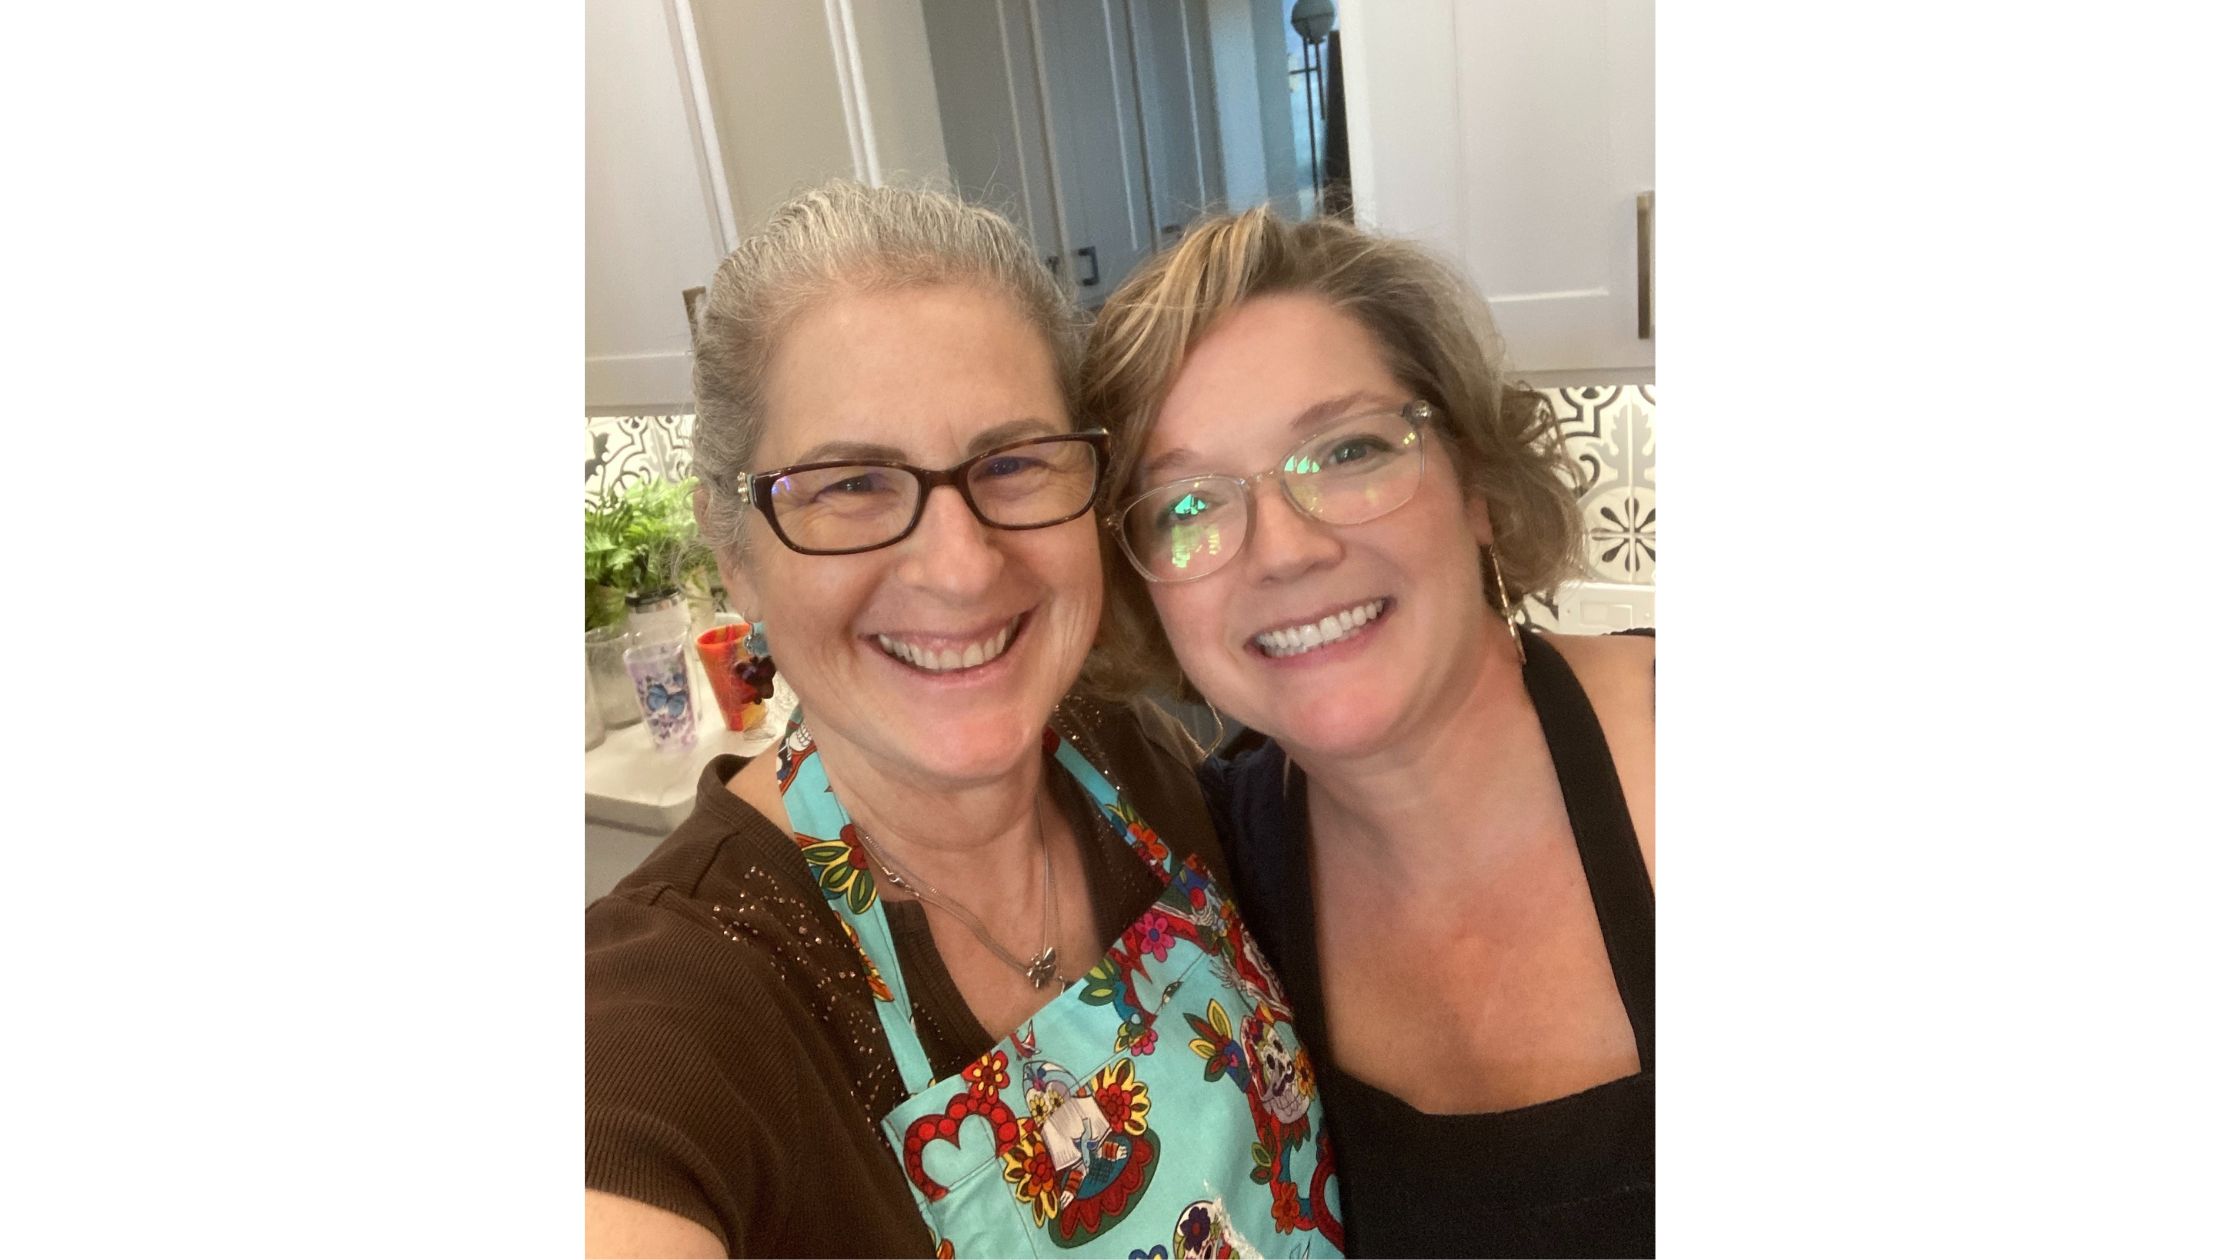
Here’s the supply list:

  • 2.2 pound Pullman Loaf Pan - Made with carbon steel it’s silicon lined with no PFOAs or PFASs, has a vent at the bottom (you use parchment paper when making batter breads), and a lid in case you want perfectly square bread
  • Konsyl Psyllium Husk Powder - This helps keep things together since there is no gluten in this mix, it also provides fiber and density for the bread
  • Nutritional Yeast - Provides a little bit of B12 and also adds delicious flavor to the bread
  • Bob’s Red Mill 1 to 1 Gluten Free Baking Flour - This is Kasey’s recommended blend
  • Active Dry Yeast - Slightly different than instant yeast although I believe both would work for making this kind of bread
  • Gluten Free Sourdough Starter - If you don’t have the opportunity to take a gluten free sourdough baking class or you don’t have a friend who has starter to share, the good news is you can get your own and start from scratch

It was a wonderful class and I’m delighted that I had the opportunity to spend time learning how to do this. If you’d like to take a class with Kasey be sure to check out her website Appetite To Travel.

If you have the chance to take cooking classes I encourage you to do it.  You’ll learn something new, have fun doing it, and gain a new skill that you can add to your kitchen repertoire.


baking powder

Not All Baking Powder Is Created Equal (Plus A Cake Recipe)

If you’re anyone who does any home baking chances are you have a few staples at hand at all times. Baking powder is one of them.  Before I share an astonishing fact that I learned about baking powder, I want to take a moment to discuss the difference between baking powder and baking soda.

The difference between baking powder and baking soda

Both are leavening agents, meaning they help baked good get fluffy. They do, however, have slightly different properties to them. 

Baking soda, also known as sodium bicarbonate, needs the presence of an acid and a liquid in order to activate.  That’s why when you are making something like pancakes, muffins, coffee cake, etc, you’ll find the recipe calls for something like buttermilk or lemon juice. And if you don’t have buttermilk you can make a mock buttermilk by adding vinegar, I use apple cider vinegar, to milk and letting it sit for a couple of minutes to curdle.

Baking powder, on the other hand, is a complete leavening agent by itself, no acidic ingredient required.  Double acting powder simply means the baking powder reacts twice. There’s a 70% rise while you are mixing the batter and a further 30% that occurs during baking. While there is such a thing as single acting baking powder, that tends to be used in only in commercial baking. 

Why use both? 

Chances are you’ve noticed that some recipes may call for both baking soda and baking powder.  Now that you know they’re both leavening agents you may be wondering why.  It turns out that sometimes having both will help balance out your recipe a little better. Because baking soda tends to neutralize acids, using them to make your baked goods rise, you may still want a little tangy flavor, so adding baking powder helps with the rise without diminishing the acidity. 

Baking soda, has another neat feature, it can help baked good get their golden color when baking.  So a little bit can improve the visual appeal of whatever you’re making.  

Who makes baking powder? baking powder brands

There are a number of different brands of baking powder on the market. Recently, however, I learned that multiple brands of baking powder are made by the same company. This only highlights something I talk about all the time, if a company buys another company often they do not change the name of the brand. With baking powder it turns out the four top brands are all made by Clabber Girl Corporation. (all of the ingredient information below comes from their website).

Going in alphabetical order…

Clabber Girl is one of the most popular baking powder brands in the US. It is certified Kosher. The ingredients are Corn Starch, Sodium Bicarbonate, Sodium Aluminum Sulfate, Monocalcium Phosphate. The label clearly states that this product does contain a bioengineered food ingredient - presumably this is the corn.

Davis Baking Powder is also certified as Kosher and its ingredients are Corn Starch, Sodium Bicarbonate, Sodium Aluminum Sulfate, Monocalcium Phosphate. Again on the label there is a notice that this product contains a bioengineered food ingredient.

Royal Baking Powder is another Kosher baking powder and is made with Corn Starch, Sodium Bicarbonate, Sodium Aluminum Sulfate, Monocalcium Phosphate. This product also is identified as having a bioengineered food ingredient

Rumsford is another popular baking powder brand in the US. In an unusual twist, this was actually the first baking powder company. It started in the late 1880’s with the company eventually being sold to the Clabber Girl Corporation in the 1960’s.

Fun fact, there was a Count Rumsford, an honorary title from the Bavarian government bestowed on Benjamin Thompson who was the benefactor of the man who invented double acting baking powder, Eben Norton Horsford. 

Rumsford is the only Clabber Girl brand to be Non-GMO Project Verified. It is not a Kosher ingredient yet it’s the only one which is aluminum free. The ingredients are: Corn Starch, Sodium Bicarbonate, Monocalcium Phosphate

There are other brands of baking powder, for example, Calumet, which is owned by Kraft Foods. They are however not GMO free, they do contain aluminum, and, for those for whom it is important, they are not listed as Kosher.

For many years, I have used Rumsford baking powder. I first began to use it when I became aware of the potential health issues from aluminum in our food. Over time my use of Rumsford continued because it became certified as a non-GMO project verified item.

Are they still good?

If you don’t bake a lot chances are those little cans of baking powder sit there for a long time.  Or that box of baking soda.  And while they’re both shelf stable, there is a limit to how long they’ll last.

Here’s a simple way to test them and see if they’re still up to the task of making your baked goods fluffy:

  • Add 1 teaspoon of baking powder to 2-3 ounces of hot water.  Bubbles means it’s still good to use.
  • Add 1 teaspoon of baking soda to 1-2 ounces of vinegar. If you’ve just created a middle school volcano eruption, you’re good to go.

Now that you know the difference between baking soda and baking powder, how to tell if they’re still useful, plus the fact that not all baking powders are equal, it seems a little unfair to not also leave you with a recipe.

Cinnamon Pecan Coffee Cake

There’s something special about coffee cake. Probably left over from my childhood when my Nana and my aunties always seemed to have coffee cake around. And there was something special about a nice cup of tea or coffee served with a delicious coffee cake and conversation.  This moist and tasty recipe is sure to be a hit anytime. 

Cinnamon Pecan Coffee Cake

Ingredients
  

  • ½ cup organic unsalted butter, at room temperature
  • 1 cup organic granulated sugar
  • 2 large eggs
  • 1 cup organic whole milk sourcream
  • 1 teaspoon vanilla extract
  • 2 cups gluten free flour blend (I prefer King Arthurs Measure for Measure)
  • 1 teaspoon baking powder (Rumsford’s, of course)
  • 1 teaspoon baking soda
  • ½ teaspoon sea salt
  • Topping

    ½ cup organic brown sugar

    ½ cup chopped pecans (can substitute walnuts if you prefer)

    1 teaspoon ground cinnamon

    4-5 grates of nutmeg

Instructions
 

  • Preheat oven to 350°F
  • Grease and flour 9-in baking pan
  • In a large bowl or mixer cream together butter and sugar until light and fluffy (3-4 minutes)
  • Beat in eggs one a time, combining well between additions
  • Add sour cream and vanilla extract until well combined
  • In a separate bowl whisk flour, baking powder, baking soda, and salt together
  • Add dry ingredients to wet ingredients slowly, stirring until combined but not overmixed
  • Make the topping by combining brown sugar, pecans, cinnamon, and nutmeg until crumbly in texture
  • Assemble the coffee cake by pouring half of the batter into the pan, top with half the topping mix and repeat with the remaining ingredients
  • Bake 40-45 minutes or until a cake pick comes out clean when inserted into the cake
  • Let cool for at least 15 minutes before serving. Enjoy!


Sources

"Products - Clabber Girl". Clabber Girl, 2023, https://clabbergirl.com/products/?_product_category=baking-powder.


Pumpkin Oat Breakfast Bars

My friend Erin recently shared this delicious recipe for a great on-the-go-snack bar. With pumpkins in season, it's easy enough to make your own puree. If you don't have the time or inclination to make your own, the canned stuff works just fine. A couple of words of caution, however, when choosing canned pumpkin:

  • It's best to use a brand that has a BPA free lining
  • Organic pumpkin is preferred
  • I highly recommend that you read the label and make sure that you are getting only 100% pumpkin. You don't need all those other ingredients.

These breakfast bars are fabulous for a quick breakfast, perfectly portable if you need to have breakfast on-the-go. And so tasty that they also make a great snack. If you'd like, add a serving of protein powder to make your bars even more nutritious. If you do add the protein powder you may find that you need just a Tablespoon or two of water so the mix isn't too dry.

Pumpkin Oat Breakfast Bars

Ingredients
  

  • 3/4 cup pumpkin purée
  • 2 eggs
  • 1/4 cup organic butter or ghee at room temperature
  • 1 large or 2 small ripe bananas
  • 1/4 cup honey
  • 2 cups rolled oats (not the quick cook variety)
  • 1/2 cup pecans, chopped (you can also use walnuts or sunflower seeds)
  • 2 Tbsp shredded coconut, unsweetened
  • 1/4 cup oat bran (optional)
  • 1/2 tsp cinnamon, ground
  • pinch of Celtic sea salt
  • 1 Tbsp grated orange rind
  • 1/4 cup dried currants
  • 1/4 cup dried blueberries

Instructions
 

  • Measure out the 2 cups of oats and pour just enough warm water over them to cover them
    Soak for about 5 minutes while you’re mixing up the wet ingredients
    In a mixing bowl, stir together the pumpkin, eggs, butter or ghee, honey, and banana
    You may want to mash the banana before adding to the bowl if it's not really soft
    Before adding the oats, drain them well
  • Add the oats, nuts, coconut, oat bran, cinnamon, salt, orange rind, currants, and blueberries, and stir until ingredients are well combined (this step is where you would also add the protein powder, if using)
    Spread mixture into a lightly greased (butter, ghee or coconut oil) pan so the batter is no more than an inch or two deep. An 8” x 10” baking dish works well
    Bake in a 350 degree F. oven for 40-50 minutes, or until golden brown
    For very crisp bars, remove from the pan and cool completely on a wire rack
    Cut the bars when cool 

Gluten Free Lemon Muffins

I needed to make something to bring to an event that I was attending recently. Knowing that the hostess was sensitive to gluten and dairy I wanted to make sure that I made something that fit her nutritional plan.

Casting around for ideas I spied a pile of fresh Meyer lemons that I had recently been gifted with in the fruit bowl.  These are my absolute favorite lemons. Immensely fragrant they add fabulous lemon-y flavor. I have a small tree that is now making 6-8 lemons a year.  I am eagerly awaiting the day that I get bags full of lemons like my friends.  Fortunately, those same friends are very generous and share.

I had thought about making a lemon quick bread but decided to make muffins instead. The best thing about muffins is that they are so easy to throw together. In just a few minutes you can have all of the ingredients mixed together and into the pan.  Because muffins are so small they bake rather quickly. 

I love lemon-flavored baked goods. Quick breads, scones, muffins, they are all so tasty when they have the added brightness of lemon added to them.  I'm not sure why lemon baked goods don't often make an appearance, more people seem to go for chocolate, or other flavors.  Sometimes sticking with a simple flavor is the best, imho.

I wanted my muffins to have a little crunch to them so I decided to add some millet which would give a slight pop.  I've used millet before in other baked goods and like the crunch and texture it adds.  

I often play with a recipe multiple times before it's ready for prime time, but this one seemed to come together really well so I'm sharing it as is.  I made it in mini-muffin tins and got three dozen.  They were well received at the event, all of them were eaten and I went home with crumbs.  This is definitely a recipe that's a keeper.  Something not-too-sweet but definitely tasty, perfect with a cup of tea to brighten up a cold, grey, winter morning.

Lemon Millet Muffins

Ingredients
  

  • 1/2 cup coconut oil
  • 1 cup sucanat
  • 1/2 cup evaporated cane juice crystals
  • 1 lemon
  • 2 eggs
  • 1/2 cup almond milk, approximately
  • 1 cup gluten free flour mix (I used a combination of oat, rice, buckwheat, tapioca)
  • 1/4 cup fresh ground flax seeds
  • 1/4 cup (heaping) millet seeds
  • 1 teaspoon baking soda
  • 1/2 teaspoon sea salt

Instructions
 

  • Preheat oven to 350 F
  • Grease three mini-muffin pans (or one regular muffin pan)
  • Zest the lemon
  • Juice the lemon and put juice into a measuring cup
  • Add almond milk until there is 2/3 cup liquid
  • Beat together coconut oil and sugars until fully combined
  • Add eggs, one at a time until well mixed
  • Add lemon zest, baking soda, and the salt
  • Alternate adding flour and curdled milk, making sure they are well mixed
  • Spoon by tablespoonfuls into muffin cups
  • Bake 15 minutes
  • Let cool 2 minutes in the pan
  • Finish cooling on a wire rack

Baking With Kids

Baking is wonderful and something I love to do. Even more fun is to bake with kids.  They're so excited and fascinated by the process.  Learning their way around the ingredients, how to measure, the wet and dry combining process; it's a fun edible science and math experiment in the kitchen.

This is one of my baking buddies, Miss A.  She came over the other day with her brother, Mr. C.   I had promised them that the next time they came over we would make cookies so that was our plan.

As it turns out Mr. C's idea of making cookies was to allow his sister and I to do all the baking while he played the part of Official Cookie Tester.  And, might I add, he was rather impatient for those cookies to be done.

Miss A and I got down to business, put on our aprons and got out my "Famous Chocolate Chip Oaties" recipe.  Mr. C. wanted to know why they were famous, had they been on t.v.? Did someone famous invent them?  I told him that it was a recipe I had created and I simply call them Famous because everyone who eats them really likes them and wants more.

Needless to say he was less than impressed and informed me that unless they've been on t.v. they can't be famous.  Maybe I should send a box to Ellen?

One of the things I love about baking with kids is how curious they are.  Miss A wanted to taste everything.  Of course we decided that the chocolate chips were pretty tasty. Surprisingly she liked the oatmeal, even raw, and requested a large spoonful of her own to nibble on.  We had two kinds of sugar and she tasted both of them.  Then we got to the baking soda.  

Miss A asked if she could taste it.  I was a little surprised and said, "I'm not sure you want to do that."

"Why?" she asked.

"Well," I replied "it's a little bitter tasting and I'm not sure you're going to like it."

"But I want to taste everything." she said.
So I let her taste it.

Her face scrunched up a little and she said, "It's not really bitter but I don't like it."

"Want some chocolate chips to wash that down?" I asked.

Of course the answer was yes.

We wound up making two batches of cookies the regular variety and the peanut butter variety.  The recipe is below and we're sure you're going to enjoy it, just like we did.

Famous Chocolate Chip Oaties

Ingredients
  

  • 1/2 C butter
  • 1 C evaporated cane juice crystals
  • 1 egg
  • 1/2 t. vanilla
  • 1 C + 2 T white whole wheat flour
  • 1/2 t. salt
  • 1/2 t. baking soda
  • 1 C chocolate chips
  • 1 C rolled oats

Instructions
 

  • Preheat oven to 375
  • Blend together butter and sugar until creamy
  • Add egg and blend well
  • Add vanilla and blend well
  • Mix together flour, salt and baking soda and sift into butter mixture
  • Blend in chocolate chips
  • Blend in oats
  • Drop by spoonfuls onto a greased baking sheet
  • Bake 10 minutes
  • Let sit on baking sheet 2 minutes
  • Move to rack to finish cooling
  • For the Peanut Butter variety:
    Substitute sucanat for the evaporated cane juice crystals
    Add 1/2 C chunky peanut butter

Baking Subtitutions

 
I love to bake; I've been baking for decades and have made a wide assortment of baked goods for family, friends, fundraisers, and more.  As a baker, one thing you quickly learn is the need to be able to make substitutions if you don't have what you need on hand. This is a list of my favorite baking swaps. I encourage you to print this out and either keep it in a binder or tape it to the inside of your baking cupboard so you always have it handy.
 
Note: The chart below assumes ingredients are organic, whole fat, or best quality as needed.
Ingredient Substitutions
Ingredient Amount Substitution
Arrowroot Powder 1 Tbsp 1 Tbsp flour or cornstarch
Baking Powder 1 tsp 1/2 tsp cream of tartar + 1/4 tsp baking soda
Baking Soda 1/2 tsp 2 tsp baking powder
Brown Sugar 1 cup Light - 1 cup sugar + 1 Tbsp molasses
Dark - 1 cup sugar + 2 Tbsp molasses
Butter 1/2 cup 1/4 cup applesauce or Greek yogurt
1/3 cup + 2 tsp pumpkin puree
Buttermilk 1 cup 1 cup milk + 1 Tbsp vinegar (let sit 5 minutes)
Cream Cheese 8 oz 8 oz ricotta
Cream of Tartar 1/4 tsp 1/2 tsp lemon juice
Egg 1 1 Tbsp ground flaxseed + 3 Tbsp hot water
2 Tbsp arrowroot + 3 Tbsp hot water
3 Tbsp aquafaba
1/4 cup applesauce or mashed banana or yogurt
Half and Half 1 cup 1 Tbsp melted butter + 1 cup milk
Honey 1 Tbsp 1 Tbsp maple syrup or molasses or golden syrup
or silan (date syrup)
Lemon Juice 1 tsp 1/2 tsp apple cider vinegar
Mayonnaise 1 cup 1 cup sour cream or plain Greek yogurt
Milk 1 cup 1 cup alternative milk
3/4 cup heavy cream + 1/4 cup water
Olive Oil 1 cup 1 cup avocado oil or coconut oil or melted butter
 
If you find yourself regularly making substitutions to recipes you use often I encourage you to write directly in the cookbook or on the recipe card so you always have the needed substitutions available.
 
Don't forget to also grab a copy of my free Kitchen Conversions handout!