All posts by Mira


About Mira

Mira Dessy is The Ingredient Guru. A holistic nutrition professional, author, and a popular public speaker, she knows that it's not just what you eat, but what's in what you eat. She is the author of The Pantry Principle: how to read the label and understand what’s really in their food. Dessy is a Board Certified Holistic Health Practitioner whose mission is to educate and empower consumers. She curates the Lean Clean Green Subscription box, the premier, organic, earth-friendly, healthy, sustainable subscription box which can be found online at https://theingredientguru.memberbox.com

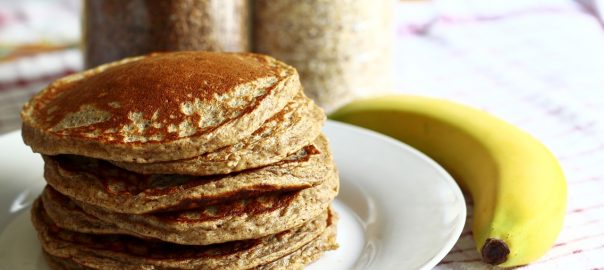
banana oat pancakes

Banana Oat Pancakes

Do you love pancakes?

We love pancakes in our house.  They are a great, easy to make, healthy, whole-grain breakfast.  Throw in some fresh fruit and maybe a little homemade Greek yogurt and it’s the perfect meal to start your day…filling, nutritious, blood-sugar balancing, and, most importantly, delicious.  Of course, pancakes are also delicious at any time [breakfast for dinner anyone?].

Using whole grains

I love it when I find a recipe that is so perfect it doesn’t need anything else.  This recipe is one of them.  From my King Arthur Flour Whole Grain Baking book, it’s a recipe that is a consistent favorite.  I love the fact that it’s made from whole grains.  Although I make my own oat flour by grinding oat groats you can easily make it at home by placing old fashioned oats in the food processor or blender and blending it until it reaches a fine consistency.  If that’s more than you are willing to do you can also just buy it, both Arrowhead Mills and Bob’s Red Mill sell oat flour or you can get certified gluten-free oat flour from Legacy Valley or Cream Hill Estates.

As a quick side note, because oats tend to be grown near, stored with or transported with other glutinous grains, most specifically wheat, if you’re following a gluten-free diet you’ll need to make sure you’re getting certified gluten-free oats.  Certified producers grow and process only oats, guaranteeing that there is no cross-contamination.

This recipe is simple and delicious. One of the things that my family likes so much about it is that the pancakes are very fluffy.  You don’t realize that these are whole grain oat pancakes they are that light and airy.  The bananas combined with the cinnamon and nutmeg make it a delicious way to start your day.  I also like having another great recipe that allows me to use up any almost over-ripe bananas.

King Arthur Flour's Banana-Oat Pancakes
Print
Ingredients
  1. 3 small bananas mashed
  2. 2 T. unsalted butter melted (use organic)
  3. 1 T. lemon juice
  4. 1 T. sugar (I reduce this to 1 t. as the bananas when they are this ripe have a lot of natural sugars)
  5. 2 eggs
  6. 1 C. oat flour
  7. 1/2 t. baking soda
  8. 1/2 t. salt
  9. 1/2 t. ground cinnamon
  10. 1/2 t. ground nutmeg
Instructions
  1. Stir together the mashed bananas, butter, lemon juice and sugar in a medium bowl.
  2. Beat in the eggs.
  3. Whisk together the oat flour, baking soda, salt and spices in a small bowl.
  4. Form a well in the center of the dry ingredients and pour in the wet ingredients.
  5. Stir the batter just until the dry ingredients are thoroughly moistened.
  6. Check to be sure the batter is thin enough for your pancakes; you may need to add a touch of milk or water (I never do)
  7. Let the batter sit 10 minutes before using.
  8. Heat a nonstick griddle or heavy skillet.
  9. If your surface is not non-stick brush it lightly with vegetable oil.
  10. When the surface is ready spoon batter 1/4 C. at a time into the pan.
  11. Let the pancakes cook on the first side until bubbles begin to for around the edges, 3-4 minutes.
  12. When the pancakes are just beginning to set flip then and let them cook on the second side, about 1 1/2 minutes more.
  13. You can sprinkle toasted walnuts over the batter just before cooking as an extra treat.
The Ingredient Guru, Mira Dessy https://theingredientguru.com/


watermelon for agua fresca

Quench Your Thirst With Agua Fresca

Agua fresca is Spanish for fresh waters. It’s a refreshing non-alcoholic summer-y drink with origins in Mexico where it is sold by street vendors.  In South and Central American stores or restaurants you can sometimes you can find it in large containers where it is ladled out by the glassful.  Agua fresca is a great drink for warm weather. It’s a hydrating and satisfying thirst quencher that is much better than soda or over-sugared bottled drinks and fountain drinks.

Agua fresca is usually made with fruit, lime juice, and water.  Watermelon, cantaloupe, strawberry, and pineapple are popular flavors.  When you make them at home the ingredients can be adjusted for personal taste.  Often there’s no need to add sugar, because the fruits are sweet enough on their own.  Because you don’t strain the agua fresca after blending it (unless it’s too thick in which case you can lightly strain to remove larger pieces) you’re also getting some of the healthy fiber.

What fruits to use

Just about any fruit or fruit combination is fair game when it comes to agua fresca. Of course you’ll need water and lime juice.  Substitute lemon if you’re out of limes, but trust me it’s somehow better with lime juice.  Mangos, peaches, pineapple, there’s really no limit to the tasty and refreshing combinations you can make.

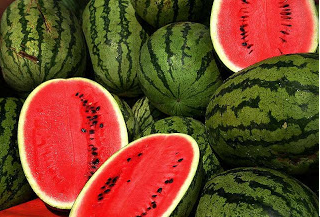
One of my personal choices for a great agua fresca is watermelon which is abundantly available in the summertime. Juicy and delicious, watermelon is in vitamin C  and lycopene, as well as being rich in the electrolytes potassium  and sodium.  This makes it a fabulous choice for summer time when we tend to lose a lot of electrolytes through perspiration.  

Luciano Pavarotti once said, “Watermelon, it’s a great fruit. You eat, you drink, you wash your face.”  If you’re eating it that’s certainly true.  With an agua fresca you can still enjoy the wonderful flavor and not have to worry about the wash your face part.  Here’s my favorite recipe:


Agua Fresca
Print
Ingredients
  1. 2 C. strawberries, dehulled
  2. 3 C. watermelon, removed from the rind and pitted
  3. juice of 1/2 a lime
  4. 1/3-1/2 C. of ice cold water
  5. mint leaves for garnish
Instructions
  1. Place berries, watermelon and lime juice in a blender
  2. Blend until well mixed
  3. Add water until you reach a consistency that you prefer
  4. Garnish and enjoy!
The Ingredient Guru, Mira Dessy https://theingredientguru.com/

Making Homemade Jam

Josh wrote in and wondered, “We just made some strawberry jam. Best jelly I’ve ever had. Do you know if you have to use such a huge amount of sugar? The basic recipe we used was adamant not to adjust or the jam would not set properly.”


Strawberries are very low in pectin so you do need to add a fair amount of sugar to get them to set. If you use less sugar they will not set. You can try using some strawberries that are not fully ripe and still have the white tips but I have had hit-or-miss success with this method.


One way to vary the amount of sugar, especially if you are not using pectin, is to mix the strawberries with a higher pectin fruit such as apples, blackberries, crab apples, cranberries, gooseberries, grapes, or citrus peel.  This works for any low pectin fruit such as apricots, blueberries, peaches, pears, rhubarb, and raspberries.


If you are willing to use pectin you can use a commercial variety, and there are some low sugar ones out there, but another option is to make your own homemade pectin using apples or lemons. There are excellent directions in the book “Preserving Memories” by Judy Glattstein (who I confess is my mother and an excellent canner).


There are recipes that talk about using honey or other sweeteners but I find that most of them call for gelatin which I prefer not to use.

Aromatherapy Field Trip

Steve and I recently took a trip into Houston.  We were headed for the Museum of Natural Science but would up making a little detour before visiting the museum.  Across the street from the Museum, located at One Hermann Street, is a garden that is open to the public.  One part of the garden is an Aromatic Garden.  Filled with raised beds of mints, culinary herbs, rosemary and other aromatics it is truly a delight for the senses.


We wandered through the beds delighting in the plantings and stroking the different plants to release their scents, admiring how many different kinds of mints and basils and thymes, and more there are.  The smell, the texture, the setting all combined to make a very relaxing and delightful stroll.  I confess that my hands smelled quite delicious by the time we were done.


Next door to the Aromatic Garden is the Rose Garden.  Abounding with blooms of all sizes and colors we wandered from bed to bed exclaiming over the different colors and scents.  Some of the showiest roses had no scent at all while some were so overpoweringly perfume-y that one small sniff was more than enough.  


I could feel my blood pressure dropping and a sense of calm envelop me as we enjoyed both of these gardens.  It was a moment of mindful meditation.  Even now, thinking about them as I write I find a peaceful feeling rising forth.  Such is the power of scent and beauty that it can help us to slow down and enjoy the moment.  Not for nothing do we have the phrase “take time to smell the roses.”


While I have aromatic herbs in my garden I’m now considering adding some roses to I can recreate a small dose of the experience we had this morning for those days when I can’t get all the way into the city.  If you have a small corner of your garden available you might want to consider doing the same.


photo courtesy of Stan Shebs | Wikimedia Commons

Grinding Flour

Claire wrote in and asked, “I have a question re: grinding your own flours out of grains, say brown rice flour, garbanzo bean flour, etc. When you do it, do you soak the grains/beans before you grind it? I soak everything over night (my grains, beans and nuts) before I cook it. I learned this from my Natural Chef class as soaking deactivates the phytic acid that acts as enzyme inhibitors and makes it more digestable. Cooking alone helps to some extent, but not as good as soaking. I am just wondering if I do soak it first, do I need an extra step, say, using a dehydrator to dry it before I grind it.

The reason I’d like to get the model Super 5200 from Vitamix, is that in addition to a wet container that’s good for processing wet goods, there is an additional dry container that has a special set of blades that are designed for grinding flours. Then it follows that do I need to also get a dehydrator before I can even grind it?”


I’ll start by saying that yes there is another container that can grind grains and beans into flours.  I use a Wondermill which does a great job and can grind to several different levels of fineness.  You cannot grind wet or oily items (flax seeds, wet sprouts, nuts, etc.) in the electric version.


As far as soaking goes there are a few different ways to do it.  The first is to soak, dry (either in a dehydrator or in an oven set to very low temp for a long time) and then grind.  Another is to sprout, dry and then grind.  The picture above shows flour made from sprouted wheat and sprouted spelt; you can see that the texture is no different than if you use the whole grain.  The third is to grind your grains into flour and then soak the flour overnight before using it, this is the method that I use most.  Any of these methods will work well, it’s up to you to determine if you want to use the oven method or purchase a dehydrator.


Using fresh ground flour is an excellent idea because many nutrients are stripped out by commercial processing.  Additionally, if you use fresh ground flour you are getting the full benefit of the germ, which is where all of the beneficial oils are.  It is important to note that using fresh ground flour may require a modification to your recipe because the extra fiber can retard the rise of gluten (requiring a longer rise time or the addition of leavening agents such as vital wheat gluten, lecithin, ascorbic acid or others) and the moisture content may change as the fiber soaks up more liquid.


There are several excellent books that deal with whole grain flours:


Thanks for your question, I hope this helps.

photo courtesy of Jaaq | Wikimedia Commons

Cottage Loaf


Over on my Facebook Fan Page I wrote about a recent experiment in bread making.  I took one of my favorite quick rise bread recipes and used the baking method from no-knead bread.  The bread rose really well.  At first I was sort of disappointed because it rose REALLY well, I was making it in 2 quart pyrex containers (I don’t own a 5 quart cast iron dutch oven as called for in no-knead bread) and I wound up with 2 quart-casserole-dish-shaped bread.  However, as you can see from the picture, once turned out of it’s container I realized it looked beautiful.    I got a fabulous rise and the crumb is very even and beautiful. 


Helayne asked for the recipe so here it is:


Cottage Loaf
[makes one loaf but doubles very well]


5-6 C. bread flour
2 T. yeast
2 T. evaporated cane juice crystals
1 T. sea salt
1 t. ground ginger
2 C. hot water


In a large bowl mix together 2 C. flour, the yeast, salt, sugar and ground ginger
Add hot water and stir well
Add flour 1 C. at a time until dough is no longer sticky
Knead for 8 minutes until dough is ready (I have a really big bowl and I just knead directly in the bowl)
Oil dough and return to the bowl
Cover with a dishtowel and let rise in a draft free place for one hour
Punch down, shape dough into a ball and place in a bowl lined with a well-floured towel
Recover dough
Take 2 quart covered casserole dish and place in the oven
Set oven to 475
When oven is done preheating open dish, slide dough into dish, place lid back on casserole
Bake 30 minutes then remove lid and bake another 20-25 minutes until bread is done
Remove bread from casserole and cool on wire rack completely before cutting 


The waiting part is very difficult to accomplish as the smell of freshly baked bread permeates the house like nothing else and draws hungry folk in a hurry.


I made this bread using King Arthur Bread Flour.  Although I bake a lot of bread using whole grain or fresh ground flours occasionally I will use unbleached all-purpose or bread flour.  Then I experiment from there to see how much I can modify it and change to less processed grains.  The next experiment with this loaf will be to see if I can substitute 1/2 of the flour for whole wheat and what happens from there.  


I’ll keep you posted.

Step By Step, Food Changes

Meg wrote in with the following, “For me, to truly change my eating habits, I have to go in very small and tasty steps. Once I find a healthier food or drink that I really like, after a few weeks of eating that I don’t miss the junk stuff and don’t feel deprived.

It would be great to find recipes / meal plans that “step you down” from junk to healthy organic by offering variations from A to B. For example, I’ve switched my typical breakfast from decaf with halzelnut non-dairy creamer and a cinnamon raisin bagel with cream cheese by first switching to whole wheat toast with a scrape of butter and cinnamon-sugar, then to one slice with the sugar, and finally to one slice of whole wheat bread with a scrape of butter or Nutella and a few spoonfuls of organic yogurt with walnuts.

I’m ready to tackle the (processed) decaf coffee with (chemical) halzelnut-flavored non-dairy creamer. Trouble is I really, really like the flavor and I don’t really like the taste of green tea (yet). Can you recommend a healthier breakfast beverage replacement that could be transformed in stages?

I find that lots of folks really like their coffee and have a hard time giving it up.  Part of it is the chemical addiction to caffeine.  What’s actually more harmful than the caffeine is the flavored non-dairy creamer. With Mono and Diglycerides, Sodium Stearoyl Lactylate, Dipotassium Phosphate, and Sodium Caseinate this is not food.  I would say there is nothing wrong with one cup of coffee in the morning to get you started, just use real cream instead.  If you want to give up caffeine and switch to decaf that’s certainly a good thing to do, but that real cream is going to make it taste a whole lot better.  And it goes without saying that organic dairy is best, read this article for more information about that issue.  Green tea is certainly a great option, filled with anti-oxidants, but maybe starting with one cup of coffee and then switching to green tea for your other beverage choices (including water, water, water, and herbal teas) is the way to go.

The most important thing to remember about your breakfast menu is that you want to make sure you are getting some good protein, some fiber, and a healthy fat.  This will help you make it through the morning with stable blood sugar.  When choosing your bread make sure that you are getting WHOLE GRAIN instead of just whole wheat.  Unfortunately whole wheat doesn’t have all of the parts of the grain, so it’s not as healthy.  Marketers are aware of how much we look for those key words and so be aware that multi-grain is also not whole grain.  For butter, choose a good, organic, butter and you can have more than just a scrape.  For your yogurt and walnuts, that’s a great choice.  Organic full fat yogurt is best.  Again, it helps you feel full, gives you the protein that you need and helps you start your morning with a stable blood sugar.

Curried Carrot Sprout Salad

In the tastes-better-than-the-picture category we have today’s lunch offering.  A conversation earlier in the day with my friend Blujay about ways to use sprouts brought up the idea of putting them into a curried carrot salad.  


Salads are so wonderful in the warmer months, keeping a couple on hand in the fridge means you always have something for lunch or dinner.  I love the idea of assembling a bunch of different salads for a composed plate as a refreshing way to make a meal.  If you don’t happen to have fresh sprouts on hand you many grocery stores now carry them although they’re certainly easy to make and I think it’s better to get them fresh, it’s certainly easy to do.


Curried Carrot Sprout Salad


6 large carrots, topped and shredded
1 C. fresh bean sprouts
1/4 C. dried currants
1/4 C. raw sunflower seeds
1/4 C. chopped walnuts
1/2 C. mayonnaise
1 t. curry powder
salt to taste


Mix all ingredients together
Let sit in fridge for at least two hours to chill and for flavor to settle


Bean sprouts are very healthy.  The act of sprouting forces the bean to convert some of it’s starches, this makes it more easily digestible.  Many of the nutrients are increased by sprouting as well, especially vitamin A, vitamin C and some of the B vitamins.  They can be made year round using very simple equipment, just a pot, a sieve and an insulated space.


I use mine in salads, green smoothies, blended into soups and sometimes just as a snack.  They are delicious


Homemade Bean Sprouts


1/2 C. assorted dried beans (I like adzuki, mung, lentil and black beans)
Sort through beans and rinse
Put in a metal pot, cover with water and set in the oven overnight (oven is off)
In the morning drain and rinse the beans well
Return to the oven
Repeat until beans have 1/2″ long tails


Rinse and eat
May be stored in the fridge but make sure they are fully dry before you do that to avoid spoilage


Note:  when making your sprouts it is helpful to put a note stating “sprouts” on the oven door so that people don’t preheat the oven without looking and accidentally cook your sprouts.  Just saying…

Food Glorious Food

Okay, that’s a song title.  But lyrics are just poems set to music and it’s National Poetry Month. This got me thinking about all the poems that mention food, and there are oh so many of them. My first exposure to food poetry was this little treasure my Grandfather taught me:

I eat my peas with honey
I’ve done it all my life
It makes the peas taste funny
But it keeps them on my knife

As a young child I found this very entertaining and it was, I believe, my first memorized poem.  More food poems began to find their way into my life from Shel Silverstein’s Sarah Cynthia Sylvia Stout to Lewis Carroll’s The Walrus and The Carpenter or Turtle Soup.   These were followed by Robert Frost’s Blueberries, Victor Buono’s The Fat Man’s Prayer, Ogden Nash’s The Clean Platter, and Jack Prelutsky’s Deep In Our Refrigerator.  There’s also Pablo Neruda’s offerings, Ode to an Onion and Ode to Salt.

And more and more and more, the list goes on.  Food is such an elemental part of our life that it is no wonder that so many poems have been written about it.

So take a moment to read or write a poem about food.  I’d love it if you’d share your favorites in the comments below.

Tre Colori

This could more accurately be called “Fridge Rummage” as that’s how all of these ingredients came together but tre colori (three colors in Italian) sounds better.

I had a lonely little eggplant that needed to be cooked.  Looking into my fridge for inspiration I found a half a red pepper, half of a large Spanish onion, 2 medium portabella mushrooms and about six leaves of kale.

Adding two cloves of garlic, olive oil, basil, oregano (both from the herb garden), salt and pepper I turned it into the tastes-better-than-the-picture-looks image to the left.

All the vegetables are cut to a medium dice and the kale is done chiffonade style; the herbs are minced.

Dice the eggplant, salt and set aside to drain while cutting other veggies
Heat 2 T. of olive oil, add onions and stir until soft and golden
Add garlic and saute for one minute
Add red peppers and kale and saute until kale begins to wilt
Rinse and add eggplant, add 1-2 more T. of olive oil and saute until eggplant is starting to soften
Then add the mushrooms and herbs and cook until mushrooms and eggplant are done (5-7 minutes)
Salt and pepper to taste

Served over whole grain penne pasta it was delicious!