All posts by Mira


About Mira

Mira Dessy is The Ingredient Guru. A holistic nutrition professional, author, and a popular public speaker, she knows that it's not just what you eat, but what's in what you eat. She is the author of The Pantry Principle: how to read the label and understand what’s really in their food. Dessy is a Board Certified Holistic Health Practitioner whose mission is to educate and empower consumers. She curates the Lean Clean Green Subscription box, the premier, organic, earth-friendly, healthy, sustainable subscription box which can be found online at https://theingredientguru.memberbox.com

Pavlov’s Chickens

I’m always amused when I see the cartons of eggs in the grocery store proclaiming in bold print “vegetarian fed.”  Chickens are not vegetarians.  As a matter of fact they do better if they get to scratch, run around in the sunshine, and eat bugs and worms.  It’s part of their natural diet.  And the healthier the chicken, the healthier the egg that it produces.

You can always tell a healthy egg because it’s a much better color, it’s firmer and holds together better, and, most importantly, it tastes better.  If you don’t believe me I encourage you to find a friend who has chickens or pay a visit to your local farmer’s market and buy some.

The chickens that you see on the left there are Josephine and Daphne, they belong to my friend Peggy who has joined the growing trend of backyard chicken keepers.  More and more folks are deciding, especially in light of the very scary egg recall that they would like to raise their own chickens.  This way they know what the chickens are eating, how healthy they are, and they’ll feel better about eating eggs.  As people join the trend more communities are passing legislation to allow keeping chickens as pets (usually limiting the number, sex – no roosters, and henhouse location).  There’s even a website devoted to urban chicken farming.

Peggy shared the following humorous story with me about her chickens, proving that in addition to making you breakfast they can also help reduce waste.

Embracing a more alternative lifestyle we recycle, garden, compost, and now raise chickens. After being city dwellers most of our lives, raising chickens is new to us, but so far so good. 


For health reasons, we spent many months on a strict diet that did not include grains and our oatmeal had gotten buggy. We thought, ‘Chickens love bugs and grain. Why not give it to the chickens?’ We tried it out by giving them just a small amount. They gobbled it down as fast as they could. This was also about the time our first hen started laying. As a matter of fact, I had started giving them some of the oatmeal when I collected that one precious egg. 


Now when they see me come out to the hen house, they come running from all points of the yard and patiently follow close by. They chatter at me, as if to say, “You can pour us some Oatmeal now. Right here would be good. We sure like Oatmeal.” One hen even tolerates me petting her, if there is a remote chance she will get some of that tasty treat. 


It’s interesting that all the books we have read say that we can expect about 4 eggs per week per hen.   Since they have figured out that they get oatmeal when I collect the eggs, we now get one egg per hen every single day. So we’re calling them, Pavlov’s Chickens. As with most pets, we think we are successful in training them, but who is actually being trained, since laying eggs comes naturally for a chicken?  And what are we going to do when we run out of buggy oatmeal?

If you think you’d like to raise chickens there are a couple of good books to get you started.       

And then, of course, you’ll need a couple of good cookbooks to go along with the all the eggs.    

Grains Are Good

Lately I’ve had several people mention to me that perhaps I need to change the name of my business, Grains&More.  Their thinking is that because so many people “can’t eat grains anymore” I might want to consider a different moniker.


As I question them further it becomes very apparent that they are talking about those folks who cannot have wheat or who must avoid gluten due to celiac or other gluten-intolerant issues.  And I find myself saying the same thing to all of them.


Grains are an important part of our diet.  Just because you cannot eat those grains that have gluten in them does not mean you cannot have grains.  As a matter of fact, there are more grains that do not have gluten than there are grains that do.  The gluten containing grains are wheat, spelt, rye, and barley.  The non-glutinous grains are rice, amaranth, teff, quinoa, corn, buckwheat, sorghum, millet, and job’s tears.  Oats fall into a special category.  They do not contain gluten in and of themselves, however they are so frequently grown near, stored with, transported with wheat that they can be contaminated.  Therefore many people who cannot consume gluten either look for certified gluten-free oats or avoid them all together.


Just as a reminder, gluten is actually comprised of glutenin and gliadin which are present in the endosperm (or starchy part) of certain grains.  They make up most of the protein in the grain.  In many cultures the gluten is carefully separated from the grain and used as an important protein component in the diet, sometimes being referred to as seitan.  Those grains that are considered gluten-free do not have gliadin in them.


If you cannot eat gluten that does not mean you cannot eat grains.  As I’ve said, they are an important part of the diet, providing fiber as well as beneficial oils from the germ which contain antioxidants and are rich in vitamin E and B.  


So in case you were wondering, I’m still Grains&More, I still believe in and promote consuming grains as a part of a healthy diet and I’m not changing my name.


photo courtesy of Fir0002 | Wikimedia Commons

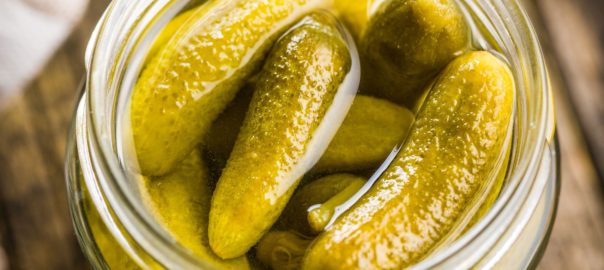
lacto fermented pickles

How To Make Traditional Lacto-Fermented Pickles

In recent years, there has been a growing interest in lacto-fermented foods, including pickles, sauerkraut, kimchi, and other probiotic-rich recipes.

The traditional lacto-fermentation process uses lactobacilli, a beneficial microbe that converts starches and sugars in food into lactic acid, which preserves the food and promotes a healthy bacterial balance in the gut.

Challenges

Lacto-fermented foods can be an excellent addition to canned vegetables, providing a boost to digestive health. However, many commercial food processes don't allow for lacto-fermentation due to longer production time, increased interaction with the food, and shorter shelf life.

I've been canning and preserving for over 20 years. Quite frankly I've never understood why pickle manufacturers felt it necessary to add yellow #2 to pickles. It doesn't add anything to the flavor. If you want your pickles to be yellow just add turmeric.

To make your own lacto-fermented pickles at home, you don't necessarily need a fermentation crock; a 1-gallon glass jar and pickle weights can suffice. The key is to ensure the brine is strong enough to preserve the cucumbers until the lactobacilli take over the preserving process, and that the cucumbers are fully submerged in the brine.

Tips

Some individuals are concerned about lacto-fermenting without the use of whey. However, whey is not strictly necessary if the brine is at the right percentage. If you live in a hot climate and have trouble getting fermentation started due to air conditioning, adding 2 tablespoons of whey can help kick off the ferment.

To make your own whey, simply strain plain organic yogurt overnight in a lined colander in the refrigerator. In the morning, you will have creamy Greek-style yogurt and clear strained whey, which can be used for soaking beans, grains, and lacto-fermented foods.

Another traditional tip from a reader's grandmother is to add grape leaves to the jar to enhance lacto-fermentation and make your pickles crisp. This sounds like it could be a good idea, as grapes are known for their natural bacteria content, which can aid the fermentation process.

Recipe

Here is a classic lacto-fermented pickle recipe that you can try at home. This recipe is for a two-quart jar, but you can easily double the ingredients if you wish to make a gallon jar.

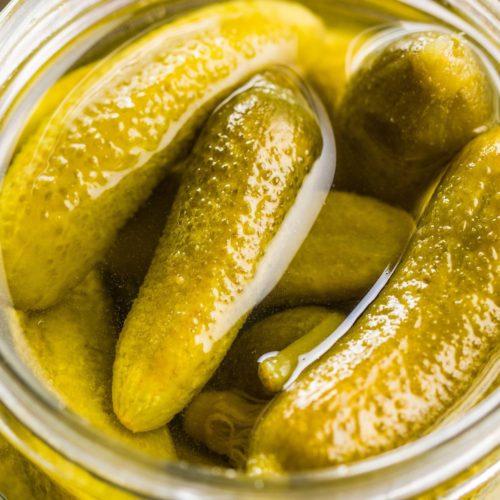
lacto fermented pickles

Lacto-fermented Pickles

Ingredients
  

  • 4 large pickling cucumbers (only because this is what fit - if using baby cukes you may need more)
  • 3 cloves of garlic, crushed, not peeled
  • 2 bay leaves
  • 1/2 t. celery seed
  • 1/2 t. dill seed
  • 1 quart of water
  • 1 1/2 T. kosher salt

Instructions
 

  • Sterilize the jar
  • Wash the cucumbers
  • Add spices to the jar
  • Mix together water and salt until salt is completely dissolved (this is your brine)
  • Pour brine over cucumbers and herbs
  • Use pickle weights to hold down the cucumbers
  • Loosely cover jar with wax paper and a ring or rubber band
  • Let sit in a warm (not hot) dark place
  • After 4 days you can cut off small pieces of pickle to taste
  • When it tastes pickle-y enough you can put it in the refrigerator
  • This will slow down but not completely stop the fermentation process

For those who want a faster option, quick refrigerator pickles are also a great alternative to store-bought pickles.

How To Make Bean Sprouts

I love bean sprouts.  They’re delicious and a great source of nutrition.  Just the act of sprouting beans increases their nutrition.  It also makes their nutrients more bio-available because the first step, soaking, removes phytic acids which interfere with nutrient absorption.

A while back my friend Jen asked me how to make them.  She had been interested in doing it but was afraid it was too difficult.  She wanted pictures to show her how it was done.  I promised that the next time I made bean sprouts I would take pictures and share the process.

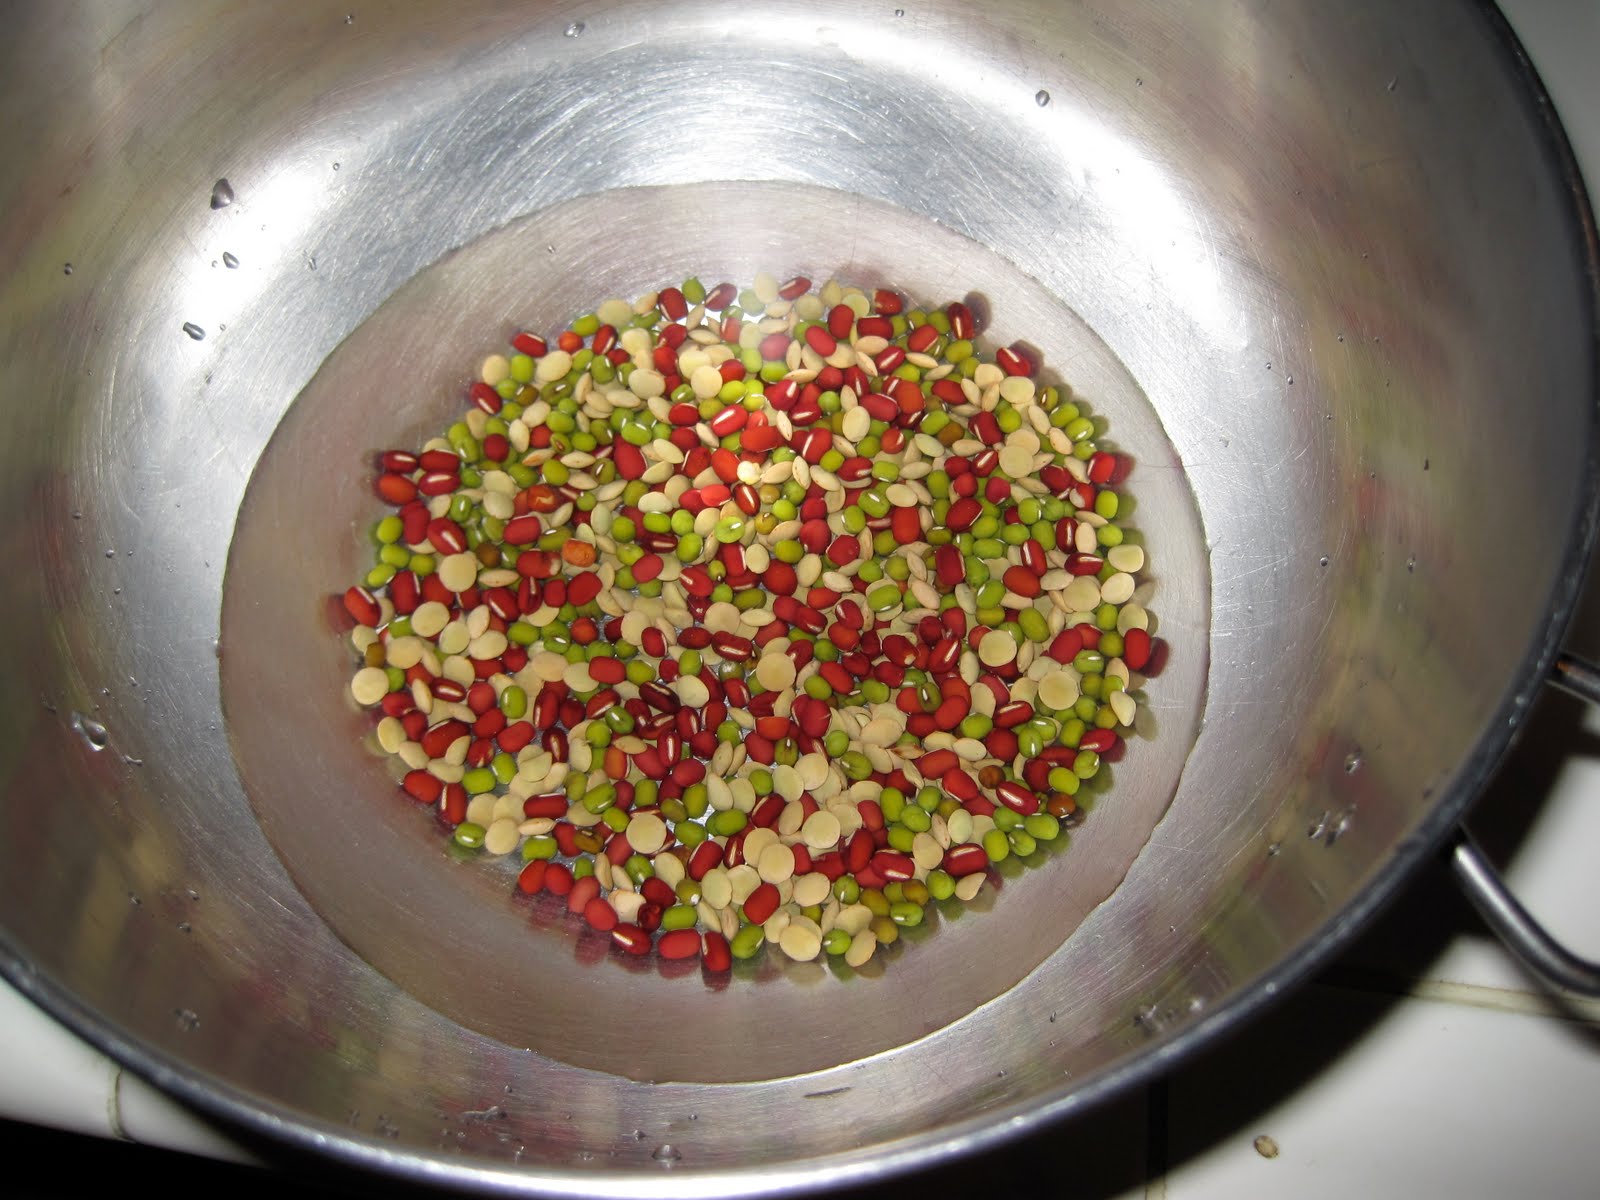
This is a batch of lentil, adzuki, mung bean sprouts.  You can use any beans you like depending on what you have handy in your pantry.  I almost always have mung beans and lentils so I use those a lot.  The other beans vary.  I usually make a bean sprout mix with anywhere from three to five different kinds of beans.

Start by putting a small handful of each of the different beans into a colander and picking them over.  Dry beans frequently have small rocks, little clumps of dirt or other debris in the package, it’s important to sort through them before you use them.

After picking them over, rinse the beans well.
Then…

Put them into a bowl and cover them with water.
Put them in the oven overnight

(Be sure to put a note on the oven so you don’t accidentally turn it on to pre-heat
when your beans are in there.  Trust me on this one.)
The next morning take your beans out of the oven and drain them.
Rinse them well and put them back in the oven.

The next day rinse and drain your beans and put them back in the oven.
Keep doing this.
On day two or three you will notice that your beans have little white sprout tails.

On day three or four you will notice that lots of beans have sprouted and they are ready to eat.

How long they take to sprout depends on how warm or cold it is in your house.  Warmer weather
causes them to sprout faster so in my house it’s usually three days.
Once you have your sprouts ready to eat it’s best to store them in the fridge.
What can you do with them?  I put mine into salads, stir fry, curry, smoothies (just a tiny bit for a protein boost), I also eat them raw as a snack.  They’re absolutely fabulous.
I hope you’ll give it a try.
Be well.

Lemon Juice Or Powder?

Over on my Facebook Fan Page I recently mentioned how important it is to alkalize your body; a great way to start your day is with 16 oz. of water to which you add 2 T. of either lemon juice or raw apple cider vinegar.


This brought up a couple of questions that I thought I would address here.


“If you want to raise your pH, making you less acidic, why are you drinking something with acid in it?”


Although we tend to think of things like lemon and vinegar as being acidic they have an alkaline effect on the body.  The reason is that they produce an alkaline ash; this is the residue left after they have been digested.  Taking in foods that are more alkaline has an alkalizing effect on the body which in turn helps to avoid acidosis and keeps the body in balance.  There are a number of medical experts who feel that a diet that is 70% alkaline is the best for our bodies.  It is important to remember that our bodies seek balance.  If we eat a diet that is too acidic the body must pull alkalizing minerals from our bones in order to balance.  If we eat a diet that is too alkalizing, similarly, the body must return to a balance.


So what are alkalizing foods?  Mostly fruits and vegetables, although there are some exceptions there, sprouted beans and seeds, almonds, millet, buckwheat, honey, molasses, and olive oil.  If anyone is interested I can put up a list of acid alkaline balance foods.


“.True lemon is a powdered lemon juice, there’s also True Lime and True Orange. For portablity, would the lemon or lime work as well?”


I don’t think so.  I looked up the ingredients:  Citric Acid, Maltodextrin, Lemon Juice, Lemon Oil, Ascorbic Acid.  Citric Acid comes from fermenting the raw sugars in citrus fruit.  Maltodextrin is a sugar  that comes from hydrolyzing starch and is usually made from corn or potatoes.  Not until the third ingredient do we get to actual lemon juice.  This means that the major ingredients are not actually juice.  I think I’d stick with the juice itself.  


Photo courtesy of:  Aka | Wikimedia Commons

Carcinogenic Strawberries

A while back I wrote a post about the proposed use of Methyl Iodide as a pesticide for strawberry crops.

The original post stated that the comment period would end on June 14.  That has been extended to June 29.

If you have not yet made your feelings about this issue known I urge you to take a moment and do so.  The United Farm Workers has a quick and easy way for you to participate on their website.

As I stated previously, this is a known carcinogen, one used in laboratories for it’s reliable ability to create tumors.  Many scientists, including Nobel winners, have urged that this never be used.  Yet California is considering going ahead with it.  The potential for damage and illness is huge.  Not only those who eat those strawberries, but those who work with the crops, those who harvest and or package those crops, those who live near the fields, all will be affected.  This is truly horrifying.  Please take just a moment of your time and vote for clean food by stating your objection to the use of Methyl Iodide.

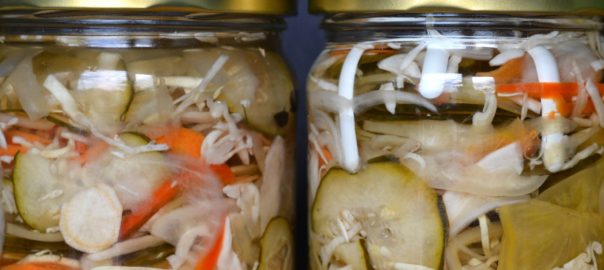
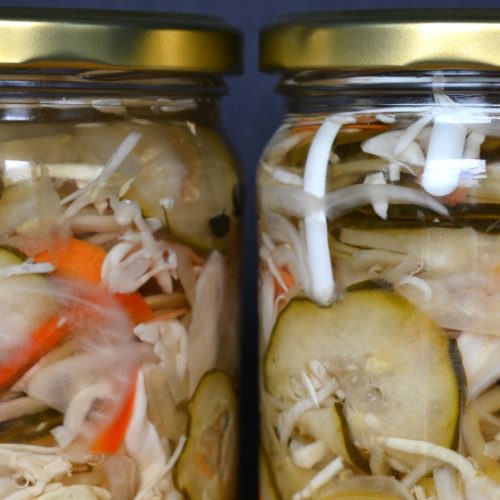
refrigerator pickle

Quick Refrigerator Pickle Recipe

Summer is a wonderful time for fresh and in season foods like salads or grilled meats. I’ve been known to serve it on the side of egg dishes, it’s fabulous on tacos, and I will even confess to occasionally eating it straight out of the jar. If you’re making any of these dishes it can be delicious to add a gentle pickle as a condiment on the side. 

This recipe is not only super easy to make, it’s delicious and adds a nice fresh snap to whatever you’re serving. It’s also a bit of a DIY pickle project because you can change the recipe depending on what’s available or what you’re in the mood for. Although you can buy some of your vegetables already julienned into matchsticks I prefer to do it myself using a julienne peeler.  My preferred peeler is this wide handled, soft grip version by Oxo. If you’re making a lot of these pickles (something I’ve been known to do once summer arrives) a mandoline slicer is going to be faster and easier. 

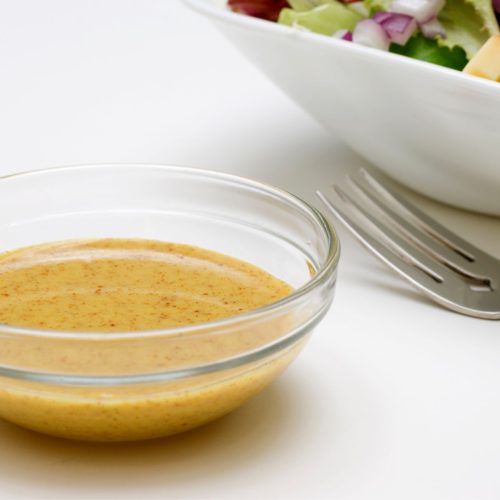
One nice thing about this recipe is that the pickles continue to get more flavorful the longer they’re in the brine.  Once you’re done with the pickles the leftover brine is so wonderful that it’s nice for making a vinaigrette.

refrigerator pickle

Quick Refrigerator Shredded Pickle Recipe

Ingredients
  

  • ½ cup apple cider vinegar
  • ½ cup white wine vinegar
  • ½ cup water
  • 1 clove garlic, minced
  • ½ teaspoon kosher salt
  • Seasonings: see note below
  • 2 cups julienned veggies - carrots, red onion, vidalia onion, golden beets, zucchini, English cucumber, radish, kohlrabi, jicama

Instructions
 

  • Wash and dry a wide mouth quart canning jar (or other large jar)
  • Bring vinegars and water to a gentle boil
  • Add garlic, salt, and seasonings, continue to boil until salt has dissolved
  • Remove from heat and let cool 10 minutes
  • Add the veggies to your jar
  • Pour the still hot brine over the veggies
  • Let the jar cool to room temperature before adding a lid and placing in the fridge
  • Lasts 2-3 weeks in the fridge

Notes

Seasoning note:
Depending on what flavor you want you can use different herbs or spices.  For this amount of liquid I like to use 1-2 of the following:
  • 1 bay leaf
  • 1 teaspoon mustard seeds
  • 2-3 sprigs of fresh herbs - thyme, tarragon, oregano, or dill
  • If you don’t have fresh herbs you can use ⅓  teaspoon of dried 

Vinaigrette

Quick Pickle Vinaigrette

Ingredients
  

  • Drain/strain your quick pickle jar to remove any floaty bits
  • ¼ cup quick pickle brine
  • Generous pinch of sea salt (taste it first to see if it needs it)
  • 1 ½ teaspoons Dijon mustard
  • ½ cup good quality *olive oil
  • 1 tablespoon dried onions (I like to use my dehydrated vidalias here)
  • ½ teaspoon minced fresh parsley

Instructions
 

  • Whisk together brine, salt (if using) and mustard
  • Slowly whisk in olive oil until mixture is emulsified
  • Whisk in onion and parsley
    This recipe can be used immediately or stored in the fridge up to 2 weeks!

Notes

*olive oil
This recipe can be used immediately or stored in the fridge up to 2 weeks

Whole Foods Versus Whole Medicines

The less we spend on food, the more we spend on health care.”  ~ Michael Pollan 

I think this recent quote is true.  The more we spend on “convenience” the more we buy over-processed, non-nutritious foods.  This leads to a nutritional deficit that in turn can lead to illness.  This then leads us to take medicines to “correct” whatever is wrong with us and unfortunately no attention whatsoever is paid to managing what fuels our bodies.

Don’t get me wrong.  I am not suggesting that medicine is bad or unnecessary.  On the contrary, I can recall being very grateful for the sophistication of our current state of medical care and what pharmaceuticals can do to help.  My foot surgery in 2003 is a prime example.  However, I do believe that in many instances we have gone too far in trying to fix everything with a pill and not looking at the food (i.e., fuel) that we put into our bodies.  Chemicals are not enough to run the complex organism that is our body.


The more our food is broken down for us, in other words processed, the easier our bodies can work through that food.  In the process of breaking down foods many nutrients are stripped.  They are then replaced with chemicals that promote shelf stability for longer life in the grocery store, colorants to make them look more attractive, flavorings to fool our palates into thinking we’re getting something good, and emulsifiers to help it all stick together.  All of these non-nutritive additives do nothing for our state of health.  In fact, the faster our body can  work through that highly processed donut, candy, cereal, canned pasta, etc, the less it needs to work.  And the more empty calories we wind up consuming.  If we can’t use them all our body saves them.  Where does it save extra calories?  As fat.  Adipose tissue.  Frequently in the belly area, but all over our bodies if it needs to.


I believe that it is important to look at what we are eating and how we can increase the nutrient density.  The more whole foods you eat, high fiber, no chemicals, low processed, the harder your body has to work to retrieve those energy units we call calories.  Yes, overeating even healthy foods can lead to weight gain, but I challenge anyone to eat the same number of apples it takes to make one glass of apple juice and claim that they still have room for more.


While eating a whole food, low process diet may not be the answer to all of your medical problems it will certainly give your body the best possible support it needs to be as healthy as it can be.  Staying well hydrated, exercising, getting enough sleep.  Those help too.  But one of the most important foundations is good nutrition.  Eat well to be well.


photo courtesy of pleasant family shopping | Wikimedia Commons

Shopping Guides

I just came across this detergent shopping guide from Organic Consumers and it’s so important that I knew I had to pass it along.  It has a list of all of the soaps/detergents that use 1,4 dioxane, a known carcinogen that can cause a host of health problems.

This seemed like a good opportunity to pass along a couple of other good resources that are available online.

The Environmental Working Group Shopper’s Guide to Pesticides

The Environmental Working Group Safety Guide to Children’s Personal Care Products

The Environmental Working Group Shopper’s Guide to Safer Sunscreen

The Food and Water Watch rBGH-free Dairy Guide (search by state)

The Non-GMO Shopping Guide

Crockpot Snack Mix

I recently made a batch of Christine’s Crockpot Granola.  I really like making it as it’s very easy and it tastes great.  While my overnight crockpot cereal is a huge hit you can only make enough for a couple of days.  With the granola I can make enough for a week or more (depending on how fast we eat it).  I posted the fact that I was making a batch of granola on FaceBook and got a comment from Sandy who didn’t know that you could make that in a crockpot.  Well folks, yes you can.  You can actually make a lot of things in a crockpot, one of the reasons I love mine so much.

My crockpot history

I own two.  A small 2 quart and a larger 5 quart.  I’ve considered getting a 6 quart but have no idea where I would store it in my rather small kitchen.  First things first, let’s clear up the terminology.  A crockpot is the same thing as a slow cooker.  Crockpot is simply a brand name from the Rival Corporation.  Slow cooker is what everyone else calls it because crockpot is trademarked.  I call mine a crockpot because I happen to own a Rival brand and that’s what I’ve been calling it for 30 years.

I got my first crockpot, which is my 5 quart when I was in college  (and yes, I’m still using it all these years later, that sucker works like a charm).  I went to a college where you needed to feed yourself on the weekends because the kitchen closed down. After a couple of weeks as a freshman I called my Mom and told her that I needed a hotpot and would she please buy me one.  She asked me what I wanted it for.  I said to make soup, sauces and things like that.  I came home a few weeks later and there was a crockpot sitting on my bed.  I was, needless to say, thrilled.  She asked if that was what I wanted.  I replied that I had been looking for a hotpot which cost about $6.  She offered to return the crockpot and buy me a hotpot (better deal for her). I hugged the box to my chest and announced that I would definitely be able to use this.  And indeed I did.  For four years I was very popular on the weekend as several of us would pool our food and make soups or a huge pot of spaghetti sauce and eat together.  It was great.

After I got married I learned that a crockpot is a lifesaver when you have two working professionals. You come home and dinner is ready.  It became one of our most used kitchen appliances.  Then we started having kids and it became even more important to plan meals that would be simple, easy and fit into our increasingly busy schedule. Now we’re empty nesters but our crockpots still get used regularly and are one of my favorite time saving tools. 

Dry cooking in a crockpot

Dry cooking in a crockpot can be tricky. That’s because the point of a crockpot is to seal in moisture. This reduces the amount of moisture you need to cook with and creates a slow braising effect. You need to adjust for dry/low moisture recipes; one trick is to leave a wooden spoon in the crock propping the lid open.  You also need to make things that won’t burn or stick.  Snack mixes are a good choice.  You get a tasty, crunchy treat where you control the salt, sugar, fat and flavor content without all of the chemicals, preservatives and artificial colors of store bought snack mixes.  Although I use cereals as the base for these mixes I tend to buy only cereals that do not have any objectionable ingredients.  I also use raw or soaked nuts and add sea salt as needed for flavor.  I prefer not to use roasted nuts because they are not as healthy for you.

Here are our favorites:

Crockpot Tropical Snack Mix
Print
Ingredients
  1. 3 C. rice squares cereal
  2. 2 C. oat squares cereal (look for gluten free)
  3. 1 C. dried banana chips, unsulfured
  4. 1 C. dried pineapple, unsulfured
  5. 1 C. macadamia nuts, raw and unsalted
  6. 1 C. shredded coconut, unsulfured and unsweeteend
  7. 1/2 C. coconut oil, organic, melted
  8. 1 T. honey, raw and local preferred
  9. 1 t. cinnamon
  10. 1 T. sucanat
  11. 1/2 t. sea salt
Instructions
  1. Mix all ingredients into the crockpot
  2. Turn it on low for 3-4 hours, propping the lid open with a wooden spoon
  3. Stir every 30-40 minutes
  4. When it is done (the mixture seems very dry), turn off the crockpot, uncover and let the mixture cool completely in the crockpot
  5. Store in an airtight container
The Ingredient Guru, Mira Dessy https://theingredientguru.com/
Crockpot Tex Mex Snack Mix
Print
Ingredients
  1. 3 C. corn squares (organic and low sugar)
  2. 2 C. rice squares
  3. 2 C. corn chips (organic)
  4. 1 C. pecans or walnuts, raw
  5. 1 stick melted butter (organic)
  6. 1/2 t. hot sauce
  7. 1 T. Penzey's Taco seasoning
Instructions
  1. Mix all ingredients into the crockpot
  2. Turn on low for 3-4 hours, propping the lid open with a wooden spoon
  3. Stir every 30-40 minutes
  4. When done (the mixture seems dry), turn off, uncover, and let cool completely in the crockpot
  5. Store in an airtight container.
The Ingredient Guru, Mira Dessy https://theingredientguru.com/
Crockpot Asian Snack Mix
Print
Ingredients
  1. 4 cups rice squares cereal
  2. 1½ cups sesame crackers
  3. 1 C. cashews
  4. 1 C. dried peas with no artificial color (these are hard to find)
  5. 1 stick melted organic unsalted butter
  6. 1 T. Tamari sauce
  7. 1 t. Chinese five spice
  8. 1/2 t. sea salt
Instructions
  1. Mix all ingredients into the crockpot
  2. Turn it on low for 3-4 hours, propping the lid open with a wooden spoon
  3. Stir every 30-40 minutes
  4. When it is done (the mix seems dry) turn off the crockpot, uncover and let the mix cool completely in the crockpot
  5. Store in an airtight container
The Ingredient Guru, Mira Dessy https://theingredientguru.com/
Crockpot Curried Snack Mix
Print
Ingredients
  1. 4 C. rice squares cereal
  2. 1 C. cashews, raw and unsalted
  3. 1/2 C. chopped walnuts, raw and unsalted
  4. 1/4 C. candied ginger, diced finely
  5. 1 C. shredded coconut, unsulfured and unsweetened
  6. 1 t. curry powder
  7. 1/2 C. ghee
  8. 2 t. Tamari sauce
  9. 1/2 t. sea salt
Instructions
  1. Mix all ingredients into the crockpot
  2. Turn it on low for 3-4 hours, propping the lid open with a wooden spoon
  3. Stir every 30-40 minutes
  4. When it is done (the mix seems dry) turn off the crockpot, uncover and let the mix cool completely in the crockpot
  5. Store in an airtight container
The Ingredient Guru, Mira Dessy https://theingredientguru.com/