Category Archives: recipes


Purslane Soup

Purslane | photo:  Aomorikuma

Merriweather has been posting delicious pictures and food ideas for many of his foraged delights. The other day he posted a picture of purslane (Portulaca oleracea).

When we lived in CT my husband and I had the stuff running wild all throughout our vegetable garden. It was, quite frankly, a weed. I spent many hours yanking the stuff out cursing at how readily it regrew not realizing that just the act of weeding caused it to reseed and become more vigorous.

All that changed the day I was at a local farmers market and saw one of the farmers there selling the stuff. His was golden purslane which is slightly different than the everyday variety we had in our garden, but it was purslane nonetheless. I began to look at my weedy friends with a rather different eye.

A succlent plant with an unusual sour-yet-sweet flavor I quickly discovered that although you can eat it raw I didn't like it that way. I also don't like okra and the texture was too similar for me. Steamed was okay but the best was when The Washington Post published this recipe for a purslane and spring pea soup. Let me tell you four cups of purslane is a fair amount. And this recipe is so delicious we often doubled it thereby neatly using up large quantities of purslane. High in both vitamin A and C as well as magnesium, purslane can be a good vegetable to add to your nutrition plan…if you can find it.

Purslane Soup

2 tablespoons organic butter
2 leeks (white and light-green parts only), washed and chopped
4 cups purslane, rinsed and dried
2 cups fresh peas
3 medium yukon gold potatoes, peeled and diced
4 cups vegetable broth
Sea salt
Fresh ground black pepper

In a large pot melt the butter.
Add leeks and saute until limp and golden.
Add purslane, peas, potatoes, and broth.
Bring to just under a boil, reduce heat and simmer 30 minutes.
Remove from the heat and blend using an immersion blender.
Salt and pepper to taste.

May be served hot or cold with a dollop of creme fraiche or sour cream on top.

Growing A Garden

Rosemary | photo: Nataraja

It's been very dry here in the Eastern Piney Woods of Texas.  So dry that there are now warning signs all over town about the potential for fire hazard.  Needless to say this is not boding well for my garden.  This is our third year here and each year we do a little bit better than the year before.  But we also spend a lot of time and energy moving things around trying to find just the *right* spot on our postage stamp-sized property.  We seem to have finally found the right spot for the tomatoes and they're producing faster than we can eat them which is a delicious thing.  If I start to get too many I make something my friend Libby calls Tomato Junk and shove it in the freezer ready to use at a moments notice for pasta dishes, salads, egg scrambles and more.

I've just gotten back from the store where I have purchased, yet again, a rosemary plant.  This is my fourth one of the season.  I had one last year.  It did pretty well.  We enjoyed using it in a lot of recipes, especially veggie marinades, last summer.  Then winter came.  It was a bad winter (for Texas) and many things in my yard did not make it.  One of them was that poor rosemary.  Okay, it happens.  So I went and bought another one.  For some reason it wasn't happy where the first one was and it died.  I bought another one and moved it to the bed across the way.  That one died too.  Then I bought another one and planted it in a pot with the lavender.  The lavender is still going but the rosemary?  Yup, dead as a doornail.

So I've bought another one (luckily they are just $4 a pot so I can afford to keep shelling out until I get it right) and I'm really hoping this one will make it.  I've got a different location in mind, a little more shade, hopefully a better location and nowhere near the areas where the others have not survived.

Along the way I keep being reminded that gardening is an ever-evolving process.  Especially after learning how to garden in one area of the country and then moving to a vastly different agricultural zone and temperate climate.  Learning what plant where takes time and attention and effort.  Luckily most of what my husband and I plant in our garden seems to grow well or I probably would have given up by now.   I also like playing in the dirt and this certainly gives me an excuse to keep on doing it.  And it's a great way to get some sunshine and fresh air, something I recommend for everyone.

Since I mentioned it, here's the recipe for Tomato Junk.  There are no precise measurements, I just throw it all together but somehow it always works out.

Tomato Junk

a lot of very ripe tomatoes, washed, cored, peeled and quartered
a sweet onion, chopped
a clove or two of garlic, minced
a bunch of basil, minced

Using a generous amount of olive oil in the pan saute onions and garlic until the onion starts to wilt
Add tomatoes and cook until they start to break down
Add basil and cook another 5 minutes

Remove from heat, let cool and then package for the freezer in 1 cup containers

I do not add salt or pepper to this as I season it when I use it

Recipe Calendar

I'm excited beyond words.  


That image to the left?  It's a recipe calendar…my recipe calendar.  Put together with the favorite, most loved recipe posts of this past year.


This is the first time I have ever set them down in glossy-print-and-photo; I'm so happy to see and hold this calendar, for me it represents another professional step forward.  


One of the neat things about it is the CD style case which presents each month upright in the holder.  On the back of each month is a recipe.  When the year is over the cards are sized to fit in a regular 4″ x 6″ recipe card box making them easy to keep and use year after year.


If you're looking for a great gift or stocking stuffer (for yourself or for someone else) I'd be more than thrilled if you would choose to give one of these.  Ordering is as simple as clicking on the button in the left sidebar.


Wishing you and yours a happy healthy holiday season.  Thanks for all of your support and encouragement over the last 12 months, it's been great and I look forward to the next twelve.  

Energy Bars

Energy bars are a great snack to have in your pantry.  They are handy and healthy for after school, wonderful if you need a little something in the afternoon to tide you over until dinner, great for after a workout, and easily portable for on the road.  Unfortunately many of the commercial bars are loaded with chemicals and preservatives (which should be avoided as much as possible).


You can bypass the chemicals and preservatives in commercial energy bars if you make them yourself.  My favorite way to do this is to start with a batch of my own Great Granola.  It's easy to make in your slow cooker, delicious, healthy, and very reasonably priced.  The overall cost of these homemade energy bars is typically less than purchasing them in the store.


To boost the nutrition of my energy bars I add sesame seeds, which are high in copper, manganese, calcium, magnesium, iron, and zinc.  They also add fiber and a great nutty flavor.  Another addition is almond butter.  Almonds are an alkalizing nut with heart healthy monounsaturated fat.  Studies have shown they can limit the rise in blood sugar which normally happens after you eat; they also provide antioxidants.  Almond butter can be purchased in a number of grocery stores from the grind-your-own machine, you can make it very easily in a food processor, or you can purchase commercial varieties.  If you purchase commercial almond butter look for one with no added oil, sugar, or preservatives.


After making the bars I wrap them individually in wax paper and store them in an airtight container.  They keep well although given their popularity I have yet to figure out exactly how long they will last.


Great Granola Energy Bars
makes 16


3 C. granola
3/4 C. sesame seeds
1 C. almond butter
1/2 C. raw honey


Toast sesame seeds lightly in a pan until golden
In a double boiler combine almond butter and honey
Stir together as it begins to soften and melt
When very warm and liquid add in sesame seeds
In a large bowl thoroughly combine granola and honey, almond butter, sesame seeds
Oil a baking pan (I use either grapeseed or walnut oil)
Pour mixture onto pan
Lightly oil your hands and press mixture onto the pan
Allow mixture to cool completely before cutting into bars

Green Tomato Chutney

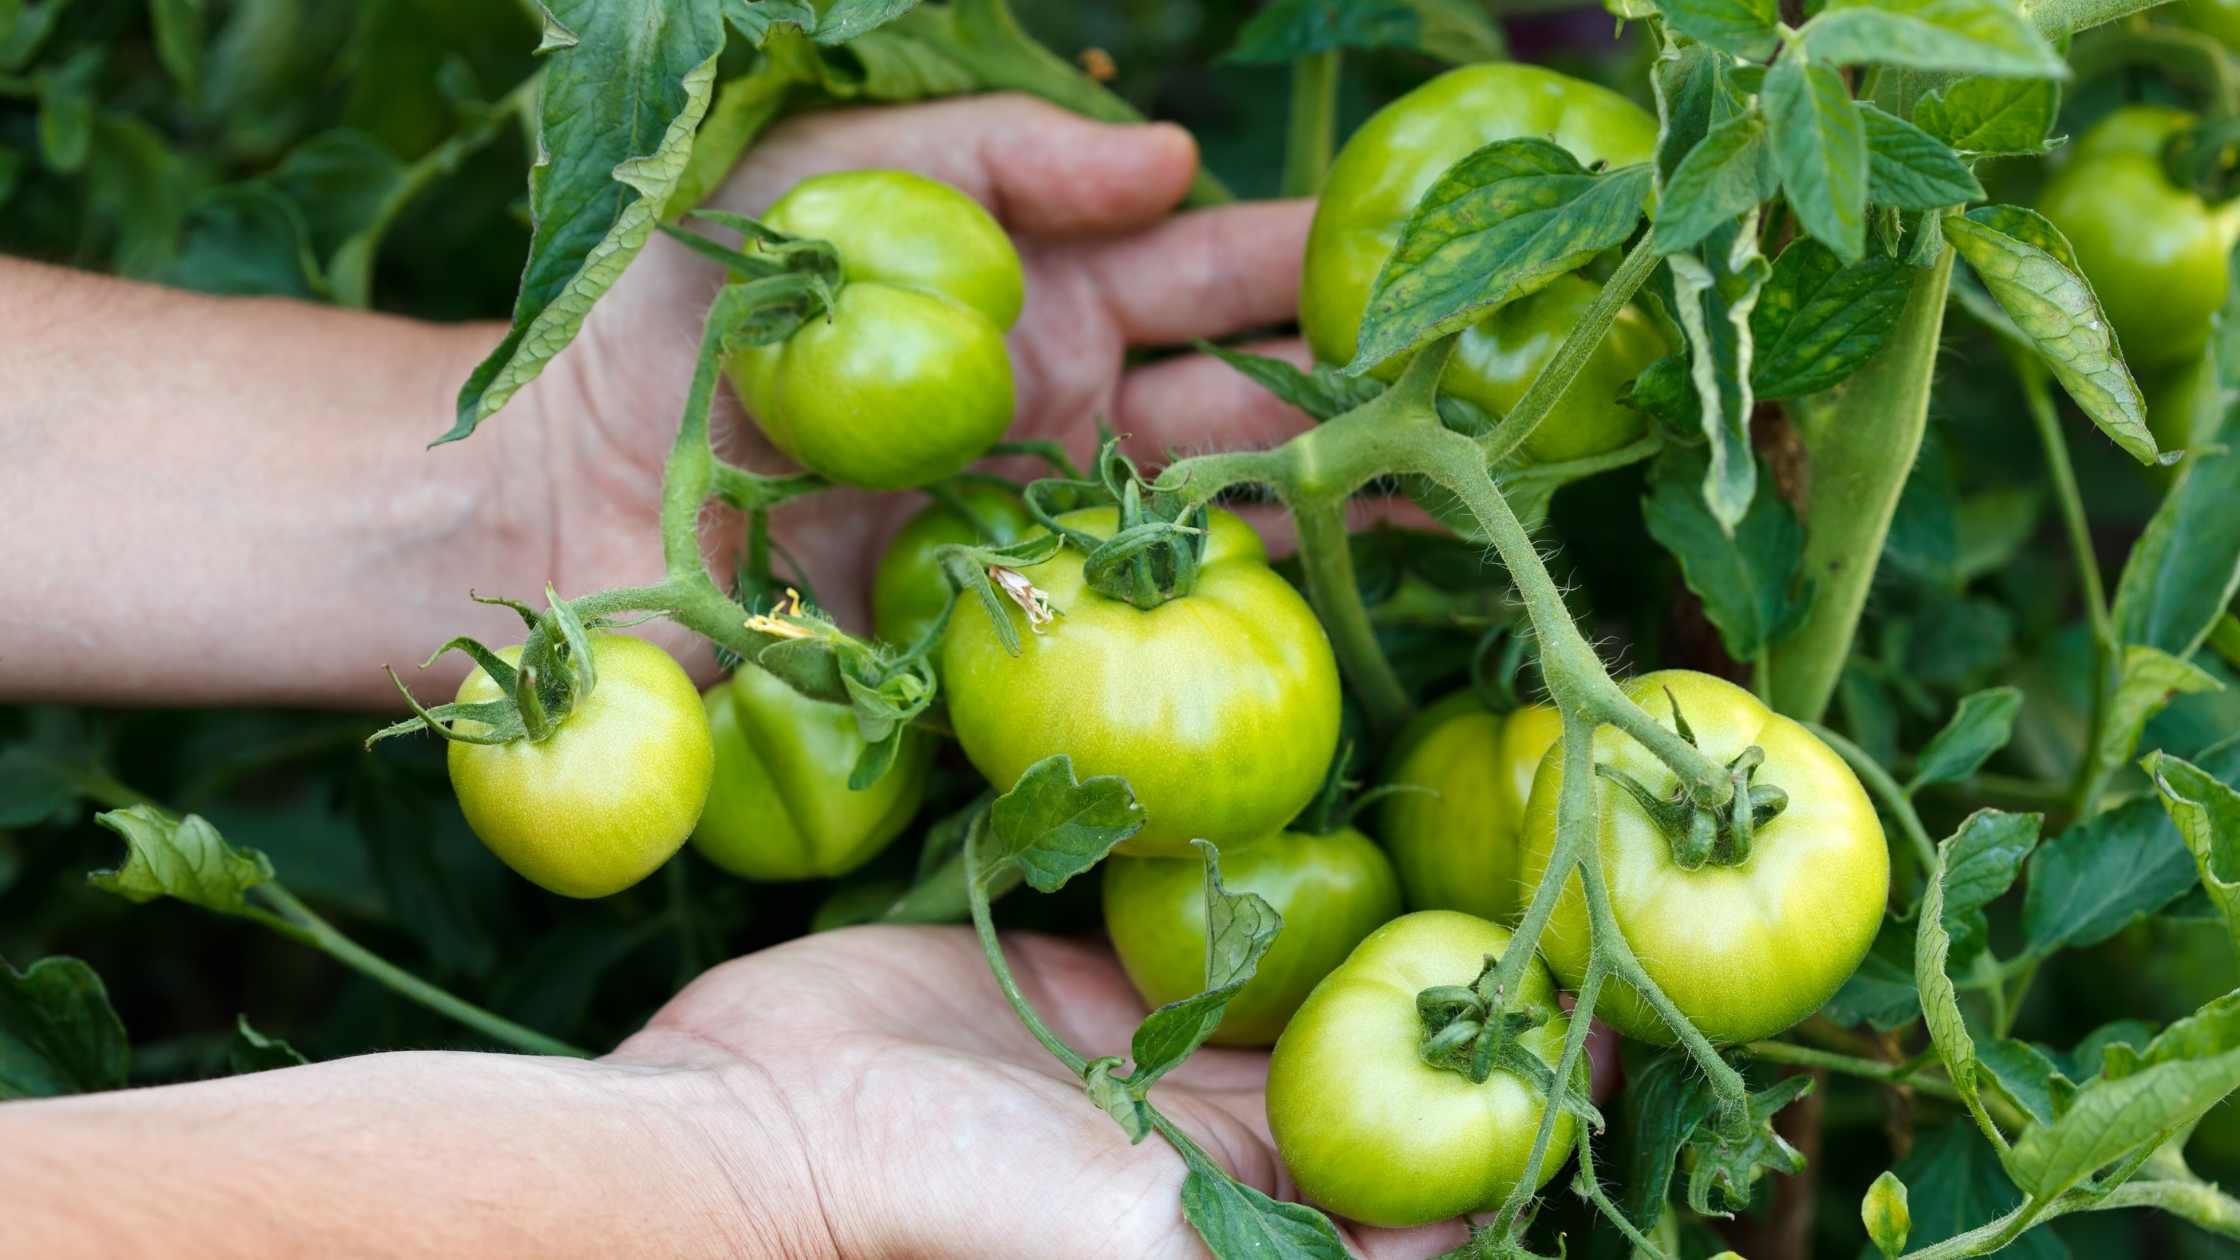
I was amused by a conversation with QuantumVegan’s about harvesting fifty pounds of tomatoes. That's a LOT of tomatoes! When we lived in Vermont that kind of a harvest was sure to mean we were getting green tomatoes.  The growing season is so short there tomatoes don't always have time to ripen.  So you come up with lots of good ways to use green tomatoes.  There's green tomato pie, green tomato salsa, the ubiquitous fried green tomatoes, and more. Luckily green tomatoes have lots of nutrition, including lycopene.

Nutritional Profile

According to the USDA, the nutritional profile of green and red tomatoes is almost the same. Green tomatoes have twice the vitamin C, more vitamin K, and more calcium. Red tomatoes have more vitamin A, E, and potassium.
 
Apparently, they have the same amount of lycopene and it is believed that the chlorophyll in the green tomatoes hides the red pigment which indicates a lycopene-rich food.

Recipe

Green tomatoes are versatile and can be made into pie (it's delicious, trust me), pasta sauce, and all manner of preserved goods.

If you're getting close to the end of your growing season and you're looking at a large crop of green tomatoes, here's my favorite way to use them up; green tomato chutney.   It goes very well with cheese and crackers, it is excellent with cold roast meats, delicious as a side to a spicy vegetarian lentil dish, it's a very versatile condiment to have in your pantry. This recipe is based on one from Fancy Pantry which appears to be out of print. I find it to be a good book with lots of wonderful recipes and well worth having.  But in the meantime here's my version:

Green Tomato Chutney

Servings 6 pints

Ingredients
  

  • 4 pounds green tomatoes, cored and cut into chunks
  • 4 pounds green apples, peeled, cored and cut into chunks
  • 2 C. yellow onions, minced
  • 2 C. raisins
  • 3 cloves garlic minced
  • 3 C. evaporated cane juice crystals
  • 1 1/2 C. raw apple cider vinegar
  • 3 T. minced fresh ginger
  • 2 T. mustard seed
  • 1 t. ground cinnamon
  • 1/2 t. ground cloves
  • 1/2 t. red pepper flakes

Instructions
 

  • In a large stock pot mix together tomatoes, apples, onions, raisins, garlic, cane juice crystals, salt, and vinegar.
  • Bring to a boil over medium heat, stirring frequently.
  • Continue to boil for approximately 30 minutes continuing to stir frequently. The fruits will begin to soften and meld together.
  • Add the spices.
  • Boil for another 10-15 minutes until you reach the consistency you want.
  • Ladle into hot sterile jars and seal according to directions.
  • Bath for 10 minutes remove and let cool.

Notes

This recipe needs to settle to allow all of the flavors to come together. Let it sit in a cool dark space for at least a month before opening.

Baking With Kids

Baking is wonderful and something I love to do. Even more fun is to bake with kids.  They're so excited and fascinated by the process.  Learning their way around the ingredients, how to measure, the wet and dry combining process; it's a fun edible science and math experiment in the kitchen.

This is one of my baking buddies, Miss A.  She came over the other day with her brother, Mr. C.   I had promised them that the next time they came over we would make cookies so that was our plan.

As it turns out Mr. C's idea of making cookies was to allow his sister and I to do all the baking while he played the part of Official Cookie Tester.  And, might I add, he was rather impatient for those cookies to be done.

Miss A and I got down to business, put on our aprons and got out my "Famous Chocolate Chip Oaties" recipe.  Mr. C. wanted to know why they were famous, had they been on t.v.? Did someone famous invent them?  I told him that it was a recipe I had created and I simply call them Famous because everyone who eats them really likes them and wants more.

Needless to say he was less than impressed and informed me that unless they've been on t.v. they can't be famous.  Maybe I should send a box to Ellen?

One of the things I love about baking with kids is how curious they are.  Miss A wanted to taste everything.  Of course we decided that the chocolate chips were pretty tasty. Surprisingly she liked the oatmeal, even raw, and requested a large spoonful of her own to nibble on.  We had two kinds of sugar and she tasted both of them.  Then we got to the baking soda.  

Miss A asked if she could taste it.  I was a little surprised and said, "I'm not sure you want to do that."

"Why?" she asked.

"Well," I replied "it's a little bitter tasting and I'm not sure you're going to like it."

"But I want to taste everything." she said.
So I let her taste it.

Her face scrunched up a little and she said, "It's not really bitter but I don't like it."

"Want some chocolate chips to wash that down?" I asked.

Of course the answer was yes.

We wound up making two batches of cookies the regular variety and the peanut butter variety.  The recipe is below and we're sure you're going to enjoy it, just like we did.

Famous Chocolate Chip Oaties

Ingredients
  

  • 1/2 C butter
  • 1 C evaporated cane juice crystals
  • 1 egg
  • 1/2 t. vanilla
  • 1 C + 2 T white whole wheat flour
  • 1/2 t. salt
  • 1/2 t. baking soda
  • 1 C chocolate chips
  • 1 C rolled oats

Instructions
 

  • Preheat oven to 375
  • Blend together butter and sugar until creamy
  • Add egg and blend well
  • Add vanilla and blend well
  • Mix together flour, salt and baking soda and sift into butter mixture
  • Blend in chocolate chips
  • Blend in oats
  • Drop by spoonfuls onto a greased baking sheet
  • Bake 10 minutes
  • Let sit on baking sheet 2 minutes
  • Move to rack to finish cooling
  • For the Peanut Butter variety:
    Substitute sucanat for the evaporated cane juice crystals
    Add 1/2 C chunky peanut butter

shitake pinto bean burger

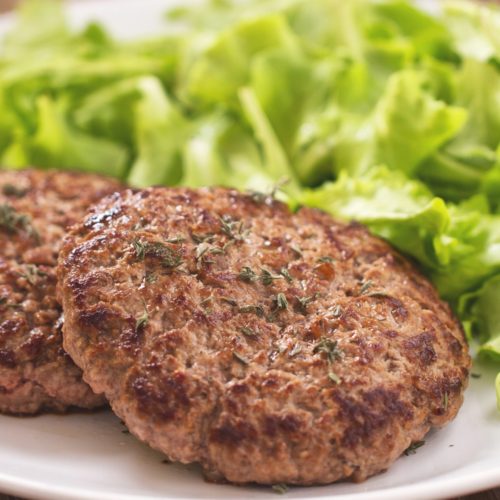
Shitake Pinto Bean Burgers

My friend Alexandra shared this fabulous recipe with me and is letting me share it with all of you.  

I love bean burgers but confess that sometimes I get tired of the same recipe over and over again.  I also usually make lentil or black bean burgers.  This recipe sparked my interest because it was a different kind of bean and the addition of shitake mushrooms.

Mushrooms can be a very wonderful food to add to your diet.  Asian cultures promote the use of mushrooms for the medicinal values, they do have healthy properties, and they are very tasty. Shitake mushrooms in particular have something called lentian in them, a substance that helps to boost the immune system, and studies indicate that it has anti-cancer properties.  Shitake mushrooms are also a good source of iron, vitamin C, and fiber as well as providing some protein.

Here's Alexandra's recipe, let us know what you paired it with.

shitake pinto bean burger

Shitake Pinto Bean Burgers

Ingredients
  

  • 3 1/2 cups or 1 can of pinto beans
  • 1 cup rough chop shitake mushrooms
  • 1 small red onion diced
  • 1/2 cup green onions diced
  • 3-4 cloves of crushed garlic
  • 1/2 tsp each of cumin and corriander
  • Sprinkle of chipotle chili powder

Instructions
 

  • Saute garlic and onions for 2-3 minutes
  • Add mushrooms, green onions, cumin and corriander
  • Cook for 2-3 minutes
  • While veggies are cooking, mash beans
  • Add veggies, chipotle chili powder, salt & pepper to beans, mix well
  • Shape into patties
  • Line a cookie sheet with parchment paper
  • Spread a bit of coconut oil on paper (helps with browning)
  • Place patties on cookie sheet and bake in 400 degree oven for about 30 minutes, flipping after 15 minutes
  • These are great topped with avocado and a side of greens. Enjoy

Gluten-free In An Rv

Increasing numbers of people have food allergies, sensitivities or intolerances these days.  There are a lot of theories as to why this is, but the bottom line is that it can make it very difficult for folks to eat outside their home.  Maintaining a healthy pantry is critical for these folks, as is an awareness of what to look for when eating on the road.

Now that summer is over and the kids are back in school, it's time to get back to the regular routine while daydreaming of summer vacations.  My friend Tina recently shared the story of her family and their ability to take a long-awaited cross-country family vacation.  It's wonderful that they were able to achieve this dream, and a definite testament to how much advance preparation they had to do to be able to make this trip a reality.

Traveling gluten-free and dairy-free definitely changes what you do and how you do it.  Our family has dreamed of a cross-country trip for years.  Those dreams were challenged by the fact that my husband is very sensitive to gluten and dairy… even a crumb or drop can leave him with asthma and GI problems for weeks.  We decided that the best way to travel would be to take our kitchen with us and do most of our own cooking. With the help of a friend who lent us their RV we were able to do finally make our dream come true and take this trip.  

Starting from CT, going across the northern states, down California, then returning via the southern states and up the eastern coast it was a wonderful adventure.  We were so happy our dream could become a reality and we had a great time. However we definitely had to consider how we would feed my gluten and dairy-free husband along the way.

Carefully considering our menus we pre-stocked the kitchen with gluten and dairy-free staples we knew we could have a hard time finding on our travels across the country.  Not every area of the country offers a wide range of dietary choices and not every store has things like:

rice/potato pastas
gluten-free pretzels
gluten-free bread crumbs
gluten-free bread
dairy-free buttery spread
gluten-free chicken broths
gluten-free, dairy-free cold cuts
gluten-dairy free brownie mix
gluten-dairy free cake mix (we had some birthdays to celebrate along the way)
corned beef without anything added in (in the midwest a lot of stores only sold corned beef with everything already added in and we couldn't trust it)


Our dinner meals were usually a meat (chicken, steak, pork, burger), sometimes breaded with veggies or a stir-fry with brown rice.


One family favorite is a breakfast that we usually have in the winter before spending the day snowmobiling out in the cold.  It's tasty, filling, and an easy on-the-road breakfast. 


The Berge's Hash and Eggs


Can of corned beef (plain, no potatoes added)
4 potatoes (or as many as you feel is adequate for the # of people you have), diced
3-4 T. olive oil
1 onion, diced
ground pepper, to taste
onion powder (optional)
eggs (1 or 2 per person)


Put the onion in a frying pan with a 1 T. oil until softened. 
Add the potatoes, more oil if needed, and cook until potatoes start getting soft. 
Add the corned beef and brown it all (no need to add salt since the corned beef has it already) 
Season with pepper and more onion powder if needed 


When the hash is browned remove from the pan and set aside
Cook the eggs (we like sunny side up)
Place eggs on top of the hash and serve


It's so delicious and for lunch you can get by with just a piece of fruit and some nuts or other light meal… works great when you're travelling around for the day.


My husband's diet influenced us in other ways as well. We ate “out” at a restaurant only twice during the five weeks we were on the road.  Before being seated we would ask our server lots of questions about whether they could accomodate us; if they said they could, we would try it.  However there was always that feeling of playing “Russian Roulette” with his GI system since you're never really “sure” that the chef and wait person “get it.” 


While we were on the road  we would seek out health food stores and would be in heaven if we found a gluten-free bakery or somewhere with treats (we were on vacation after all!). We were surprised to find  that out west people do not know what italian ices are. There's a market to be tapped there, for sure!


We talked a lot about how it would be great if there were some quick, healthy drive-thru type places where gluten and dairy free people could find food. Unfortunately it doesn't exist, even the salads are usually tainted with croutons and/or cheese. It was eye opening how much harder it is to travel when you don't fit into the majority.


Travelling with food allergies can be a great experience if you plan ahead on how to find or make foods that work. Yes, it would be nice to be able to eat out a little more often while on vacation (food is half the fun of vacation!) but we were able to manage. The good news is that the States seem to be getting more aware of food allergies and it is definitely easier to find gluten-free and dairy-free foods than it was 10 years ago.


photo courtesy of:  Bill Ward's Brickpile

How To Make Bean Sprouts

I love bean sprouts.  They're delicious and a great source of nutrition.  Just the act of sprouting beans increases their nutrition.  It also makes their nutrients more bio-available because the first step, soaking, removes phytic acids which interfere with nutrient absorption.

A while back my friend Jen asked me how to make them.  She had been interested in doing it but was afraid it was too difficult.  She wanted pictures to show her how it was done.  I promised that the next time I made bean sprouts I would take pictures and share the process.

This is a batch of lentil, adzuki, mung bean sprouts.  You can use any beans you like depending on what you have handy in your pantry.  I almost always have mung beans and lentils so I use those a lot.  The other beans vary.  I usually make a bean sprout mix with anywhere from three to five different kinds of beans.

Start by putting a small handful of each of the different beans into a colander and picking them over.  Dry beans frequently have small rocks, little clumps of dirt or other debris in the package, it's important to sort through them before you use them.

After picking them over, rinse the beans well.
Then…

Put them into a bowl and cover them with water.
Put them in the oven overnight

(Be sure to put a note on the oven so you don't accidentally turn it on to pre-heat
when your beans are in there.  Trust me on this one.)
The next morning take your beans out of the oven and drain them.
Rinse them well and put them back in the oven.

The next day rinse and drain your beans and put them back in the oven.
Keep doing this.
On day two or three you will notice that your beans have little white sprout tails.

On day three or four you will notice that lots of beans have sprouted and they are ready to eat.

How long they take to sprout depends on how warm or cold it is in your house.  Warmer weather
causes them to sprout faster so in my house it's usually three days.
Once you have your sprouts ready to eat it's best to store them in the fridge.
What can you do with them?  I put mine into salads, stir fry, curry, smoothies (just a tiny bit for a protein boost), I also eat them raw as a snack.  They're absolutely fabulous.
I hope you'll give it a try.
Be well.
refrigerator pickle

Quick Refrigerator Pickle Recipe

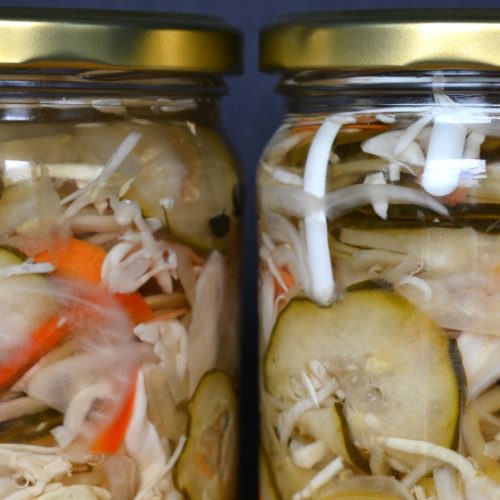
Summer is a wonderful time for fresh and in season foods like salads or grilled meats. I’ve been known to serve it on the side of egg dishes, it’s fabulous on tacos, and I will even confess to occasionally eating it straight out of the jar. If you’re making any of these dishes it can be delicious to add a gentle pickle as a condiment on the side. 

This recipe is not only super easy to make, it’s delicious and adds a nice fresh snap to whatever you’re serving. It’s also a bit of a DIY pickle project because you can change the recipe depending on what’s available or what you’re in the mood for. Although you can buy some of your vegetables already julienned into matchsticks I prefer to do it myself using a julienne peeler.  My preferred peeler is this wide handled, soft grip version by Oxo. If you’re making a lot of these pickles (something I’ve been known to do once summer arrives) a mandoline slicer is going to be faster and easier. 

One nice thing about this recipe is that the pickles continue to get more flavorful the longer they’re in the brine.  Once you’re done with the pickles the leftover brine is so wonderful that it’s nice for making a vinaigrette.

refrigerator pickle

Quick Refrigerator Shredded Pickle Recipe

Ingredients
  

  • ½ cup apple cider vinegar
  • ½ cup white wine vinegar
  • ½ cup water
  • 1 clove garlic, minced
  • ½ teaspoon kosher salt
  • Seasonings: see note below
  • 2 cups julienned veggies - carrots, red onion, vidalia onion, golden beets, zucchini, English cucumber, radish, kohlrabi, jicama

Instructions
 

  • Wash and dry a wide mouth quart canning jar (or other large jar)
  • Bring vinegars and water to a gentle boil
  • Add garlic, salt, and seasonings, continue to boil until salt has dissolved
  • Remove from heat and let cool 10 minutes
  • Add the veggies to your jar
  • Pour the still hot brine over the veggies
  • Let the jar cool to room temperature before adding a lid and placing in the fridge
  • Lasts 2-3 weeks in the fridge

Notes

Seasoning note:
Depending on what flavor you want you can use different herbs or spices.  For this amount of liquid I like to use 1-2 of the following:
  • 1 bay leaf
  • 1 teaspoon mustard seeds
  • 2-3 sprigs of fresh herbs - thyme, tarragon, oregano, or dill
  • If you don’t have fresh herbs you can use ⅓  teaspoon of dried 

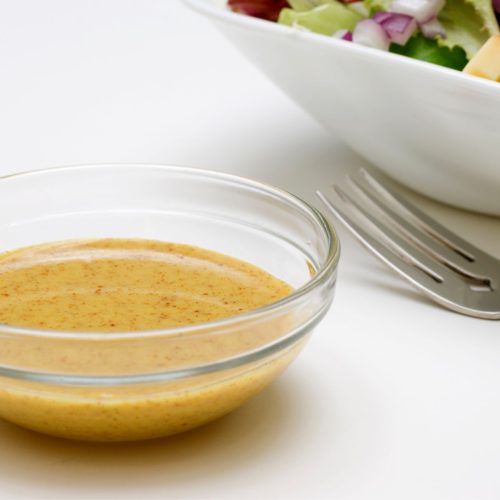
Vinaigrette

Quick Pickle Vinaigrette

Ingredients
  

  • Drain/strain your quick pickle jar to remove any floaty bits
  • ¼ cup quick pickle brine
  • Generous pinch of sea salt (taste it first to see if it needs it)
  • 1 ½ teaspoons Dijon mustard
  • ½ cup good quality *olive oil
  • 1 tablespoon dried onions (I like to use my dehydrated vidalias here)
  • ½ teaspoon minced fresh parsley

Instructions
 

  • Whisk together brine, salt (if using) and mustard
  • Slowly whisk in olive oil until mixture is emulsified
  • Whisk in onion and parsley
    This recipe can be used immediately or stored in the fridge up to 2 weeks!

Notes

*olive oil
This recipe can be used immediately or stored in the fridge up to 2 weeks