Category Archives: recipes


Swiss Chard Two Ways

The other night I picked the last of my Swiss chard from our garden for dinner. It's one of my favorite dark leafy green vegetables. Antioxidant-rich, loaded with vitamins K, A, and C, Swiss chard also provides a healthy dose of magnesium.

Often when we eat it I make simple sauteed greens. This time, however, I wanted to do something different and came up with these two recipes, using the entire leaf. 

Although most people throw out the stems, they are delicious and can be cooked in a variety of ways. These are the two recipes I created using all of the Swiss chard. I can't wait to plant more and enjoy this again.

Braised Carrots and Swiss Chard Stems

Ingredients
  

  • ½ onion, diced
  • 8 carrots, sliced into ½ inch pieces
  • Stems from Swiss chard, cut into ½ inch pieces
  • 2 tablespoons butter
  • ¼ cup water
  • Sea salt and fresh ground pepper to taste

Instructions
 

  • In a large pan melt butter
  • Saute onions until starting to turn golden color
  • Add carrots and Swiss chard stems
  • Stir to coat with butter
  • Add water and bring to a boil
  • Reduce heat and cover
  • Cook until carrots are tender (about 15 minutes)
  • Add salt and pepper to taste

Creamed Swiss Chard

Ingredients
  

  • Large bunch of Swiss chard
  • ½ cup boiling water
  • ½ onion, diced
  • 1 clove garlic, pressed
  • 2 tablespoons butter
  • ½ cup organic sour cream
  •  ½ cup organic whole milk
  • sea salt and fresh ground nutmeg to taste

Instructions
 

  • Trim stems from Swiss chard
  • Cut leaves into 1” pieces
  • Wilt in boiling water until limp
  • In a large saucepan melt butter
  • Saute onions and garlic until onions start to turn golden color
  • Whisk sour cream and milk together
  • Pour over onions and heat until just starting to bubble
  • Add wilted Swiss chard leaves
  • Bring to a boil, stirring frequently
  • Reduce heat to just under boiling
  • Cook 5-7 minutes until sauce thickens slightly
  • Add sea salt and fresh ground nutmeg to taste

Cucumbers

I've picked what I believe is the last cucumber of year from my garden.  The heat and the lessening rain have done a number on the plant which is shriveling and not likely to produce any more fruit.  Of course, there are also no more blossoms, another pretty good indicator.

Although we treat them like a vegetable, cucumbers are actually a fruit, related to melons like cantaloupe.  High in antioxidants and anti-inflammatory, cucumbers are a good source of vitamin K which is important to help the body properly utilize vitamin D.

Refreshing, hydrating, and delicious, cucumbers can be prepared a number of different ways, used raw in salads, creamy salads (such as raita or tzatziki), or pickled.

One of my absolute favorite ways to eat them is as a refrigerator pickle because in season I just keep throwing more cucumbers into the jar.  They only need to sit for a few days to be ready to eat.  It's important to remember that because these are not hot water bathed, they will not last outside the refrigerator and even stored in the refrigerator are probably not good to keep for more than two weeks,  I confess I eat them so quickly when I make them that I'm not really sure how long they would last.

cucumber pickles

Refrigerator Cucumber Pickles

Ingredients
  

  • 1/2 gallon jar - sterilized
  • 2 cups raw, unfiltered apple cider vinegar
  • 6 cups of water
  • 1/2 cup pickling salt
  • 1 bunch fresh dill
  • 3-4 cloves garlic cut in half
  • 1 small vidalia onion, peeled and sliced - optional
  • Don't forget the cucumbers

Instructions
 

  • In a medium pan combine vinegar, water and salt
  • Bring to a slow boil, stirring until salt is completely dissolved
  • Remove from heat and let cool completely
  • Add remaining ingredients including onion slices if desired
  • Wash and prepare cucumbers by cutting into slices or spears
  • Put as many as will fit into jar and still be submerged
  • Let sit 2-3 days before eating

Detox Bath

Baths versus showers


There are many ways to “clean up” which can include showers or baths. Many of us tend to take showers rather than baths. For some it's a matter of necessity with no tub available, for others showering is seen as faster and more convenient.  

Yet, taking some time and enjoying a bath can be a powerful way to help balance our bodies.  First there is the slow down, taking the time to soak.  A form of hydrotherapy, that relaxing time goes a long way toward counteracting the hectic pace at which most of us lead our lives.  Baths can also, however, be a great way to help us re-mineralize our system.  This is done through the use of something called a detox bath.

Health benefits of a bath


Our skin is our largest body organ, sometimes referred to as the “third kidney.”  What we put on it goes into our system.  This works for both positive and negative ingredients.  Often, we are exposed to many environmental stressors and/or we eat foods that may cause a more acidic body state.  While a bath cannot counteract all of that it can help to balance us.  Many people find that when they take a detox bath, they feel much better and more relaxed.  

It's often recommended to take the bath immediately before bed. In fact one small scale study showed a positive correlation between bathing and improved sleep.  Some participants reported falling asleep faster and researchers noticed that after bathing sleep movement was reduced for the first three hours.

A bath can not only be relaxing but also may have positive benefits for your overall health. These benefits can include improved mental and emotional health, soothe muscle and joint pain, and increase blood flow, thus supplying more oxygen to the periphery areas of the body. One study published in the British Cardiac Society, Heart, found that among middle aged people taking baths was linked to a reduced risk for cardiovascular disease.  All of which adds up to a good reason to include regular baths as part of your self care routine.

What’s in that tub?


Many people, when they think about a bath, think about bubble baths.  Those aren’t recommended due to the ingredients.  A much better option is an epsom salt soak.  And while you can purchase scented bath salt products you need to be careful about what the fragrance is made from, what the ingredients are, plus you may be spending too much. As it turns out you can make a simple detox bath at home for pennies.  

While daily bathing is fine and has a variety of health benefits as mentioned above, it is often suggested to not take a detox bath more than 2-3 times a week so as to not overwhelm your system. 

This detox bath recipe includes Epsom salt which helps to soothe inflammation, reduce stress, promote elimination of environmental toxins, and help with re-mineralizing the body with its magnesium content. The baking soda is alkalizing for the skin and many people report the combination to be very soothing.

Detox Bath

Ingredients
  

  • 1 cup Epsom salts
  • 1 cup baking soda
  • 5-7 drops relaxing essential oil (the most relaxing ones are lavendar*, ylang ylang, sandalwod, geranium, and vanilla)

Instructions
 

  • Run a hot bath and add the ingredients
  • Combine the ingredients and add them into the bath
  • Soak for 20 minutes immediately before bed
  • Take the time to invest in you and your health with a relaxing detox bath.

Notes

Note: Hot baths and sauna bathing are not recommended if you are pregnant, nursing, or have a health condition which might be negatively affected by immersion in high heat.


[expand title="Sources"] 

Family Medicine. Four reasons to take a bath. Cleveland Clinic.

Ukai, Tomohiko et al. "Habitual Tub Bathing And Risks Of Incident Coronary Heart Disease And Stroke". Heart, vol 106, no. 10, 2020, pp. 732-737. BMJ, doi:10.1136/heartjnl-2019-315752. 

Kanda, Kiyoko et al. "Bathing Before Sleep In The Young And In The Elderly". European Journal Of Applied Physiology And Occupational Physiology, vol 80, no. 2, 1999, pp. 71-75. Springer Science And Business Media LLC, doi:10.1007/s004210050560. 

[/expand]

august produce guide

August Is Peachy

August is National Peach Month. In season and amazingly fragrant, it's difficult to walk past peaches, whether at a farmer's market or in the grocery store, without being tempted to purchase a few. Peaches are a good source of vitamin C and A. They also provide a fair amount of potassium, beta-carotene (which becomes vitamin A), and fiber.  When they are ripe and juicy they are also very hydrating.

There are many different ways to use peaches and to enjoy them. While they're certainly delicious just the way they are, they're also amazing when paired with a good cheese, a dollop of yogurt, or even grilled as part of a barbeque menu.

This particular recipe is one our our summertime favorites and it comes from my mom.  It's simple and so easy to put together. It makes a perfect dessert after just about any meal.

Frenchtown Cobbler

The biscuit topping is modified from a July 1997 issue of Gourmet magazine, while the filling is modified from one found in the July/August 1996 Cook's Illustrated.

Ingredients
  

  • Topping:
  • 5 Tablespoons cold unsalted organic butter
  • 1 cup Pamela's baking mix
  • 2 Tablespoons organic yellow cornmeal
  • 2 Tablespoons sugar
  • 1 1/2 teaspoons baking powder
  • 1/2 teaspoon salt
  • 1/2 cup organic whole milk
  • 1/2 teaspoon vanilla
  • Filling:
  • 3-4 peaches, peel, pit, and slice thick
  • 2 cups blackberries, rinsed
  • mix 2 teaspoons organic cornstarch
  • 1/3 to 1/2 cup sugar
  • 1 teaspoon vanilla extract
  • 1 Tablespoon brandy
  • toss with fruit to coat

Instructions
 

  • Preheat oven to 375 degrees F
  • Cut butter into pieces
  • In a bowl with a pastry blender or in a food processor blend or pulse together baking mix, cornmeal, sugar, baking powder, salt, and butter until the mixture resembles coarse meal
  • If using a food processor transfer to a bowl
  • Add milk and vanilla and stir until the mixture forms a dough
  • Drop topping by rounded spoonfuls onto filling (do not completely cover it) and bake in the middle of the oven 40 minutes, or until topping is golden and cooked through.
  • Serve with ice cream or lightly whipped cream

More delicious summer recipes

Here are a few more fabulous summertime recipes

Healthy Watermelon Recipes To Try This Summer

I'm starting to see beautiful personal sized watermelons at the grocery store. They're delicious and a great treat.

One of the most alkalizing foods, watermelon is a refreshing, hydrating, low calorie wonderful addition to summertime menus. High in vitamin A and C while also providing some magnesium and potassium, watermelon is a great antioxidant fruit. It also provides high levels of lycopene which studies have shown to be helpful in preventing various types of cancer. Watermelon appears to also have some effect on lowering blood pressure.

There are many delicious ways to include watermelon into your summertime menus such as making watermelon water ice or granita, making agua fresca, fruit salads, or even a savory sweet salad.  My current favorite fruit salad is rich in lycopene and anthocyanins, those dark rich fruits which are supportive of cognitive function while helping to reduce inflammation in the body.  This salad is refreshing and satisfying, I've even been including it as part of my breakfast for a delicious treat.

Anthocyanin-rich Fruit Salad

Ingredients
  

  • 2 cups watermelon, balled
  • 1 cup blueberries, rinsed
  • 1 cup strawberries, rinsed and sliced
  • 1 cup cherries, rinsed, pitted, and quartered
  • DRESSING:
  • 1 small lime
  • 2 tbsp fresh lime juice
  • 2 tsp poppy seeds

Instructions
 

  • Mix together fruits
  • Mix together dressing in a separate cup
  • Pour dressing over fruits and toss gently
  • Let sit 30-60 minutes in the fridge before serving

After you’ve enjoyed your watermelon there still a very tasty treat available. Pickling the rind is simple and easy to do. It doesn’t take very long and the results are delicious!

It's important to note that although you can process watermelon rind pickle for long-term storage, this recipe is for the refrigerator pickle version which is imho easier and faster.

Watermelon Rind Pickles

Ingredients
  

  • Rinds from 1/2 of a large watermelon
  • 4 cups apple cider vinegar (with the mother)
  • 2 cups water
  • 2 cups cane juice crystals or other low process sugar
  • 1/3 cup kosher salt
  • SEASONING: 2 sticks cinnamon or 2” piece fresh ginger or 1 jalapeño (seeded) or 1 lemon thinly sliced

Instructions
 

  • When cutting watermelon leave 1/4-1/2” of red flesh on the rind
  • Using a vegetable peeler thoroughly remove the green rind
  • Cut rind into -1 1/2” pieces
  • Combine vinegar, water, sugar, salt, and seasoning in pot (large enough to also hold the watermelon rind)
  • Bring to boil, stirring to dissolve sugar and salt
  • Add the watermelon rind
  • Bring back to a boil, then reduce heat and simmer for 2 minutes
  • Remove pan from heat and let cool to room temperature (about) one hour
  • Transfer rind to clean and sterilized wide-mouth pint or quart canning jars
  • Cover with pickling brine (do not include seasonings otherwise the flavor gets too strong)
  • Refrigerate overnight before serving
  • Keeps 2-3 weeks in the refrigerator

Take Back Your Kitchen

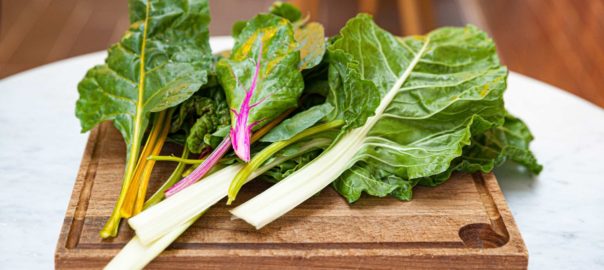
I was talking with a friend of mine who recently moved to this area.  She was stunned to discover how many people don't cook.  It seemed very strange to her that so many eat out almost all the time or purchase prepared “convenience” foods.  I think this is something which is happening not just where we live but all over the country.

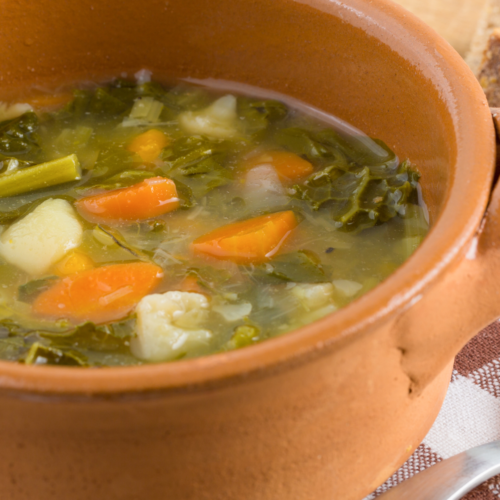
While I no longer cook the way I used to when I had three small children at home, I do cook on a regular basis.  In prior days I cooked a lot, every day.  I still cook a lot but the meals tend to be simpler and less involved.  I still use my slow cooker frequently however instead of feeding five it now feeds two to three with leftovers, a bonus as far as I am concerned.  A hearty pot of soup, a tasty stew, these are all so easy, delicious and nourishing.  And the leftovers are perfect for our current lifestyle.

I believe that just about anyone who walks into a house fragrant with the smells of a roasting chicken  or a robust ragout will comment on how delicious that house smells.  We know good food when we smell it, we just think we can cut corners to make it.

We've been sold a bill of goods about food and sacrificing “convenience” for time.  I believe it's a myth.  There are things that you can do to make your time in the kitchen faster or less involved.  But there's no way that you can convince me that prepared foods in a box or a can are “just like homemade.”  Especially after you read the label and see how many non-food items are in that package.  I also find that in spite of the rising cost of groceries your food dollars are well spent when you buy the ingredients for homemade wholesome food.

Additionally most of us have forgotten how to cook.  A lot of people have lost the native understanding of how flavors go together, how spices work, what constitutes the basics of culinary knowledge.  One of my biggest joys right now is watching my two older daughters taking their culinary knowledge to the next level.  Working together with them in the kitchen or enjoying a fabulous meal that they have made from scratch.  Sharing my cooking knowledge with them as they add their own twist to a dish or develop their own culinary style.

Just because you don't cook doesn't mean that these skills can't be relearned and you can't take back your kitchen.  You can.  And not only will it taste better and, I believe, be better for you, you're nourishing more that just your belly.  There's something intrinsic about cooking and eating something that you have prepared yourself that quite simply nourishes the soul.

Here are a few simple, easy recipes that I have created which you can easily prepare at home:

Breakfast Quiche Muffins – these can be made in muffin form and frozen until needed.  Or you can make it as a quiche and serve it for breakfast, lunch, or dinner.  You need to adjust the time as it will take longer to cook if you cook it in a pie pan as a large quiche.

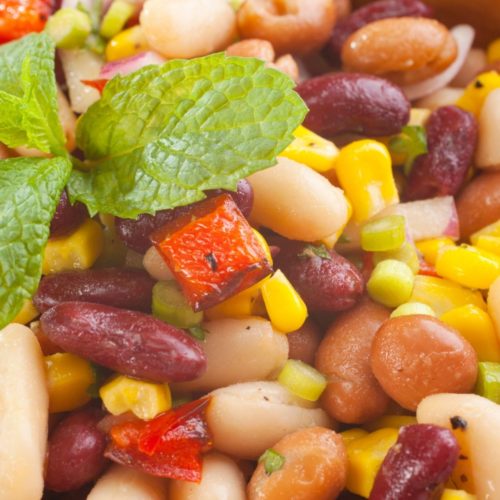
Black Bean Casserole – this is a great dish to serve as is with lots of steamed veggies on the side.  But the leftovers are also fabulous for topping on salads, baked potatoes (with my salsa recipe), they also stand on their own reheated as leftovers very nicely.

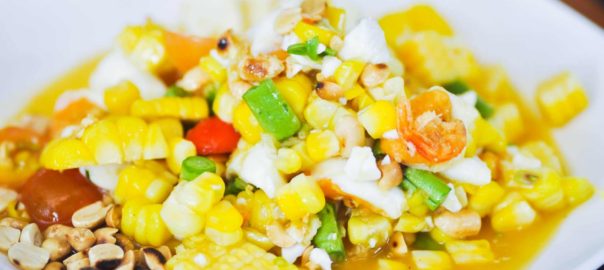
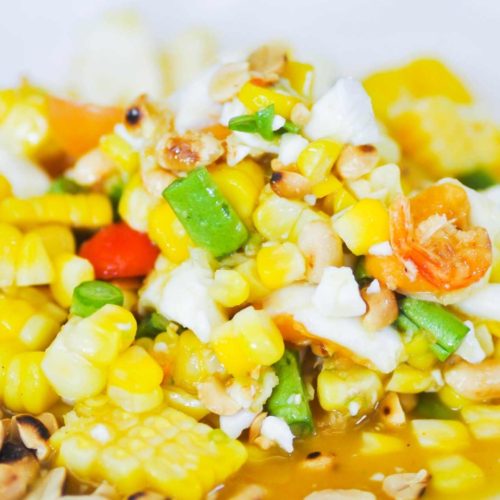
Peas-y Peas and Celery – this is a fabulous side dish, easy to make and absolutely delicious.

For true kitchen basics here are some videos:

Giada DeLaurentis' Tomato Sauce – this is a basic sauce that goes with pasta, chicken, beef, and is very versatile

Mark Bittman's Roasted Tomato Soup – because nothing says comfort food like a good bowl of homemade tomato soup.  This is the deluxe version and totally worth making

Homemade Chili – a classic comfort food it's always good to know how to make this

Bechamel Sauce – a white sauce a basic foundation for many different uses

Paula Deen's Macaroni and Cheese – once you start making homemade you'll never want the boxed stuff again.  Be warned though this is a treat food and needs to be served as a side dish not the entree

Jill Sanpietro's Basic Pizza – much better than store bought and easier to make it just the way you like it

Whole food cooking doesn't have to be expensive.

Three Bean Salad

This is a guest post by my Aunt Haya who recently shared a very sweet story about food, connections and memories.  I love food stories.  I like hearing where food came from, how it's changed, and the associations we make with our food; those moments that join us together.  I agree with my Aunt that in this overstimulated fast-paced world it's nice to have these kinds of connections to make us stop a moment and reflect on the various ways that our food comes into our lives. I also love how so many recipes, when shared, keep the name of the person who gifted them to us.

This evening my congregation will be hosting a group of 32 members of a congregation in Maryland who are on a 10 day tour of Israel with their Rabbi. After many guided tours to historical sites they are looking forward to sitting and talking with folks who live here. I have been asked to contribute my three bean salad to the meal.   I am always glad to make and share it.  While assembling the ingredients I stopped to think about it's entry into our lives. 

Nowadays, three bean salad is well known all over the US and multiple variations are on the web. But while living in Houston (in the late 1960s), my husband and I made sure that each of us would have some private time each week, with each of our children.  On one such outing I went with our son Daniel to attend an outdoor performance of an abridged version of some Gilbert and Sullivan operetta out on a lawn of The University of Houston. I think that it was the Pirates of Penzance, but am not sure. 

I did not recognize anyone sitting near us in the audience but Daniel soon picked up a conversation with a boy near his age. I introduced myself to his mother and learned that they were in Houston for the summer while her husband, a school teacher, took summer classes at U of H, in order to eventually qualify to become a school principal in their home town somewhere I think in Arkansas or Alabama. He was often busy attending those summer program classes or working in the university library on his homework, so she and their son were exploring Houston on their own. 

I invited them to join our family picnic the next week in Herman Park on the 4th of July--speeches, fire works and all. They were glad to accept and she brought three bean salad that she'd made. We'd never tasted one before. We all enjoyed it so I asked for her recipe. She wrote out on a piece of paper which I copied on to a file card after I returned home. I added her name Eula Ross.  We got together only once or twice more during that summer, but three bean salad became a staple in our family's favorite summer recipes; particularly as a contribution to buffets and picnics.

Here in Israel the recipe has changed somewhat. I add diced fresh rosemary needles (that I pick fresh from the shrubs) to the chopped parsley in the original recipe and often use chickpeas for the third bean. 

Today I found that I needed to purchase more chickpeas so used red beans as I have no red onion and wanted to add color other than the chopped sweet red pepper to the salad.  I use less sugar in the dressing that Eula Ross recommended and the minimum quantity of oil.  But each time I prepare this dish, whether or not I check the details on the old file card or fly free with improvisations, I think a special thanks to Eula Ross where ever she is now. 

I am sharing this story with you because in this day and age of instant communication, information from people whom one never meets, an entire rainbow of recipes for any dish for which one could possible conceive of hankering, this older, slower, deeper time of meeting a stranger who became an acquaintance and shared her recipe and it's evolution to fit my current location and dietary preferences, pleases me a great deal.

Eula Ross' Three Bean Salad

Ingredients
  

  • 2 cups each green string beans, yellow string beans, red beans or pinto beans
  • 2 stalks of celery cut into cubed shape pieces
  • 1/2 red union diced
  • 1 cup chopped fresh parsley
  • 1/2 cup chopped bell peppers
  • 1/2 cup vinegar
  • 1/3 cup sugar
  • 1/4 to 1/2 cup oil
  • 1 1/2 teaspoons salt
  • 1/4 teaspoon fresh ground black pepper

Instructions
 

  • Whisk the five dressing ingredients together and pour over the vegetables.
  • Mix together cover and chill in fridge.
  • Keeps for 10 days

Notes

Aunt Haya's changes: 
  • 1 Tablespoon of chopped fresh rosemary to the parsley
  • I used frozen cut yellow and green beans which I steam over boiling water just until they thaw, so that they are still a bit crisp
  • I sometimes substitute chick peas for the red or pinto beans – I soak which ever of the three that I use overnight, then cook them myself, drain them before adding to the salad. (I find commercial canned beans of all three types, over cooked (too soft) and too salty)
  • I use only 1 teaspoon of salt
  • About 1/3 cup of oil
  • Reduce the amount of sugar
  • I like to use apple cider vinegar

Roasted Corn Salad

I love summer and summer food.  For me, there is nothing better on a hot day than a quick simple barbecue with lots of tasty side salads.  My sister-in-law is a genius at the side salad thing, probably because she grew up in Texas where all my friends seem to be good at that.   Me?  Well, it's a learned thing, mostly started by her generous gift of two cookbooks loaded with salad recipes.

This is my latest creation.  It was late by the time we ate and I was too hungry to stop and get out the camera.  When I remembered to take this picture there was, I kid you not, only three spoonfuls of salad left.  That's how good it is.  The general family consensus is that it's a keeper.  Hope you think it is too.

Roasted Corn Salad

Ingredients
  

  • 3 ears of corn
  • 1 red bell pepper diced
  • 3 spring onions, cleaned and diced
  • 1/2 cup celery diced
  • 1 clove garlic, pressed
  • 1 small bunch of cilantro minced
  • 1/3 cup extra virgin olive oil
  • 1 small lime juiced
  • sea salt and pepper to taste

Instructions
 

  • Shuck the corn and cook in a pot of water until just starting to boil
  • Remove from the water, pat dry and place on a medium high grill
  • Turn corn occasionally to prevent burning (although my guinea pigs family says the darker bits are tasty too)
  • When corn is slightly browned all over remove from grill
  • Using a sharp knife remove kernels from cob and place into a bowl
  • Add bell pepper, spring onions, celery, garlic, and cilantro
  • Mix well
  • In a separate container whisk together olive oil, lime juice, salt, and pepper
  • Pour dressing over corn salad and toss well to coat evenly


Basil mania

Basil Mania

Bay-sil, bah-sil, whatever you call it, it's one of the most fragrant and delicious herbs around.  High in vitamin K, basil also has some healthy properties to it's oil which is anti-bacterial and also highly anti-inflammatory.  These properties combine to make it a very heart-healthy herb to include in your diet. Recently I went to The Arbor Gate nursery and took their Basilmania class.  Starring Chef Chris Crowder and Herbal Expert Ann Wheeler it was an information packed event.

It turns out that there are a vast number of different varieties of basil.  According to Ann there are 64 native species of basil, however we now have hundreds of varieties because it is a “promiscuous cross polinator.”  I also learned that pepper basil is the only one which does well in the shade.  Three years ago I was given a gift of pepper basil from my friend Paula and it has indeed done well on the shadier west side of my house.  Now, due to rather mild winters, it's still going strong.  And it does indeed taste like a pepper plant.  The one basil which I was really taken with while at the nursery was the lime basil.  It is so powerfully fragrant and the leaves so deliciously citrus-y that I kept wanting to nibble at it.

In addition to talking about basil, there were demonstrations of different recipes using it.  Recipes mentioned included adding basil to tartelettes, a bellini, a vegetable mousse and more.  Here's one recipe created by Chef Chris Crowder shared from The Arbor Gate website:

Frozen Basil Strawberry Mousse

2 tablespoons roughly chopped fresh basil
1/4 cup sugar plus 1/3 cup
3 cups quartered strawberries
1 1/4 cups heavy cream
1 tablespoon fresh lemon juice
1  tablespoon unflavored gelatin
1/3 cup sliced strawberries, for garnish
1 tablespoon chiffonade of fresh basil, for garnish

Process the basil and the 1/2 cup sugar in a blender or small food processor and pulse until combined, stopping to scrape down the sides as needed. Place quartered strawberries in a medium bowl and sprinkle with the basil sugar. Allow the mixture to stand for 20 minutes.

Cut parchment paper into 5 long strips, about 2-inches wide and 12-inches long. Wrap one strip of parchment around the top of a 3-ounce ramekin and secure with string or tape to form a collar that extends above the top of the ramekin. Repeat with the remaining 4 strips and ramekins. Set aside.

Whip the heavy cream until soft peaks form and refrigerate until ready to use.

Combine the lemon juice with 3 tablespoons of water and the gelatin in a small bowl. Allow gelatin to soften, about 5 minutes. Place the macerated berries and sugar in a blender or food processor and puree until smooth. Pour mixture through a fine-mesh strainer and press to release the juices; you will need about 1 1/4 cups of the strained juice. Discard the pulp and seeds.

In a small, heavy saucepan, combine 1/4 cup of the strawberry puree and the 1/3 cup sugar over medium heat, stirring to dissolve the sugar. Just before the mixture begins to boil, remove the syrup from the heat and stir in the gelatin mixture until well incorporated and dissolved.

Combine the gelatin mixture with the remaining strawberry puree in a medium bowl. Set the medium bowl inside a large bowl filled with ice water. Stir the strawberry mixture until cooled and syrupy.

Fold the reserved whipped cream into the syrup mixture, gently but thoroughly, until well incorporated and the mixture is one solid color. Fill the prepared molds with the strawberry mousse, cover, and freeze until firm, at least 4 hours.

Allow mousse to stand at room temperature for about 10 minutes before serving. Remove the parchment paper from the molds and garnish with fresh sliced strawberries and basil.

However you pronounce it (and whether you think it's an -erb or a herb) basil is a delicious plant which definitely deserves to be made into more than just pesto.

Twitter Party #foodrevparty

As I said…it was a busy night.  I actually managed to participate in two twitter parties with the second one based on Jamie Oliver's Food Revolution.  The topic of the evening was Winter Seasonal Foods.  This was a great topic; I love seasonal eating.  We try pretty hard to eat seasonal foods in our home for two reasons. First, if it's seasonal it's often local, and that means fully ripe, fresh, and much more tasty.  The other is that it keeps our taste buds and food sensibilities engaged.  If you can only have strawberries when they are local and in season you sure appreciate them a whole lot more than when you buy them year round. I often find that out of season produce looks beautiful only to discover that it somehow doesn't smell or taste right.

This is an overview of an hour of fast and furious typing by a LOT of people.  There are some really great ideas here about how to incorporate seasonal eating into your nutritional plan.  Hopefully these suggestions will help you add more seasonal foods to your menu.  I only list the first question here as the others all seemed to keep circling back to the idea of recipes, and food suggestions.  There's a brief synopsis of the other questions at the end.

Winter is here for most of us, which brings new meal challenges. What seasonal foods are readily available in your area?  The answers seemed to be pretty consistent (with the exception of at least one participant who lives in a tropical climate and so has no distinct tropical variation), most people talked about winter squashes, cabbages, sweet potatoes, some mention of root crops and some citrus.  Recipe suggestions were great and I encourage you to use any and all of these:

  • parsnips in spaghetti sauce – I plan to try this
  • oven roasted butternut squash fries
  • butternut squash soup
  • grilled butternut squash
  • using butternut for vegetarian soup base
  • braised squash with lemongrass
  • butternut squash salad with raisins and ginger
  • risotto with winter squash and wild mushrooms
  • kale chips (love these!)
  • fermented cabbage (here's a great recipe from Nourished Kitchen)
  • fermented carrots (another great recipe from Nourished Kitchen)
  • use spaghetti squash or sauteed shredded cabbage instead of pasta
  • using cranberries to make whole-cran-lemonade
  • using cranberries for smoothies
  • baby carrots roasted with rosemary
  • roasted vegetables with herbs, acid (vinegar, lemon, etc) and olive oil
  • growing herbs indoors all year round for fresh seasonal flavor
Discussion continued with talk about the use of Farmer's Markets, CSA's, and the use of freezers, canning/preserving, and dehydrating as a way to deal with an abundance of seasonal produce.  These were seen as a great way to obtain seasonal foods.  After all, and I believe it's true for most people, if you're going to go to the trouble of obtaining and eating food that is specifically in season, you probably also want to get food that is as local as possible.  And if you have more than you can eat, you're smart to want to save some for a later time by preserving it through one means or another.  
As the evening began to wind down the topic turned to cocktails.  Specifically pumpkin martinis.  Not sure that's going to be on my #gottatryit list.  However I am really glad to have some new, wonderful ideas for recipes that all rely on the bounty of winter produce.  The discussion of how to obtain produce from various sources year round reminds me to always be aware and alert for opportunities to source locally, seasonally, and, most important, to try to get to know my farmers.  And the discussion of dehydrators reminded me that I need to learn more about how to use mine and to be more consistent in it's use.