Category Archives: recipes


Making Mayonnaise

I began making my own mayonnaise probably about 15 years ago after a visit to my husband's grandmother, Mamie.  She made her own mayonnaise.  All of it.  I'm not sure she ever bought a jar in her entire life.  During this particular visit, she happened to need mayonnaise while we were there so she assembled all of the ingredients and made it.  I was delighted to see how easy it was.  Homemade mayonnaise is so much creamier and more flavorful than store-bought, my family was hooked.

Homemade Mayonnaise

The recipe that I use is a modified combination of the recipe from Joy of Cooking (page 363 in my 1975 edition if you care to look it up) and the way that Mamie made it.  Quick, easy, and delicious; I make it all the time.

Ingredients
  

  • 1 egg
  • 3/4 t. dry mustard
  • 1 t. sea salt
  • 1 cup olive oil
  • 3 T. tarragon vinegar Tarragon vinegar is made by putting a bunch of tarragon into a bottle of white wine vinegar and letting it sit "for a while."  If you don't like tarragon, don't use it.  I have also made this recipe with raw apple cider vinegar when I didn't have any tarragon vinegar on hand.

Instructions
 

  • Place the egg, 1/4 C. oil, salt, and mustard into a container. Blend well. I use a stick blender which I think is one of the best kitchen gadgets ever invented.  
  • Drizzle in another 1/4 C. olive oil and blend well again.
  • Add the tarragon vinegar, blend well
  •  Add the remaining 1/2 C. olive oil slowly and blend well a final time

Notes

The end result is a delicious, creamy mayonnaise.  It's a little thin at first but after it sits in the refrigerator it firms up quite a bit and is just fabulous spread on sandwiches, in dressings, or any other way you choose to use mayo.  My particular favorite is for tomato sandwiches.
quinoa tabbouleh - delicious recipe

Quinoa Tabbouleh

Tabbouleh is a Middle Eastern salad dish; it makes a great meal when paired with falafel (fried chickpea patties), dolmas (stuffed grape leaves), hummus and other Middle Eastern or Mediterranean food items. It's primary ingredient is cracked bulgur wheat, something that is not allowed for those who cannot eat gluten. In order to make a version of tabbouleh that would be suitable for a gluten free diet I've substituted quinoa as the base.

Quinoa is a gluten free grain.  Actually it's a pseudo-grain.  Quinoa has a lot of fiber, and is high in B vitamins, calcium and iron. It also has balanced amino acids which gives it a good protein profile. Before you use quinoa you'll need to wash it (unless you buy pre-washed).  This is because the outer coating has saponins on it. If they don't get washed off they will make the quinoa taste soapy. When cooking quinoa the ratio is pretty much the same as rice, two cups of water to one cup of grain, simmered for 14-18 minutes.

Most tabbouleh is made with parsley and mint.  In this recipe I exchanged the mint for cilantro which makes a delicious change and gives it a bit of a kick.  Rich in phytonutrients, fiber, iron and magnesium the cilantro adds even more to the nutrient profile of this recipe.

This is one of my family's favorite summertime recipes.  Easy to make it's delicious as a side dish or it makes a great part of a composed salad plate.

Quinoa Tabbouleh
Print
Ingredients
  1. 2 C. cooked quinoa
  2. 1 C. finely minced cilantro
  3. ½ C. minced parsley
  4. 1 clove garlic minced
  5. 1 t. sea salt
  6. 1 C. cherry tomatoes – halved
  7. 1 red pepper, small dice
  8. 3 scallions, mostly white part, minced
  9. 3 T. fresh lemon juice
  10. 2 T. olive oil
  11. ¼ C. pine nuts
Instructions
  1. Mix all ingredients together
  2. Stir well
  3. Add fresh ground pepper to the top
  4. Enjoy!
The Ingredient Guru, Mira Dessy https://theingredientguru.com/

Vegetarian Shepherd’s Pie

Seasonal eating

If we choose to eat seasonally (and we should) we need to respect the foods that are available during certain seasons.  That means also paying attention to the needs of our body.  In the cooler months of the year, we are looking for comfort food.  Warming, nourishing foods that are deeply satisfying. Not the lighter, crisper salads and cooling foods of summer. That's because winter is the settling in and deep, rooted nourishing time of year.  It's perfect for hearty dishes like Shepherd's Pie.

The versatility of shepherd's pie

Shepherd's pie is a great dish because it is so versatile; a “crust”, a vegetable filling and a mashed root vegetable topping.  It makes a delicious meal served with say, a hearty salad, and a simple millet muffin. The crust can be made with ground meat or you can use a legume base, such as lentils. For the topping potatoes tend to be the most common. But sweet potatoes, a carrot and parsnip combination, or even turnips can be a delicious way to top off the pie.

One of my favorite dishes for this time of year is my vegetarian shepherd's pie using lentils for the crust.  Because only half of my family are vegetarians, I usually make two pies, one with a ground turkey crust and one with a lentil crust.  This means there are plenty of tasty leftovers to keep everyone happy for a couple of days.

About lentils

Lentils, (Lens Esculenta), also known in Indian cuisine as dal, are a legume (as are all dried beans and peas).  While most legumes need to be soaked before cooking, lentils are very quick and easy to prepare. 

They come in different varieties, green, brown, black, yellow, orange, and red, although most of us are familiar with the green kind which is easily available.  Lentils are nutrient-dense powerhouses and their nutrition content includes being very high in fiber, folate, tryptophan, and manganese. Their nutrient-rich profile makes them good for healthy bones, fatty acid and cholesterol synthesis, and help stabilize blood sugar among other things.  They are also good sources of protein, iron, and phosphorus, all of which the body needs for bone health.

Cooking with lentils

When cooking lentils it's important to know that they are often packaged straight from harvest. So they need to be sorted and rinsed before you can cook them. The general ratio for cooking lentils is 1 cup of lentils to three cups of water or nourishing broth.

After cooking it's best to let them sit for 10 minutes or so to firm up before using in a recipe. Otherwise if you try to use them while they are still warm they tend to get mushy.

If you are using them in a salad, let them cool completely before adding the other ingredients and your dressing.


Vegetarian Shepherd's Pie
Print
Ingredients
  1. 1 cup lentils
  2. 3 cups water
  3. 1/2 C. chopped onion
  4. 1 T. nutritional yeast
  5. 1 T. dried, Kirkland No Salt seasoning
  6. 1 tsp. sea salt
  7. 2 C. lightly steamed or heated veggies
  8. 1 Tbsp GMO coconut aminos
  9. 2 C. mashed potatoes
  10. paprika
Instructions
  1. Lightly grease pie pan
  2. Preheat Oven to 350F
  3. Bring the water to a boil
  4. Add the lentils and the onion, cook on medium for approximately 30 minutes
  5. Remove the lentils from the heat and let sit 10 minutes
  6. Mash together with nutritional yeast, seasoning, and salt
  7. In a lightly greased pie pan, put in the mixture and shape it into a bottom crust
  8. Fill the crust with veggies
  9. Drizzle with coconut aminos
  10. Top with mashed potatoes
  11. Sprinkle with paprika
The Ingredient Guru, Mira Dessy https://theingredientguru.com/


Spicy Millet Muffins
Print
Ingredients
  1. 2 1/4 C gluten free flour baking blend
  2. 1/3 C millet
  3. 1 t baking powder
  4. 1 t baking soda
  5. 1 Tsp fine sea salt
  6. 1 jalapeno seeded and minced fine
  7. 1 T toasted cumin seeds
  8. 2 T toasted pine nuts
  9. 1 C buttermilk
  10. 1/2 C olive oil
  11. 1/2 honey
  12. 1 egg whisked
Instructions
  1. Preheat oven to 400 degrees Fahrenheit.
  2. Oil a 12 cup muffin tray and line the bottom of each with cut parchment paper
  3. Mix all dry ingredients with the jalapeno, toasted pine nuts and the cumin seed.
  4. Mix all wet ingredients together then fold into the dry ingredients until incorporated well.
  5. Fill each cup 3/4 full and bake for approximately 15 minutes.
  6. Let cool and remove from tin.
Notes
  1. You may want to do 2 pans as this recipe makes a little more than a dozen muffins. You can fill the empty muffin tins with water or pie-weights to help make the cooking time a little more even.
The Ingredient Guru, Mira Dessy https://theingredientguru.com/
 
Don't forget to check out these other delicious lentil recipes:

Pumpkin Oat Breakfast Bars

My friend Erin recently shared this delicious recipe for a great on-the-go-snack bar. With pumpkins in season, it's easy enough to make your own puree. If you don't have the time or inclination to make your own, the canned stuff works just fine. A couple of words of caution, however, when choosing canned pumpkin:

  • It's best to use a brand that has a BPA free lining
  • Organic pumpkin is preferred
  • I highly recommend that you read the label and make sure that you are getting only 100% pumpkin. You don't need all those other ingredients.

These breakfast bars are fabulous for a quick breakfast, perfectly portable if you need to have breakfast on-the-go. And so tasty that they also make a great snack. If you'd like, add a serving of protein powder to make your bars even more nutritious. If you do add the protein powder you may find that you need just a Tablespoon or two of water so the mix isn't too dry.

Pumpkin Oat Breakfast Bars

Ingredients
  

  • 3/4 cup pumpkin purée
  • 2 eggs
  • 1/4 cup organic butter or ghee at room temperature
  • 1 large or 2 small ripe bananas
  • 1/4 cup honey
  • 2 cups rolled oats (not the quick cook variety)
  • 1/2 cup pecans, chopped (you can also use walnuts or sunflower seeds)
  • 2 Tbsp shredded coconut, unsweetened
  • 1/4 cup oat bran (optional)
  • 1/2 tsp cinnamon, ground
  • pinch of Celtic sea salt
  • 1 Tbsp grated orange rind
  • 1/4 cup dried currants
  • 1/4 cup dried blueberries

Instructions
 

  • Measure out the 2 cups of oats and pour just enough warm water over them to cover them
    Soak for about 5 minutes while you’re mixing up the wet ingredients
    In a mixing bowl, stir together the pumpkin, eggs, butter or ghee, honey, and banana
    You may want to mash the banana before adding to the bowl if it's not really soft
    Before adding the oats, drain them well
  • Add the oats, nuts, coconut, oat bran, cinnamon, salt, orange rind, currants, and blueberries, and stir until ingredients are well combined (this step is where you would also add the protein powder, if using)
    Spread mixture into a lightly greased (butter, ghee or coconut oil) pan so the batter is no more than an inch or two deep. An 8” x 10” baking dish works well
    Bake in a 350 degree F. oven for 40-50 minutes, or until golden brown
    For very crisp bars, remove from the pan and cool completely on a wire rack
    Cut the bars when cool 

crockpot shredded chicken

Use Your Crockpot To Beat The Summer Heat

It's getting hot here in Texas

And the humidity isn't far behind. Once the humidity hits stepping outside is like walking into a sauna.

With all of that heat and humidity, it's no wonder dinner time is seen as more of a chore in the summer. After all, who wants to heat up the kitchen when it's already hot and sticky outside? And here in Texas, we're not the only ones. Although we get the heat early, summertime and hot temperatures are about to hit all around the country. The good news is in spite of the heat outside, you can still have a delicious meal without raising the temperature indoors. It's easy when you use a crockpot.

So, how does crock pot cooking beat the heat? Simple, it uses less heat than an oven or the stovetop. In addition to using less heat to cook the food, a crockpot also doesn't heat up the environment the same way. This means you don't need to crank up the air conditioning, run a fan, or start your swamp cooler to reduce the additional heat from ovens and stoves.

Crockpots are also a great energy-saving device and the operating costs are very low. Especially when compared to electric stove and ovens, but even when compared to gas. So not just from a heat standpoint, but from a cost to operate standpoint as well, this makes crockpots a great resource.

Not just for winter anymore

If you're like most people you think of crockpots as being more for wintertime use. Great for making soups, stews, and chili. But truthfully crockpots are good all year round. I love mine and use it for making snacks, breakfast, and even for making shredded meats for summer salads. Crockpots are actually very versatile and can be used for a wide variety of meals and foods.

Benefits of Crock Pot Cooking

As well as being less expensive to run, crockpots have a number of benefits that make them a great addition to any kitchen:

  • All the work is done ahead of time making mealtime and cleanup a lot easier. If you're making breakfast, you're starting it the night before so there's less cleanup while you're trying to get out the door. If you're making dinner, it makes getting dinner on the table faster and easier at the end of a long day.
  • A lot of crockpot dinner recipes are a meal in a dish. Make a salad or a side dish to go with it and you've got a nutritious meal for your family. If it's a stew or a chili you can bulk it up with extra veggies and up your daily count of veggie servings.
  • Cleanup is a breeze. Usually, with crockpot cooking, there's the cleanup from the prep and then just one dish (the crock) to clean when you're done. This means you're not only spending less time cooking, but you're also spending less time cleaning up.

Have a couple of crockpots is, in my humble opinion, a good idea. I have one large one for the main dishes or large items and one small one for side dishes, appetizers, desserts, and that sort of thing. They're versatile, easy to use and make life much simpler.

Take it to the next level

Combine crockpot cooking with the Fast Fun Freezer Meals program and you'll really beat the heat. This program allows you to get 20-24 servings of dinner in the freezer ready-to-cook in 90 minutes or less. Sounds unbelievable but it's true. And when you're ready to cook simply pull your meal out of the freezer the night before. Pop it in the crockpot in the morning and at the end of the day you've got a hot, delicious meal, but the kitchen is still cool. Make a salad or side dish and dinner is done. Best of all cleanup is a breeze because you did most of it when you prepped the meal.

Less work, less time in the kitchen, no hot sticky mess. Crockpot dinners are definitely the way to go.

More great crockpot recipes

More delicious summer recipes

Here are a few more fabulous summertime recipes


September - cholesterol awareness month

September Is Cholesterol Awareness Month – Part 3

Focusing on cholesterol awareness

This month we've covered what you need to know and healthy food choices. I've shared lots of great information to help you really understand the importance of cholesterol and how changing your diet can help with heart health. Now for the best part, delicious recipes!!

After all, let's be honest, it's great to know about what to do to make healthy changes, but sometimes it can be just a little challenging to know what to do with that information.  I'm taking the guesswork out of figuring it out by giving you this great roundup of recipes. I start with a few tasty recipe cards below followed by delicious shares from some of my friends to help you add new recipes for your heart-healthy diet.

Heart-healthy recipes

Garlic

This first one was submitted by Sam, a newsletter subscriber who sent it in along with a delightful story:

Peggy's Garlic Soup
Print
Ingredients
  1. 1 head of garlic, peeled and smashed
  2. 32 ounces organic chicken broth
  3. 32 ounces water
  4. 1 handful each of three of these herbs (fresh): Rosemary, Thyme, Sage, Marjoram
Instructions
  1. Put in a large pot, bring to a boil
  2. Reduce heat and simmer for 45 minutes or till the garlic is soft
  3. Remove garlic and herbs
  4. At this point you can freeze or eat
  5. To eat, put back into pot on LOW heat
  6. Add 1 small container of organic cream
  7. Season with a dash of white pepper
  8. Serve over homemade croutons and Gruyere cheese grated on top
The Ingredient Guru, Mira Dessy https://theingredientguru.com/
If you're shrinking at the thought of peeling an entire bulb of garlic here's a quick an easy way to get the job done.

And now for the story:

My sister's knitting group meets at the library.  Last year the group had a drop-in.  We were talking about fall soups.  She said she once made a garlic soup but lost the recipe. I gave her this one.

Yes, she was THE Peggy! We laughed at how far her soup had traveled before she got it back.

Oat Bran

Another great recipe is oat bran muffins.  Now before you run for the hills I promise, these are delicious. It is important to note that if you're not used to a lot of fiber you will need to start with ½ of a muffin and bumping up by ½ of a muffin every 3-5 days in order to allow the body time to re-regulate when adding this much fiber.

Fruity Oat Bran Muffins
Print
Ingredients
  1. 2 cups oat bran, uncooked
  2. ¼ cup fresh ground flax seed
  3. 2 teaspoons baking powder
  4. ½ teaspoon salt
  5. 1 cup organic whole milk
  6. 2 egg whites, slightly beaten
  7. 1/3 cup honey
  8. 3 tablespoons unsweetened applesauce
  9. 1 cup unsweetened dried cranberries
  10. ¼ cup chopped walnuts
  11. 1 mashed banana
Instructions
  1. Preheat oven to 425 F
  2. Line muffin tins or grease bottoms only
  3. Combine dry ingredients, mix well
  4. Combine wet ingredients
  5. Add wet to dry and mix until combined
  6. Fill muffin tins 3⁄4 full and bake 15-17 minutes
Notes
  1. Pre-ground flaxseed meal is often de-germed for shelf stability.  Flax seeds can be purchased inexpensively and ground into meal at home.  This way you get all of the beneficial parts of the seed. Use a clean coffee grinder, pulse them for one minute and then use.
The Ingredient Guru, Mira Dessy https://theingredientguru.com/


Broccoli Avocado Bowl

This delicious dish is from my friend Shawn Borup. It is one packed with heart-healthy ingredients including leafy greens, avocado, beans, and seeds, so yummy!

Broccoli Avocado Bowl
Print
Sauce
  1. 1 Tbsp. miso
  2. 1 Tbsp. unfiltered apple cider or coconut vinegar
  3. 1 Tbsp. organic tamari or coconut aminos
  4. 1/2 organic lime, juiced
  5. ¼ cup organic Greek yogurt
Bowl
  1. 2 cups organic broccoli, chopped
  2. 3 Tbsp. organic pumpkin seeds
  3. 3 Tbsp. organic sesame seeds
  4. 2 cups organic leafy greens, packed
  5. 1 ripe avocado, sliced
  6. 1 ½ cups cooked white beans (soaked overnight and preferably sprouted) or 1 can, No BPA
Instructions
  1. Mix all your dressing ingredients together in a bowl. Steam the broccoli until crisp-tender, about 8 minutes. Set aside. Toast the pumpkin and sesame seeds in a pan over medium heat until lightly golden. Chop the greens and put into a serving bowl. Add the rest of the ingredients and fold in the sauce. Serve over organic quinoa or brown rice if desired. Top with sauerkraut and cayenne pepper to taste.
The Ingredient Guru, Mira Dessy https://theingredientguru.com/


Recipe Roundup

I reached out to a number of friends and I'm delighted to share all of these amazingly delicious recipes with you.

The goal was to create a list of fabulous new recipes for you that include healthy fats plus use ingredients like garlic, onions, high fiber, fish, olive oil, and are low sugar, no crappy ingredients. This roundup covers a wide range of ideas from dressing to dessert. Be sure to bookmark this page so you can stay up to date as it continues to grow.

For more information about healthy food choices don't forget to check out my book, The Pantry Principle: how to read the label and understand what's really in your food. This is your information resource about the ingredients in your food that are not a good choice for health and how you can take back control of your pantry.


What’s Really In Your Food

As you know I spend a lot of time at the grocery store and in people's pantries looking at labels.  The other day I was at a grocery store for a book signing.  I was there for two days.  While I obviously couldn't see every person in the grocery store I was sitting in an area where I had a pretty good field of vision for quite a few aisles.  It took until halfway through the second day before I saw someone actually look at a label.  I was so excited that this woman actually read the label that I ran over and told her so.  Most people either simply selected their favorites or only looked at the front of the package to compare products.

Unfortunately when we shop on autopilot we don't realize what's in our food.  Reading the label is the only way to know what you're really eating.

Below is a list of ingredients that belongs to a very common item found in many homes.  It's also especially popular with children so they consume quite a bit of it:

 Soybean Oil, Water, Egg Yolk, Sugar, Salt, Cultured Nonfat Buttermilk, Natural Flavors (Soy), Spices. Less than 1% of Dried Garlic, Dried Onion, Vinegar, Phosphoric Acid, Xanthan Gum, Modified Food Starch, Monosodium Glutamate, Artificial Flavors, Disodium Phosphate, Sorbic Acid and Calcium Disodium EDTA as Preservatives, Disodium Inosinate and Disodium Guanylate.

So what is it?

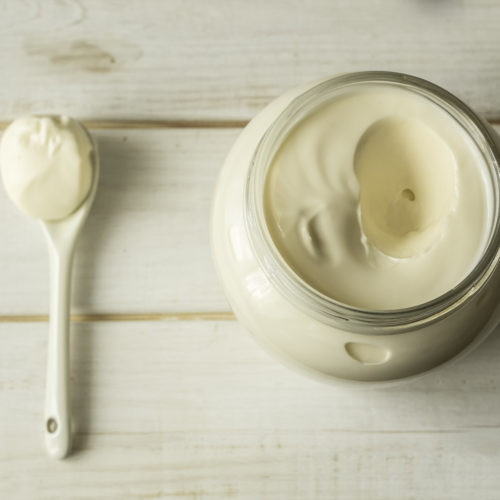
Ranch dressing.  Specifically Hidden Valley Ranch.  I'm not focusing on them, I simply had to pick a bottle and a label.

So let's break this label down and understand what we're looking at:

Genetically modified – the soybean oil and quite possibly the modified food starch which often comes from corn.

Sugar – added sugars in the diet increase inflammation, lower the immune system response, and, in things like dressing, are, in my opinion, not necessary.

rBGH – the buttermilk almost certainly contains this hormone which was given to the cows to make them produce more milk.  Linked to an increase in IGF-1 which is linked to diabetes it's not something you want in your food.

MSG – flat out, right on the label.  This ingredient may make things taste better but it can cause a wide range of symptoms from headaches, rashes, and flushing to muscle weakness and fatigue.

Artificial flavors – why would you want to eat anything fake?

Unknown ingredients – do you really know what Phosphoric Acid, Disodium Phosphate, Sorbic Acid, Calcium Disodium EDTA, Disodium Inosinate and Disodium Guanylate are?  If you don't know what it is you shouldn't eat it.  Just as a brief example of some of the health risks, phosphoric acid may be linked to lowered bone density, and calcium disodium EDTA is a preservative which has the potential to cause kidney damage.

I cannot recommend strongly enough how important it is to know what's in your food and to read the label.

Looking for an alternative to packaged ranch dressing?  Try making your own, simple to make, fresh tasting, tangy and the flavors can be modified to be exactly to your personal preference.

homemade ranch dressing

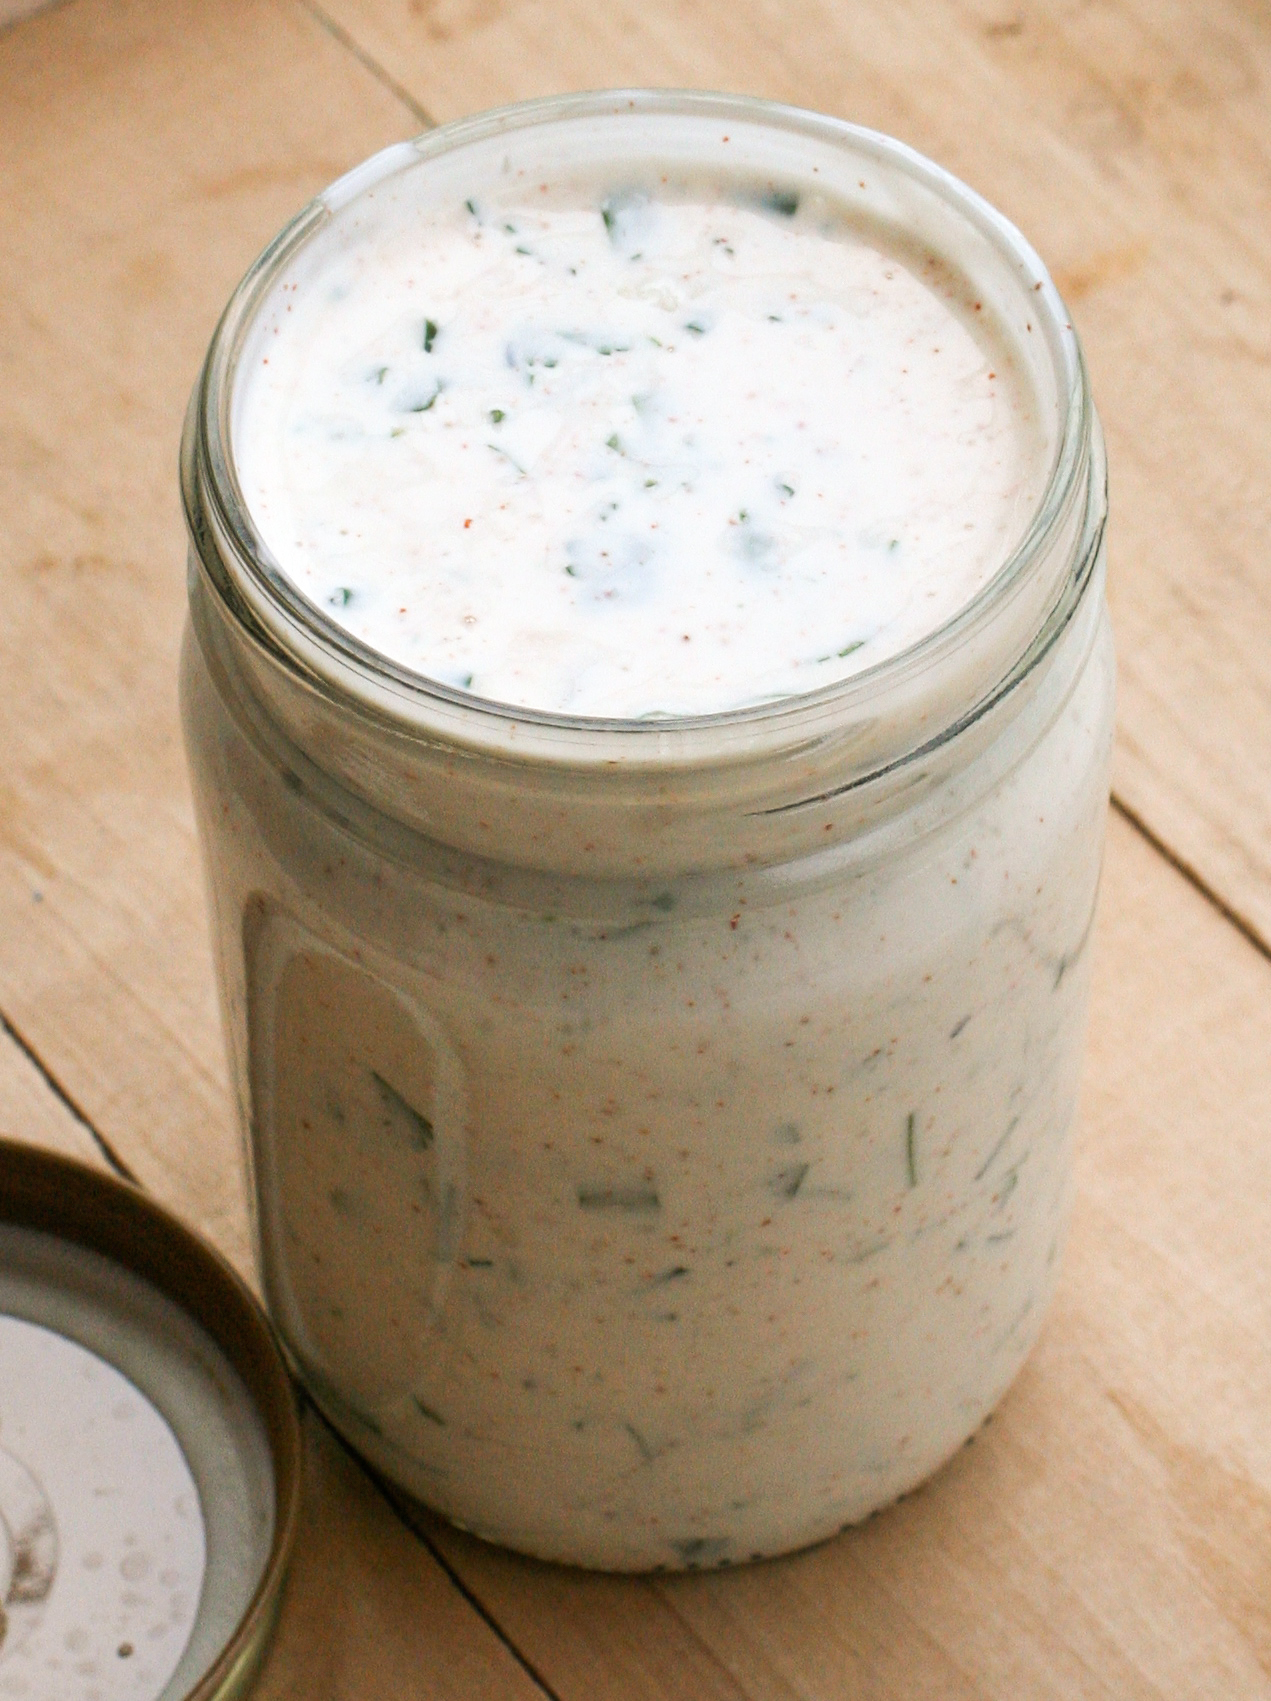
Homemade Ranch Dressing

1/2 cup organic whole milk*
1 tablespoon raw apple cider vinegar
2 cloves garlic
1/2 teaspoon salt
1 tablespoon fresh chopped parsley
1 teaspoon fresh chopped chives
2 tablespoons mayonnaise
2 tablespoons organic sour cream
fresh ground black pepper to taste

Pour apple cider vinegar into milk and let sit
In a separate, wide mouth bowl place garlic and salt
Mash together with a fork until garlic turns into a paste
Add chopped herbs, mayonnaise, sour cream, and black pepper
Blend this mixture with milk, combine well
Best served immediately, however leftovers store well in the fridge for up to a week

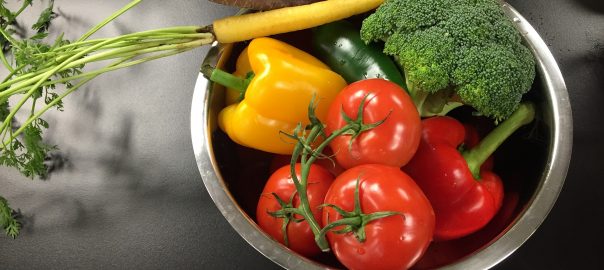
This is delicious not only on vegetables but as an addition to mashed potatoes, as a dressing for pasta salads, and is the perfect dipping sauce for homemade wings.

*Note:  there was a typo in the original which called for 1 cup of milk.  That will make a very thin ranch dressing.  I prefer mine a little creamier and so have amended it to reflect my initial recipe.

photo: Diádoco

Garlicky Cherry Tomato Bombs

Cherry Tomato BAsil Garlic

After learning about the benefits of garlic yesterday, we're offering a light dish to tickle your taste buds. This garlic infused cherry tomato is the perfect aperitif partner with a white wine or rosé and as a complementary side dish with a salmon or chicken entrée.

(more…)

Un-Stuffed Cabbage Casserole

This post, and delicious recipe, are from my friend Robin Horn over at Seasonal Eating.  A foodie from a very young age, Robin lives in Santa Cruz, California, and is a proponent of seasonal eating and CSAs.  

Cabbage is coming into season and there are so many delicious ways to serve it.  While I love stuffed cabbage I confess that the time it takes to make all those little rolls (especially compared to how quickly they get scarfed down) is somewhat of a deterrent.  This seems like a tasty solution, and since it makes 12 servings it would be great for a big family gathering (or for delicious leftovers).

Someday I will make stuffed cabbage leaves, the delicious galumkis that my mother and grandmother used to make…sort of. The family recipe was never written down, so this is a project for when time, patience, and creativity are simultaneously expanded.

In the meantime, working on my cooking goal of exploring my Polish cooking roots, I found a Weight Watchers stuffed cabbage casserole, and set out to make a no-beef, more easily prepared version.

Because the original recipe had a number of cabbage leaves wrapped around one mound of filling, it was tricky to cut and serve—and to fill in the first place. So, I simply chopped all of the cabbage and put half in the filling and half beneath the filling, where all the juices from the filling drip down deliciously.

I topped the filling with a thin tomato sauce. Originally I tried a layer of cabbage on the top, but the tomato sauce dried out instead of flavoring the cabbage. So I replaced this layer with a few thin cabbage strips. The meat and rice filling right below the tomato sauce draw the tomato flavor down into the casserole because the uncooked rice is “thirsty.”

While not as time-consuming as stuffed cabbage leaves, there are many steps in this recipe and it must cook for 1½  hours. Just like stuffed cabbage, the leaves must be precooked. Save time by having two people chop veggies, measure and mix meat filling ingredients,  make the sauce, and assemble the layers.

You can use lean ground beef in this recipe if you prefer. I added paprika from my family recipe. You could choose various herbs, garlic powder, and/or a hint of cayenne. If you’re braver than I am, you can blend the meat mixture with your hands, like my Mom did. It’s faster, and if I’d had some latex gloves, I would have tried it.

 
Note from Mira:  I find it's simple to mix meat mixtures like this in my blender.  And since I'm often working with cold ingredients I don't get that chilled effect on my hands which I find unpleasant.


Un-Stuffed Cabbage Casserole

Servings 12

Ingredients
  

  • 2 ½ lbs. cabbage
  • 1 lb. ground turkey
  • 2/3 cup shredded carrot
  • ½ cup minced onion
  • ½ cup brown rice
  • ½ tsp. salt
  • 1½ tbsp. paprika
  • 1 large egg
  • 1¼ cup chicken or veggie broth
  • 24 oz jar tomato sauce
  • 2 tbsp. wine vinegar
  • 2 tsp. sugar
  • olive oil for greasing pan

Instructions
 

  • Bring a large pot of water to a boil.
    Remove 3 outer leaves from cabbage to make the strips of cabbage for the topping. 
    Cut remaining cabbage into quarters without removing core.
    Boil each quarter cabbage in water until tender, about 5 minutes. 
    Drain well and cool. 
    Chop cabbage quarters into ½ inch dice, discarding cores. 
    Boil the 3 cabbage leaves in water 3 - 4 minutes, until tender. 
    Remove with slotted spoon, drain and cool. 
    Cut out rib and make ½ inch strips of soft parts. 
    Dice ribs with quarter cabbages.
  • Preheat oven to 350 degrees F.
  • Put ground turkey into bowl and break up into pieces with wooden spatula. 
    Mix in carrot, onion, rice, salt, and paprika. 
    Beat egg together with ¼ cup broth till smooth. 
    Add this mixture and ½ cup tomato sauce to meat mixture and beat till evenly blended.
    Mix in half of the cooked chopped cabbage evenly. To make the sauce, combine the remaining tomato sauce with wine vinegar and sugar.
  • Lightly oil a 9” x 14” baking pan. 
    Spread the remaining half of the cabbage in the bottom of the pan. 
    Pour the remaining (1) cup of broth around the edges of the pan. 
    Spoon on the meat mixture. 
    Smooth out with a rubber spatula to make an even layer. 
  • Place the cabbage strips across the top, leaving space between them.
    Pour tomato sauce over top of meat mixture and cabbage strips and spread into even layer.
  • Bake for 1½  hours. 
    Let stand at least 20 minutes before serving so liquid is absorbed.

Swiss Chard Two Ways

The other night I picked the last of my Swiss chard from our garden for dinner. It's one of my favorite dark leafy green vegetables. Antioxidant-rich, loaded with vitamins K, A, and C, Swiss chard also provides a healthy dose of magnesium.

Often when we eat it I make simple sauteed greens. This time, however, I wanted to do something different and came up with these two recipes, using the entire leaf. 

Although most people throw out the stems, they are delicious and can be cooked in a variety of ways. These are the two recipes I created using all of the Swiss chard. I can't wait to plant more and enjoy this again.

Braised Carrots and Swiss Chard Stems

Ingredients
  

  • ½ onion, diced
  • 8 carrots, sliced into ½ inch pieces
  • Stems from Swiss chard, cut into ½ inch pieces
  • 2 tablespoons butter
  • ¼ cup water
  • Sea salt and fresh ground pepper to taste

Instructions
 

  • In a large pan melt butter
  • Saute onions until starting to turn golden color
  • Add carrots and Swiss chard stems
  • Stir to coat with butter
  • Add water and bring to a boil
  • Reduce heat and cover
  • Cook until carrots are tender (about 15 minutes)
  • Add salt and pepper to taste

Creamed Swiss Chard

Ingredients
  

  • Large bunch of Swiss chard
  • ½ cup boiling water
  • ½ onion, diced
  • 1 clove garlic, pressed
  • 2 tablespoons butter
  • ½ cup organic sour cream
  •  ½ cup organic whole milk
  • sea salt and fresh ground nutmeg to taste

Instructions
 

  • Trim stems from Swiss chard
  • Cut leaves into 1” pieces
  • Wilt in boiling water until limp
  • In a large saucepan melt butter
  • Saute onions and garlic until onions start to turn golden color
  • Whisk sour cream and milk together
  • Pour over onions and heat until just starting to bubble
  • Add wilted Swiss chard leaves
  • Bring to a boil, stirring frequently
  • Reduce heat to just under boiling
  • Cook 5-7 minutes until sauce thickens slightly
  • Add sea salt and fresh ground nutmeg to taste