All posts by Mira


About Mira

Mira Dessy is The Ingredient Guru. A holistic nutrition professional, author, and a popular public speaker, she knows that it's not just what you eat, but what's in what you eat. She is the author of The Pantry Principle: how to read the label and understand what’s really in their food. Dessy is a Board Certified Holistic Health Practitioner whose mission is to educate and empower consumers. She curates the Lean Clean Green Subscription box, the premier, organic, earth-friendly, healthy, sustainable subscription box which can be found online at https://theingredientguru.memberbox.com

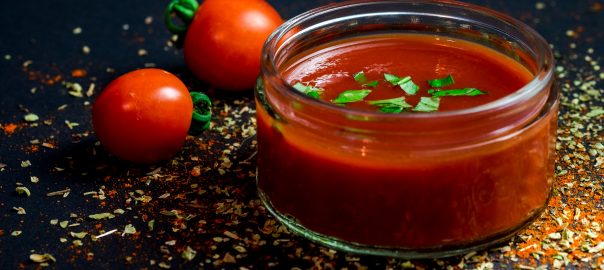
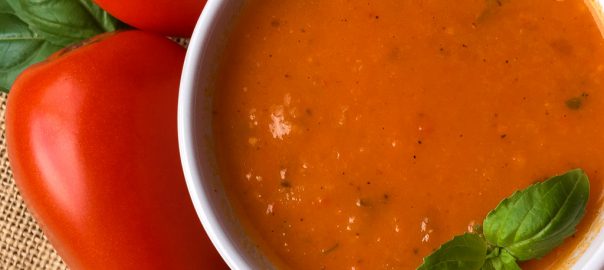
Roasted Vegetable Soup

Roasted Vegetable Soup With Tomato And Fennel

As the weather gets chilly and the days get shorter I find an increased desire for soup. Nourishing and warming, soup seems to really hit the spot.  Plus it’s so versatile. Soup is great as a snack, as a meal starter, or in some cases as the meal all by itself. 

This particular roasted vegetable soup is a favorite. After all, who doesn’t love tomato soup? But part of what makes this so wonderful is the fennel which gives it a delicious flavor boost. This soup tastes even better the second day, so be sure to make a lot (this recipe doubles or even triples with ease) to ensure you have leftovers.

Roasted Vegetable Soup with Tomato and Fennel
Print
Ingredients
  1. 1½ lbs. Roma tomatoes, halved
  2. 2 medium red bell peppers, deseeded and quartered
  3. 1 large fennel bulb, thinly sliced
  4. 2 large carrots, cut in half lengthwise
  5. 2 medium shallots, outer skin removed and halved
  6. 4 cloves garlic, smashed and peeled
  7. 2 T. extra virgin olive oil
  8. Sea salt and black pepper, to taste
  9. 2 T. fresh thyme leaves
  10. 4 c. organic chicken bone broth
  11. ½ c. full-fat coconut milk
  12. ½ c. fresh basil leaves, thinly sliced
Instructions
  1. Preheat oven to 400°F
  2. Line a large, rimmed baking sheet with parchment paper or a baking mat and set aside
  3. Arrange the tomatoes, red peppers, fennel, carrots, shallots, and garlic in a single layer on the prepared baking sheet
  4. Drizzle with olive oil and season with salt and black pepper, to taste
  5. Toss to combine and sprinkle veggies with fresh thyme leaves
  6. Place baking sheet in preheated oven and roast until vegetables are tender and lightly charred, approximately 20-25 minutes
  7. Transfer the roasted veggies and any juices from the baking sheet to a large soup pot and add the bone broth
  8. Cook over medium heat, stirring occasionally, until hot and and bubbly
  9. Remove from heat
  10. Using an immersion blender, blend contents of the soup pot until completely smooth
  11. Stir in the coconut milk and fresh basil, and serve
  12. Enjoy!
Notes
  1. Safety Tip: If you don’t have a stick or immersion blender, it is possible to use a blenders to process the cooked veggies and liquid. However it is important to be sure your blender lid is vented  properly to prevent the hot liquid from exploding when you turn on the blender.
The Ingredient Guru, Mira Dessy https://theingredientguru.com/

Store in the refrigerator for several days. It can also be stored in single-serving containers in the freezer for a quick meal or snack later.

The Lean Clean Green Hydration Box

Hydration

Each month here at the Lean Clean Green Subscription box I create a theme and then curate products around that. One because it’s fun, two because it gives me the opportunity to share some great information about how to create your best, healthiest life. What I call the Ingredients For A Healthy Life.

Hydration is a theme that is near and dear to my heart. I feel that many people don’t realize how important it is to stay adequately hydrated. And while not everything in the box is drinkable, it all ties together. But before we run through the products I wanted to share a few links that I believe are helpful:

  • Staying well-hydrated is one way to help support your body when it’s hot and humid outside or if you’re exercising a lot. It’s also important in the colder months because you may not realize you are getting dehydrated. This article shares some good info plus gives you the hydration factor so you can figure out exactly how much you need to drink to stay well hydrated (hint: it’s probably not the 8 glasses you thought it was)
  • Hydration is more than just drinking water. We can also meet some of our hydration needs through the foods we eat. Check out this post to see which foods are the best when it comes to hydrating your body.
  • Sometimes you want something that’s not water but is still hydrating. A couple of my favorite choices are agua fresca and water kefir
  • And remember that if you’re looking for hydration, please don’t rely on sports drinks. They’re not as good for you as the manufacturers would have you believe.

What’s in the box?

We’ve got some fabulous products in this month’s box and I know you’re going to love them too.

But first…The disclaimer:  I’m not pulling stock photos when I share the contents of the box with you. These are my pictures taken of the products in my box. I’m learning how to take better pictures but I wanted you to know this is real life and yes, these are from my personal subscription.

Strawsome Glass Straws 

I’m a big fan of reusable straws. And there is nothing better, in my humble opinion, than having your own straw with you, especially when you are out an about. 

I’ve given you not one but two straws. You can leave one at home and take one on the road, or simply share a straw with a friend.  The only hard part about sharing may be that they don’t want to give you back your straw. Making it a perfect opportunity to go into the marketplace and order one for each of your friends so everyone has their own.  And each tempered glass straw comes with their own cleaning brush. 

Lean Clean Green Hydration Box - Sipping Vinegar

Sipping Vinegar 

These delicious vinegars from Vermont Village are just fabulous. I’ve chosen the blueberry flavor for you but you can also get them in other flavors (their Turmeric & Honey is pretty awesome too). 

Each bottle comes with raw and unfiltered apple cider vinegar. That means the mother is still in the bottle.  These are great as a shot, as a sipping drink, or to add to other beverages for flavor and health benefits. You can even add these delicious sipping vinegars to other dishes. I’m thinking of adding some of this blueberry to my Thanksgiving homemade cranberry sauce to give it a little blueberry lift. Of course, I’ll need to buy more because we all know it’s not going to last from now till then.


Lean Clean Green Hydration - Wine Wands

Wine Wands

Of course if you’re looking for a more adult beverage you may be thinking about wine. Part of the challenge with wine, however, is some of the ingredients.  I’m talking about the sulfites and the histamines. Those ingredients responsible for that “not so great, got a headache” feeling after you drink wine. While you can buy sulfite-free wines they’re often expensive. And they still come with histamines.  

Using a wine wand allows you to remove both the sulfites and the histamines so you can enjoy a glass without worrying about the headache.  I’m not sure how their patented process really works (I think it’s magic), but they’re winning rave reviews. 

Try it and let me know what you think.

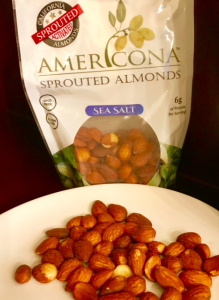
Lean Clean Green Hydration Box - Americona Almonds

Americona Sprouted Almonds 

Of course you can’t have all that hydration with a little snack. And these are my new favorite sprouted almonds. These crunchy little gems are just amazing. 

When you sprout nuts (and seeds, legumes, and grains) you remove the phytic acid coating that interferes with nutrient absorption. The process of sprouting helps to boost the nutrition just a little bit. Sprouting also improves digestion. It’s really the best way to eat almonds.

The folks at Americona use only 100% pure olive oil plus sea salt to make a truly tasty treat for you to enjoy.

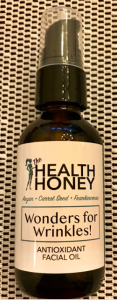
Lean Clean Green Hydration - Healthy Honey Facial Spray

Healthy Honey Facial Oil 

Okay so you can’t eat or drink this one. But it’s like a hydration drink for your face. This facial oil/spray feels so good you’re going to wonder how you managed without it.  One of the things that I love the most is the clean ingredients. After all, what we put on our skin can migrate into our bloodstream. That’s part of why using lotions and potions that contain things like artificial colors, sorbates, EDTA, and other negative ingredients is never a good idea. 

Admittedly it’s not always easy to find great personal care products, but I’m a fan of this facial oil. Filled with antioxidant rich ingredients and amazing for the skin, it’s definitely a perfect addition to your skincare routine.


When you join the Lean, Clean, Green Subscription box family you’ll get a themed box filled with holistically healthy, well-sourced products personally curated by me. Each month you pay only $47.

The September 2019 HydrationBox is worth $97.97!!

* The best part about the box is that you’re in control of how often you get it. Monthly, every other month, every three months, it’s up to you. And if you miss a box, or need a refill on any of these fabulous finds, as long as you’re a subscriber you have access to the Marketplace. That means you can log in and still get the items you want.

If you’ve just found this post and you’re not a member of the Lean Clean Green family, join us, you’ll be glad you did.

Should you do low FODMAP

Should You Try A Low FODMAP Diet?

What is a FODMAP?

FODMAP is an acronym used to identify a series of short-chain carbohydrates and sugar alcohols in foods that are either naturally occurring, or used as food additives. This acronym stands for:

Fermentable – these items are broken down by the bacteria in our large bowel
Oligosaccharides – “oligo” means “few”, “saccharide” means sugar. These are individual sugars which are chained together
Disaccharides – “di” means two meaning this is a molecule with two sugars
Monosaccharides –(non-intoxicating) sugar alcohols
And
Polyols – a form of carbohydrate that is only partially digested

Does your gut hurt?

Do you have significant digestive health issues? After you eat do you feel ill or very tired? Do you have cramps or other digestive health issues? If so you are probably one of the millions of people who struggle with some form of Irritable Bowel Syndrome (IBS). The causes of IBS are many and varied but the one thing that they all have in common is that they start in the gut. And many of these issues can be resolved by changing your diet. 

Some people with gut health issues may try a gluten-free diet. If that doesn’t quite seem to do the trick they then look at the possibility that it’s not the gluten but the glyphosate (the active ingredient in Roundup which is used to dry out crops before harvesting) that is the problem. So they avoid that. And while that often helps it may not be enough. If the issues are IBS, or if there are concerns about digestion in general, you may find that a low FODMAP diet is the answer.

Common Symptoms of Digestive Health Issues

While a low FODMAP diet can be a good choice for people with IBS or related issues, it can also be supportive for those with general digestive health problems. A low FODMAP diet does this by eliminating those foods which might be triggers. Some of the signs that you may want to consider this diet include:

  • Abdominal pain after eating
  • Bloating
  • Bowel Incontinence
  • Cramping
  • Regular Constipation or Diarrhea
  • Nausea or vomiting

Is your gut health getting worse?

Maybe you are one of those people who has had some form of mild digestive health issues for years. Or you’ve been diagnosed with IBS but it’s never been “that bad.” But your gut health has been getting worse lately. While there is always a possibility that this can be part of the aging process, it can also be due to your diet.

If you have regular bloating or stomach upset after eating but can’t identify what’s causing the problem, food journaling and a dietary change can be a good way to figure out what your triggering foods are. Part of the issue is that our meals are/should be made up of a variety of foods. This makes it difficult to pin down specifically which foods are causing the problem.

And while your gut health issues might be related to any of the common food allergens such as gluten, dairy, nuts, etc, it could also be other foods. Following a FODMAP diet removes these foods, plus others, from the diet while you work on restoring gut health.

If you enjoyed this article, please join my community to receive more information and special offers with my free newsletter, Food News You Can Use (I do the research so you don’t have to). This concise, informative newsletter gives you updates you need to know about the ingredients for living a healthy life.

But the label said no nitrates

But The Label Says No Added Nitrates

What are nitrates?

Nitrates and nitrites are preservatives frequently found in preserved meats such as deli meats, hot dogs, sausages, etc. Nitrates are seen as the less harmful of the two, however, they can turn into nitrites which are linked to more serious health concerns.

Nitrites help keep the meats looking pink and can prevent the growth of listeria or botulinum bacterias. Unfortunately, however, consuming high amounts of nitrates and nitrites can be bad for your health. And nitrites can further degrade into nitrosamines (which are highly carcinogenic) when exposed to the amino acids in the stomach. 

Health impact of nitrates

Studies have shown that people who eat a lot of processed meats tend to have a higher than average risk for cancer including pancreatic and gastrointestinal cancers. Other studies indicate a link between nitrosamines and diabetes, Alzheimer’s, and liver disease. So even if you’re not highly sensitive to nitrates, consuming a lot of them is not a good idea. 

“No nitrates” on the label

Sometimes you’ll see labels that say “no nitrates.” You may be wondering how they’re preserving the food.  The answer is they’re still using nitrates, they’re just using a different form, usually celery juice or celery salts.

This is a case of manufacturer manipulation. Because of what these food/based nitrates are, the current FDA rules allow for the product to be labeled either No Nitrates or No Added Nitrates. (Similar to how they allow certain glutamate-rich products to be labeled no added MSG).

Because of consumer demand for cleaner labeling, some food producers are choosing to manufacture with these food-based nitrates. They then use Front-of-Package terminology to lure consumers to their products. However, some people are very sensitive to nitrates, even the food-based ones. So once again it comes down to reading the ingredient panel and knowing what’s in what you are eating.

Symptoms of allergy or sensitivity

The symptoms of nitrate sensitivity include headaches, sinus issues, stuffy nose, sneezing, runny nose, itching, hives, or asthma. It can be difficult to pick out if it’s specifically due to nitrates as these symptoms can be found with other ingredients as well.

If you think you are sensitive you can check with a doctor for an allergy test. You can also do an elimination diet and avoid all sources of nitrates. Those added to the food, as well as the vegetable-based sources listed below. When doing an elimination diet it’s important to keep a food journal so you can closely track your symptoms in relation to the food you are consuming.

Food sources of nitrates

High nitrate vegetable sources include:

  • Beets
  • Cabbage
  • Carrots
  • Celery
  • Collard Greens
  • Green beans
  • Lettuce
  • Parsley
  • Radishes
  • Spinach

Plus, when these ingredients are juiced, the longer they sit the more the nitrates convert to nitrites. So if you make juice that includes these kinds of vegetables, it’s best to drink it right away rather than letting it sit.

If you’re looking to consume low nitrate vegetables, these are:

  • Artichokes
  • Asparagus
  • Broad Beans
  • Eggplant
  • Garlic
  • Green beans
  • Mushrooms
  • Onions
  • Peas
  • Peppers
  • Summer Squash
  • Sweet Potatoes
  • Tomatoes

It’s also important to know that industrial fertilizers are high in nitrates. This means that commercially grown crops tend to have higher levels. In other words, the more nitrate-rich the soil they are grown in, the higher the nitrate level in these vegetables.

[expand title=”Sources”] 

  • Hord N.G., Conley M.N. (2017) Regulation of Dietary Nitrate and Nitrite: Balancing Essential Physiological Roles with Potential Health Risks. In: Bryan N., Loscalzo J. (eds) Nitrite and Nitrate in Human Health and Disease. Nutrition and Health. Humana Press, Cham.
  • Nothlings, Ute, et al. Meat and Fat Intake as Risk Factors for Pancreatic Cancer: The Multiethnic Cohort Study. Journal of the National Cancer Institute. Vol. 97, No. 19. October 5, 2005.
  • Tong, M, et al. Nitrosamine Exposure Causes Insulin Resistance Diseases: Relevance to Type 2 Diabetes Mellitus, Non-Alcoholic Steatohepatitis, and Alzheimer’s Disease. J Alzheimers Dis. 2009; 17(4): 827–844.
  •  

[/expand]

If you enjoyed this article, please join my community to receive more information and special offers with my free newsletter, Food News You Can Use (I do the research so you don’t have to). This short newsletter gives you updates to help you stay informed about the ingredients for living a healthy life.

Instant Pot Vs. Air Fryer

What do you do if you’re an Instant Pot fan, you really want to get an Air Fryer, but you have no kitchen counter space? Do you have to pick one or can you have both? This was me. Fortunately, I found a solution.

I love my Instant Pot

I’m a big Instant Pot fan. Ever since I got mine it has migrated to live permanently on the kitchen counter and I use it several days a week for a wide variety of things. When I got my Instant Pot I was able to get rid of my popcorn popper, my rice cooker, and my pressure cooker. My husband was pushing for me to get rid of the slow cooker as well but I defended it because (a) I’ve had it since I was 18 and I’m kind of attached to it, and (b) when you have a party sometimes you need an extra cooking device.

For me, having an Instant Pot has been a game-changer in my kitchen. I use it for a so many things, especially this delicious Instant Pot Summer Vegetable Soup.

But I want an Air Fryer Too

When I heard about Air Fryers I was tempted. I'm seeing them everywhere. They are very popular and everyone seems to be getting one. But after much careful consideration, I decided not to get one.

Sure an Air Fryer is a cool idea. It uses only a tiny bit of oil plus some heated air to ‘deep fry’ your food. Okay, it’s great that you can make “fried” foods that are healthier and cook them really quickly. I was seriously tempted.

But then I looked at my kitchen and realized that counter space was at an all-time premium. In fact, I joked that if Instant Pot came out with a new version that did air fryer plus the other 11 functions I would be all in, but until then I was sticking with my IP. 

How does an air fryer work?

For all you Air-Fryer-Curious people, let’s look at how an air fryer works. Unlike the multi-function Instant Pot, it’s pretty much a single-use device. With just a little bit of oil, a high temperature (an average of 392°F / 200°C according to my research), and air circulating rapidly, you get convection cooked food with a “fried” texture. Due to the convection cooking, foods do cook in much less time than actual frying.

Although the process is somewhat similar to a deep fryer, the Air Fryer uses a lot less oil so the idea is that you are getting a healthier “fried” food. This cuts down quite a bit on the fat and calories. However, you still get to enjoy the crispiness of fried foods. 

The Solution

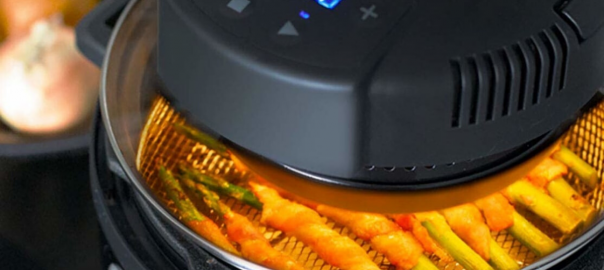
While I wasn’t prepared to give up my Instant Pot I was very tempted by the idea of an Air Fryer (have I mentioned that?). Then a friend shared something I had never heard of before. A Mealthy Crisplid.

What is a Mealthy Crisplid? It’s a lid that converts any 6 or 8 quart Instant Pot or electric pressure cooker into an Air Fryer. It’s kind of like the best of both worlds because you get to keep your Instant Pot but you don't have to have another big counter-space-required appliance for air frying.

I was blown away by this concept. And I bought one.  Of course, now I’m having to learn how to make air-fried things. And while I don’t plan to make a lot of them, it’s a nice way to be able to add that to our meal planning.

Basic Tips

I’m still learning how to use my crisplid, but I’ve learned a couple of tips that are important whether you have an air fryer or a crisplid.

Do the Prep Work

Prep work is key for this method of cooking. You have to take your time to make sure that things are properly coated, that they’re seasoned or oiled as required, and that you’ve followed instructions on how to prep the food. The recipes are not like traditional deep-fried recipes where you can just throw it in the oil and it mostly sticks together. 

Loading Your Air Fryer

You’ll need a basket to hold the food in so that it can get good circulation (the Mealthy comes with a trivet and a basket). I’ve learned the hard way that you need to (a) not overcrowd the basket, and (b) flip the food partway through to make sure the browning and crispiness is even. I’m still working on perfecting French fries (this is where I’ve really learned the importance of not putting too much into the basket).

Be aware of temperatures

Your Mealthy, and I’m assuming an Air Fryer too, gets HOT. You need to use caution when handling it, have a good surface to set the lid down when flipping items over, be careful when handling the parts, and remember the foods come out fried-food-hot. You also need to wait until the device is completely cool before you clean it. So caution and patience are the words of the day here.

Quick Recipes

If you're looking for a solution to the Instant Pot vs. Air Fryer dilemma, this may just be the answer you are looking for.

As I mentioned above, I'm still learning, but here are a few quick recipe ideas that I’ve found as I’ve been doing my research. I’m going to keep experimenting and learning as I continue to use my Mealthy Crisplid but I’m glad I got it.

Mozzarella Sticks

Instead of the melted cheese thing that tends to happen in a deep fryer, air frying is an easier way to make mozzarella sticks. Cut mozzarella sticks in half, dip them into beaten egg and roll in grated parmesan with 1 teaspoon of Italian seasoning. Then put them into the air fryer (spray the basket with olive oil) at 390°F for 4-6 minutes.

Fried Broccoli
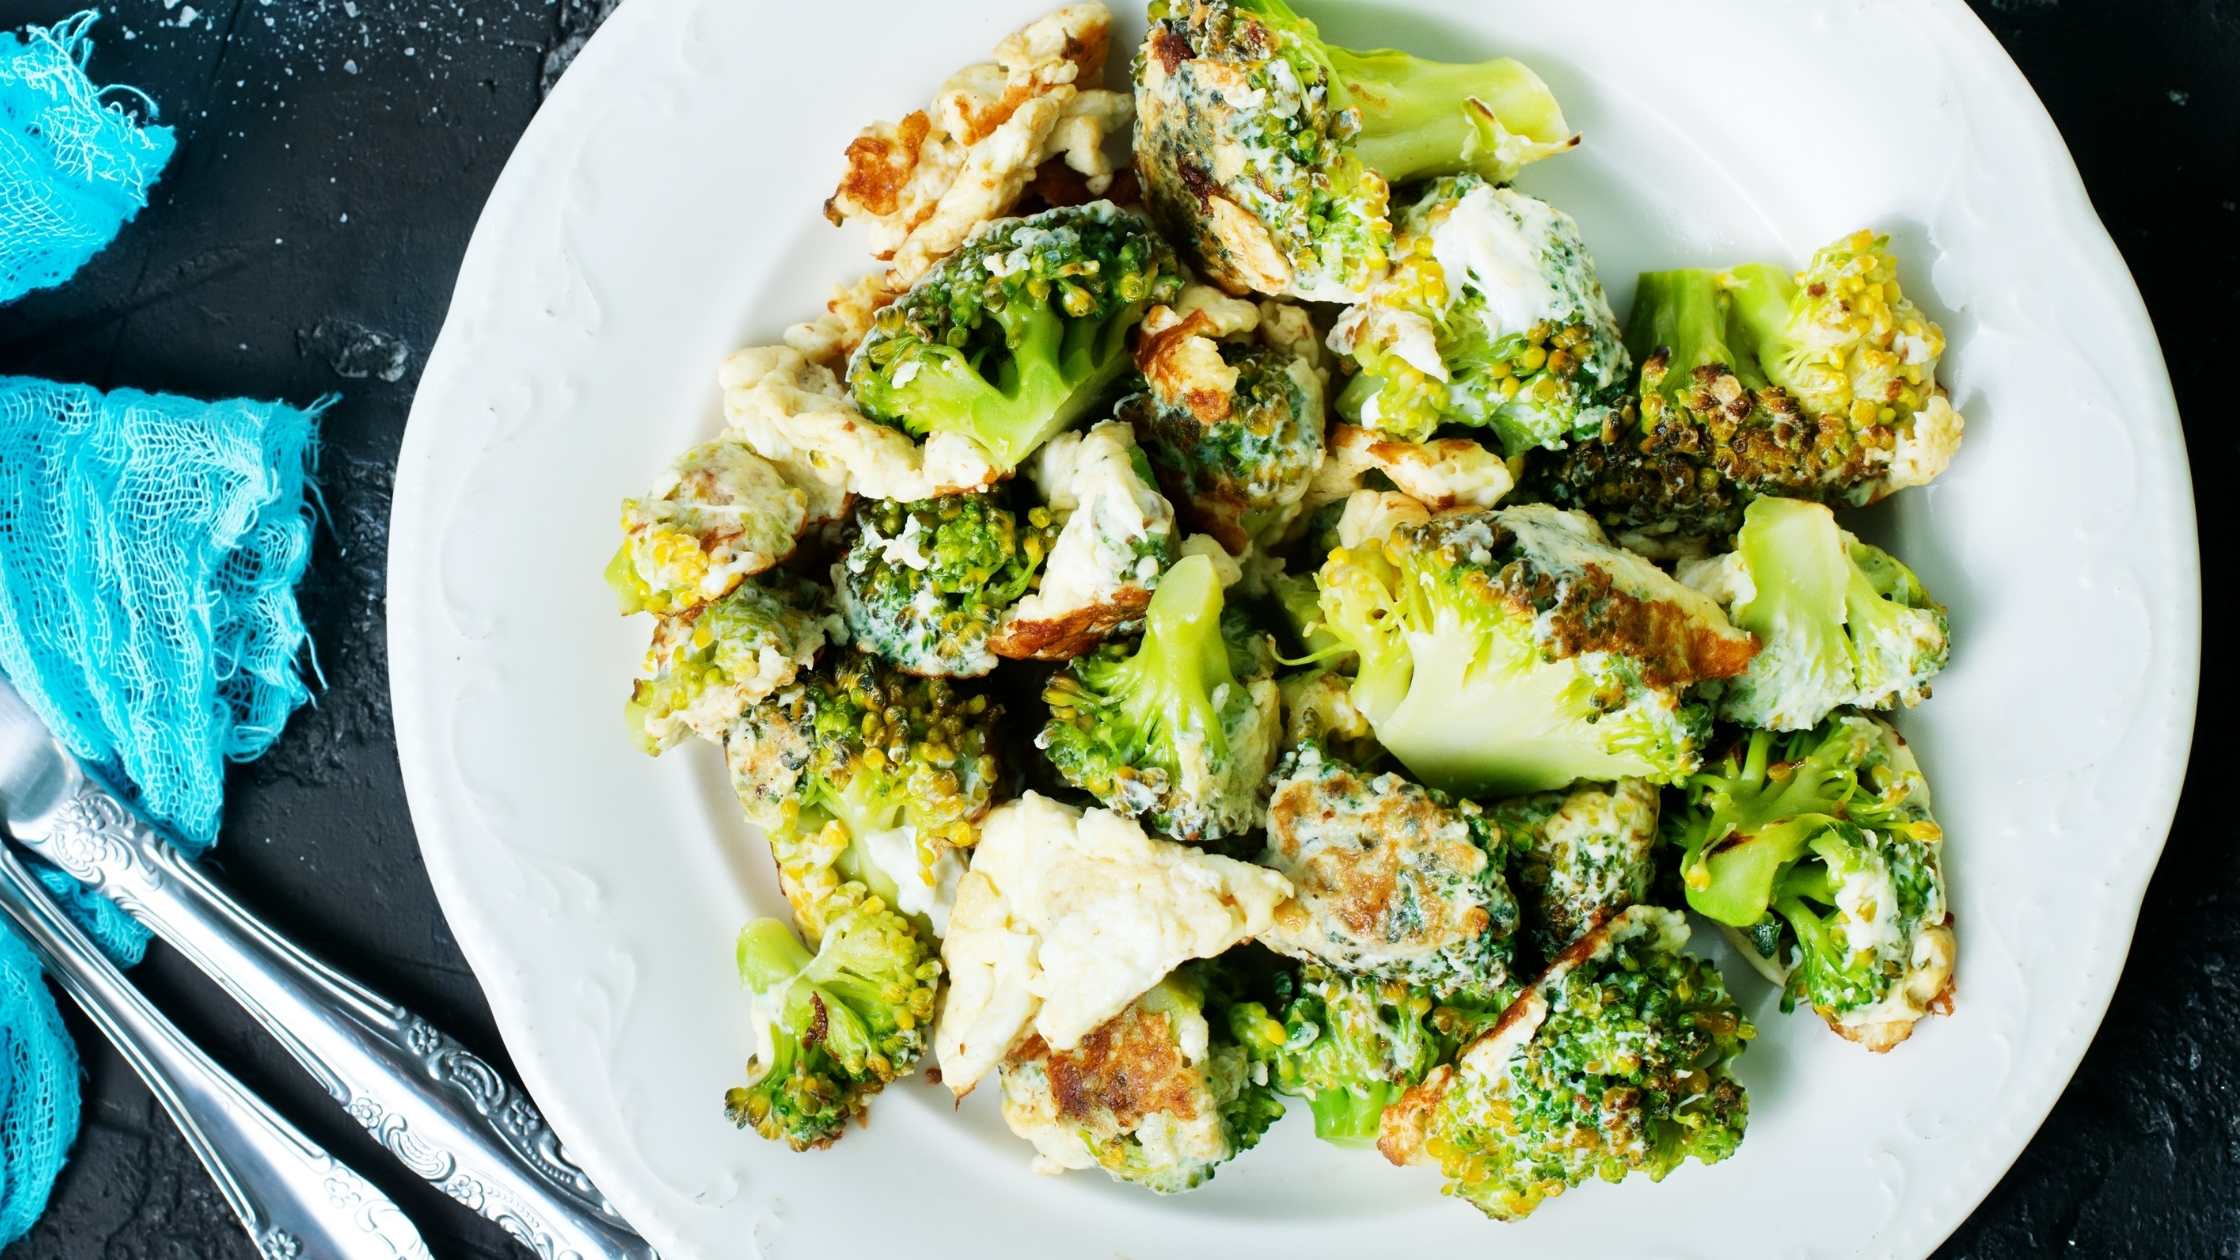
This can be a delicious way to eat broccoli. It comes out with a crispy edge. Soak small florets in water, and drain. Then roll in almond flour with a seasoning of your choice. Put into your sprayed air fryer basket and cook at 400°F for 10 minutes.

Banana Chips
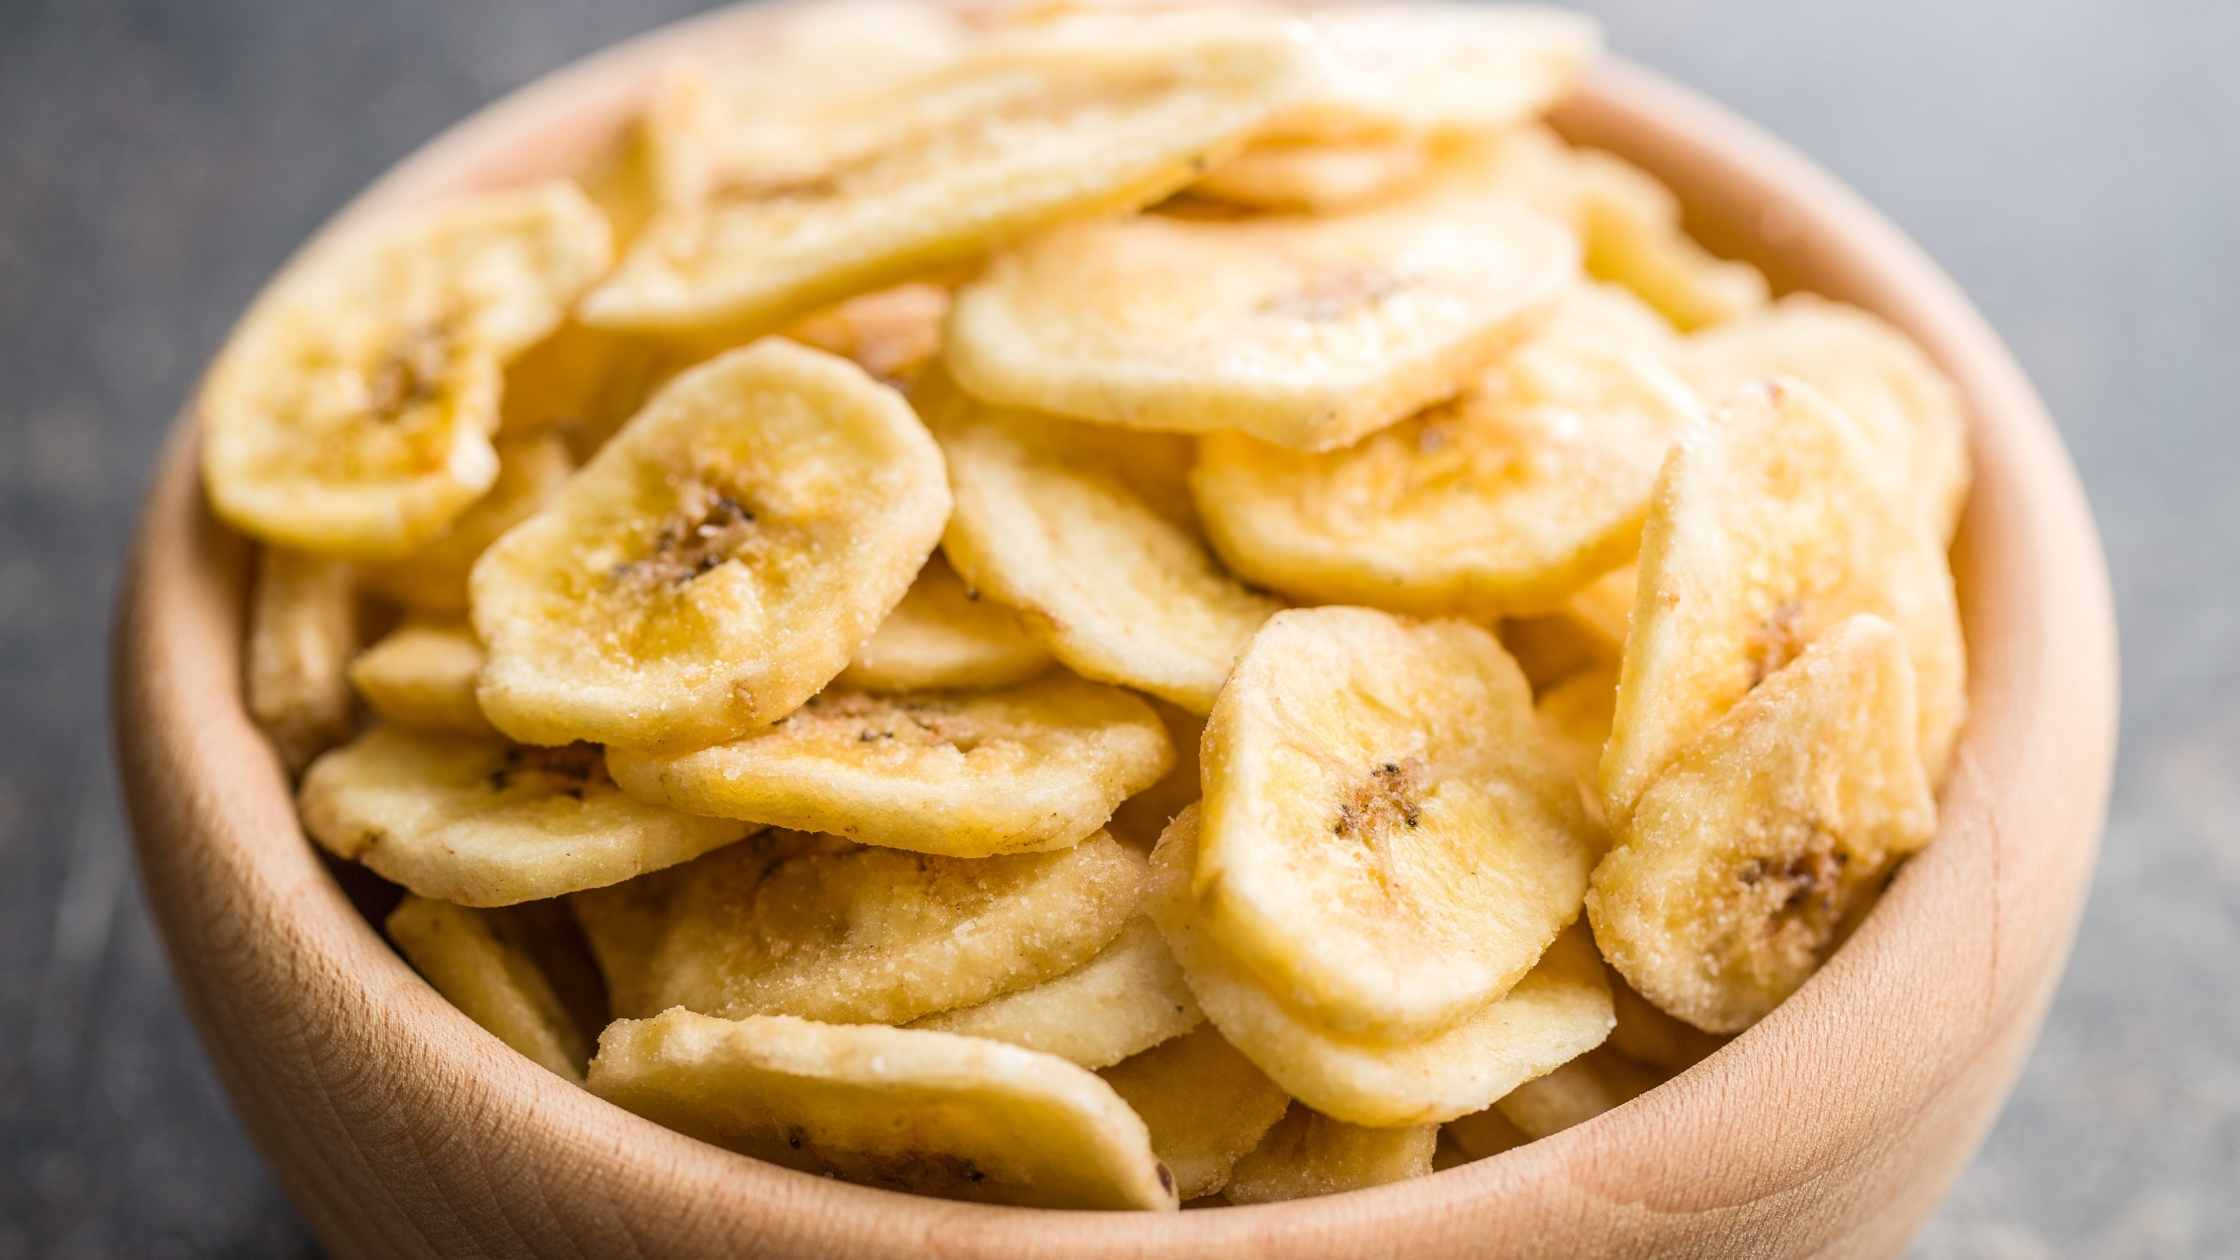
I love banana chips and this could be a great way to make them at home and skip the preservatives that they typically come with. It’s important to use bananas that are greener and not too soft or mushy. Slice thinly, mist with a little olive oil, add salt, cinnamon, or any other seasoning you’d like. Place into an oiled basket and cook at 395°F for 15 minutes.

 

The Self-Care And Pampering Box

I’m thrilled about the contents of this month’s Lean Clean Green Subscription box. This first box has some great products and the theme for this month is self-care and pampering. Why? Because let’s be honest, most of us are so busy taking care of others that we often forget to take care of ourselves. And it’s difficult to carve out that time for yourself. Well now I’m sending you a self-care kit.* In a box. Delivered right to your door. So there’s no excuse.

This month’s products

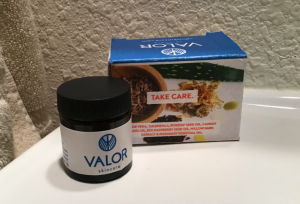
Valor Facial Lotion - LCG BoxValor Facial Lotion

This amazing lotion is so smooth and wonderful (and it smells absolutely fabulous). One of the things I love best about it (aside from how great my face feels when I use it) is that you can actually read all of the ingredients without needing a magnifying glass. And even better, they’re all real words. No degree in biochemistry needed to understand what you’re putting on your face. 


Essential Living Witch Hazel - LCG Box

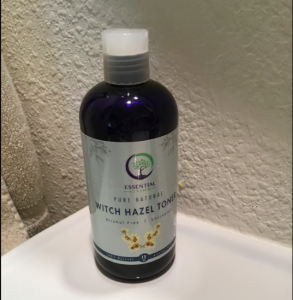
Essential Living Witch Hazel Toner

This wonderful toner is made from 100% American witch hazel. There’s no alcohol or preservatives in the bottle, just witch hazel. Of course, I’ve never understood why anyone would put alcohol into something that’s supposed to be good for your face, alcohol just dries out your skin.  Witch hazel is useful for:

  • Nourishing for dry skin. And if used immediately after a shower can help seal in moisture
  • Reducing acne and redness
  • Helps to relieve sunburn discomfort
  • Supportive against itching and inflammation from eczema
  • Soothing against razor burn
  • Can help reduce bruising (apply 3 times per day to the affected area)

Turkish cotton makeup towel - LCG BoxTurkish Makeup Towels

I love these towels. It honestly never occurred to me to wonder why we always use white towels to remove makeup. But after 2-3 months of daily use, you just throw it out. Even though you’ve been running it through the wash, it looks like an art project, with lipstick, eye-liner, eye shadow, blush, foundation, whatever you wear. And it just looks gross. Even if you don’t wear much make-up, white towels still get stained with skin oils and daily pollution exposure. Now with this wonderful, soft, Turkish cotton towel, you don’t have to worry about that.

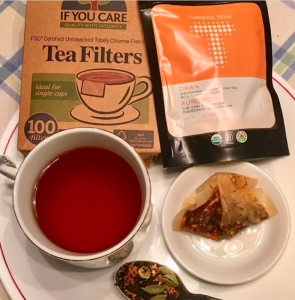
Turmeric Tea and If You Care Tea FiltersTurmeric Tea + Filters - LCG Box

This tea is amazing!! I wish I had smell-o-vision right here on the screen so you could enjoy the fabulous aroma of this incredible 100%-organic-no-added-crap tea. It’s delicious hot or cold and I can’t make up my mind if I like it better as a morning cuppa or in the evening (even though it’s called Dawn).

And these filters? They’re unbleached, durable, and really wonderful. The great thing is that you can use these filters for more than just tea. Check out this video on my Facebook page to learn how else you can use them.


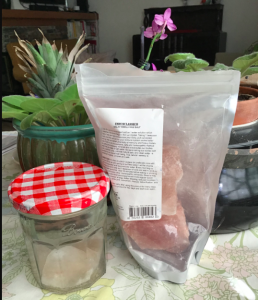
Himalayan Salt for Sole - LCG BoxHimalayan Salt 

Rounding out this month’s amazing box is this bag with CHUNKS of Himalayan Salt.  Use this to make Sole (pronounced solay) an adrenal support drink. It is very supportive for those with low energy, fatigue, or anyone who needs a good mineral boost.  Here’s how you make it:

Fill a glass jar about 1/4 of the way with Himalayan salt chunks
Fill the rest of the way with water
Let sit 24 hours so that the water becomes super-saturated
The salt will still be visible at the bottom of the jar
Take 1 teaspoon of the sole, mixed into some room temperature water first thing in the morning (if desired this can be put into a cup of nourishing broth)
Keep refilling your jar with water when it runs low
As the salt run out add another chunk

This bag should provide around 9 months of sole if used daily.

When you join the Lean, Clean, Green Subscription box family you’ll get a themed box filled with holistically healthy, well-sourced products personally curated by me. Each month you pay only $47.

The August 2019 Self-Care Box is worth $78.62!!

* The best part about the box is that you’re in control of how often you get it. Monthly, every other month, every three months, it’s up to you. And if you miss a box, or need a refill on any of these fabulous finds, as long as you’re a subscriber you have access to the Marketplace. That means you can log in and still get the items you want.

If you’ve just found this post and you’re not a member of the Lean Clean Green family, join us, you’ll be glad you did.

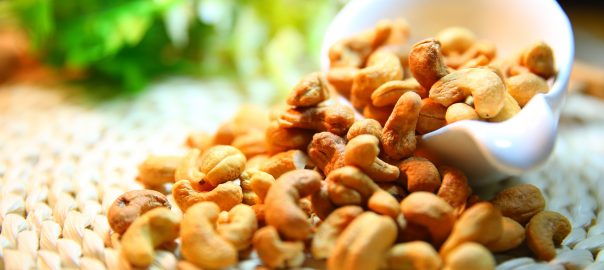
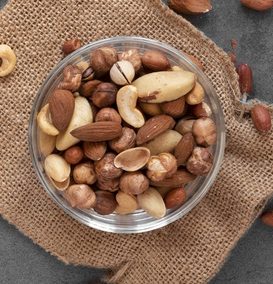
sprout nuts and seeds

The Easy Way To Sprout Nuts And Seeds

Why Sprout Nuts and Seeds

Nuts are one of the healthiest and nutrient-dense foods. They are known to contain high levels of key minerals such as calcium, iron, omega 3 fats, and vitamin E. Studies have shown that consuming nuts may also help fight various conditions such as cancer, heart disease, Alzheimer’s and depression.

Although rich in many nutrients, they have a mechanism that makes it rather hard for the human body to absorb these items. Enzyme inhibitors and toxic substances such as goitrogens and phytic acid make it hard both to digest and take up the nutrients contained in the nuts and seeds.

Fortunately, there’s a simple and natural way to get rid of these substances. Sprouting, sometimes referred to as soaking softens and readies the nuts or seeds for germination. When they are sprouted it forces them to get shed the phytic acids and other protective substances that ensure their survival but inhibit nutrient absorption. It also gives a little bit of a nutrient bump due to the sprouting activity.

It is, therefore, really important to soak and sprout nuts and seeds before consuming them in order to get the most nutrition possible out of them.

Once soaked, the nuts make the perfect snack or addition to your smoothies. They are also great for making nut-butters which are a great snack when added to sliced apples or pears, on celery, or used in a wide variety of recipes.

How to Sprout

Sprouting the nuts and seeds is quite simple.  All you need is a glass jar, some sea salt, water, and the nuts or seeds you want to sprout. If you’re using a quart jar you can make 4 cups, a pint jar will yield 2 cups.  For ease of use, it’s best to get wide-mouth canning jars.

The nuts and seeds need to be raw, unroasted, and unsalted in order for this process to work.  I do not recommend mixing the nuts and seeds together, even if they require the same amount of time for soaking. Personally, I find it better to soak each one individually. If you want to turn them into a trail mix or use them combined you can do that after they have been sprouted and dried.

Simply put the nuts in the jar, add two teaspoons of sea salt, fill it up with water and leave to soak for the required period of time.

How long to soak for sprouting

Every nut or seed has a different soaking period. Here’s a chart to help you understand the timing needed to soak each different kind.

  • Almonds – 8 to 12 hours
  • Brazil nuts – 8 hours
  • Cashew nuts – 2 to 3 hours
  • Hazelnuts (filberts) – 8 to 12 hours
  • Macadamia nuts – 2 hours
  • Pecans – 4 to 6 hours
  • Pistachio nuts – 6 to 8 hours
  • Pepitas – 8 hours
  • Sesame – 8 hours
  • Sunflower seeds (no hull) – 2 hours
  • Walnuts – 4 to 8 hours

Once you have removed the seeds and nuts from the water, you can dry them; the best way is to use a dehydrator or oven. If you opt to use the oven, set it at 150F and let the seeds and nuts dry for 12 to 24 hours. Make sure that they are completely dry before removing them. For the dehydrator, it depends on how well yours works, if you have a manual you can check it for recommended drying times.

It is important to note that not all seeds can or should be sprouted. In particular, avoid sprouting chia seeds, hemp seeds, flax seeds, and pine nuts.

Nutrients in nuts

Different nuts have different nutrients making it a good idea to snack on a variety rather than just one or two.  I find that a quick and easy trail mix is 3 parts nuts, 2 parts seeds, 1 part dried fruit.  Mixing different nuts and seeds gives you a tasty treat and a nutritional boost.

For those who really want to know:

  • Acorns – highest in manganese
  • Almonds – highest in manganese and vitamin E
  • Beechnuts – highest in manganese
  • Brazil nuts – extremely high in selenium, also a great source of manganese, phosphorus, and magnesium
  • Cashews – highest in copper, but also a good source of magnesium and tryptophan
  • Chestnuts – (European) highest in manganese
  • Hazelnuts – (also called filberts) very high in vitamin E and a good source of B vitamins
  • Hickory nuts – very high in selenium, also high in magnesium, thiamin, and copper
  • Macadamia nuts – very high in selenium and thiamin, also high in copper and magnesium
  • Peanuts – not a nut, they’re actually a legume, a good source of manganese and tryptophan
  • Pecans – very high in manganese, also high in copper and thiamin
  • Pistachio – very high in B6, a good source of manganese, copper, phosphorus, and thiamin
  • Walnuts – very high in omega 3 fatty acids and a great source of manganese

Recipes

Soaked/Sprouted Nuts

Raw nuts are best but for optimal nutrient density, you can boost the nutrition by soaking them.  This breaks down the phytic acid coating, an enzyme that protects the nuts until they're ready to sprout but inhibits our ability to absorb nutrients. When soaking or sprouting the nuts you remove this phytic acid coating which makes the nutrients more bioavailable. Soaking/sprouting couldn't be simpler:

Ingredients
  

  • 4 cups of nuts
  • 2 teaspoons sea salt
  • water

Instructions
 

  • Place nuts in a quart jar, add salt, and fill with water
  • Let soak overnight
  • Drain and then dry in dehydrator or oven set at 175ºF 12-24 hours or until completely dry.

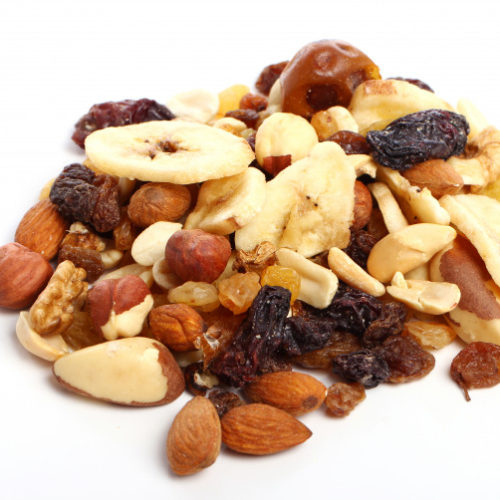
3-2-1 Trail Mix

One of my favorite ways to eat nuts is to make my 3-2-1 Trail Mix. This is a great nutrient dense snack (especially if you soak the nuts and seeds ahead of time) and perfect for on-the-go or anytime you need a quick protein boost.

Ingredients
  

  • 3 parts raw nuts (soaked/sprouted preferred)
  • 2 parts raw seeds (soaked/sprouted preferred)
  • 1 part dried fruit

Instructions
 

  • Be sure to look for dried fruit that does not have added sugar, sulfites, or other preservatives

Crock Pot Roasted Nuts

Crockpot is a brand name that has become a common usage term. They're all slow cookers and in my opinion they're one of the best kitchen devices you can own. I wanted to share another great use for your crockpot, seasoned nuts. 

Ingredients
  

  • 4 c. raw soaked nuts
  • 1/2 C. melted coconut oil
  • seasonings

Instructions
 

  • Cook on low for 2-3 hours, stirring every 30 minutes, with the lid off
  • When done turn off the crockpot and let the mixture cool completely in the crock before jarring up
  • How you season them is up to you.  I have a couple of mixes that I like but feel free to go ahead and make up your own.
    1 T. Penzey's taco seasoning + 1/2 t. hot sauce or 1 t. red pepper flakes
    1 T. tamari sauce + 1/2 t. garlic powder + 1/4 t. sea salt
    1 T. curry powder + 1/2 t. ground cinnamon
    1 T. sucanat + 2 t. ground cinnamon + 1/4 t. nutmeg
    2 t. vanilla + 2 t. sucanat + 1/2 t. pumpkin pie spice

[expand title=”Sources“]

  • https://www.fastachi.com/nuts_health_benefits
  • https://www.foodmatters.com/article/the-benefits-of-soaking-nuts-and-seeds
  • Shahidi, Fereidoon, et al. 8 Almond and Almond Products: Nutraceutical Components. Tree Nuts: Composition, Phytochemicals, and Health Effects (2008): 127.
  • Vinson, Joe A., and Yuxing Cai. Nuts, especially walnuts, have both antioxidant quantity and efficacy and exhibit significant potential health benefits. Food & function 3.2 (2012): 134-140.
  • Yadav, Mukesh, et al. “Medicinal and biological potential of pumpkin: an updated review.” Nutrition research reviews 23.2 (2010): 184-190.

[/expand]

Top tips for clean eating

Three Top Tips For Clean Eating

What is clean eating?

There’s a lot of media exposure and talk about “clean eating” but what is it exactly? The widely accepted definition is that clean eating means avoiding highly processed foods, refined sugars, and eating a diet rich in whole foods in their most natural state. For fruits and vegetables that means buying organic for The Dirty Dozen. When it comes to animal products, it means buying free-range or pastured with no antibiotics, pesticides, or added hormones.

For some people a clean eating diet also means no gluten.  The challenge with going gluten-free (whether on a clean eating diet or not) is that you need to avoid the gluten-free crutch foods that are scattered all over the grocery store shelves. These highly processed gluten alternatives are not a healthy choice.

1. Start with breakfast

Many people often skip breakfast, possibly because they’re running late or they’re too busy to stop and have a meal. But breakfast is how you fuel your body for the day ahead. If you are going to have breakfast, don’t just choose simple carbohydrates or a fast food option. You want a real food breakfast that will provide healthy fats, protein, and complex carbohydrates.

2. Simple Swaps

  • Hummus is a great alternative to mayonnaise. But instead of being mostly fat, it’s mostly protein. And it has a similar consistency to mayo making it perfect for wraps, dressings, and spreads. If you’re buying it in the store be sure to read the label in order to make sure you are getting the cleanest possible option. Or make it really clean by simply making your own at home.
  • If you’re looking for yogurt it’s easy to be distracted by the fruit-flavored varieties on the dairy case shelves. But the prepared fruit yogurts tend to come with excessively high levels of sugar and may also have other artificial colors, flavors, or preservatives, none of which you want on a clean eating plan. Instead choose plain, whole milk yogurt, either regular or Greek-style and add your own sweeteners and flavoring. Options could include fruit, honey, chopped nuts, or delicious spices like cinnamon.
  • Our modern diet has led us to feel that we have to have rice or potatoes or pasta with a meal. We’ve been taught that you “need” a starch. If you feel you still want that to make your meal complete, choose more complex carbohydrates like riced cauliflower, sweet potatoes, or simply double up on your veggies. Cauliflower can also be used as a substitute for mashed potatoes without too much extra effort.
  • Salad and dressing seem to naturally go together. Unfortunately, if you take the time to read the label on the back of the bottle it’s not good news. Filled with loads of preservatives and artificial ingredients, these are definitely not part of the clean eating ideal. Instead make your own vinaigrette by combining 1/2 cup olive oil, 3 tablespoons vinegar or lemon juice, salt, pepper, and the herbs or seasonings of your choice.

3. Don’t Do This

Just as important as all the things listed above that you want to do, there are few things that you need to keep in mind to not do:

  • An easy way to clean up your diet is to skip those foods that are most highly processed and offer the least nutrition. That includes white rice, pasta, cookies, crackers, and chips. Choose nutrient-dense foods that will actually support your health like raw nuts, veggies, and quality proteins.
  • Juices, juice drinks, and soft drinks are empty calories. Truthfully they’re nothing more than liquid candy bars. They provide little to no nutritional value and should be avoided. Eat those fruits instead of juicing them so you can enjoy the fiber which helps to slow down how quickly the sugars hit your bloodstream. If you’re thirsty choose water, herbal teas, or home-made green juices instead.
  • We’ve been misled to believe that artificial fats like margarine are good for us. We’ve also been guided towards vegetable fats like canola or corn oil. What you really want is healthy fats like butter, ghee, or beneficial oils like avocado, olive, and coconut. These are nourishing, satiating, and supportive.

As you start your clean eating journey it can be helpful to use a food journal so that you can see the progress that you're making. It's also important to remember that it's not easy to make all of these changes at once. Baby steps are the key to success here. Start with one thing, like eating breakfast or making a healthy swap. Master that and then move on to the next thing. Before you know it you'll be well versed in what those clean eating choices are and you'll be focused on your health goals.

Clean eating is a good step towards a healthy life. In fact, it's one of the #IngredientsForAHealthyLife. If you're looking to do even more and learn how to really understand what's in your food, be sure to read The Pantry Principle.

lacto-fermented condiments

Be Prepared To Make Condiments

Preparedness is a big topic these days and many people are looking at purchasing packages of food that are good for long term storage. The biggest challenge with pre-made prepared foods is all of the chemicals and additives that are in them. Of course, making a list of foods to have on hand for those times when you need it is important. But when you’re putting that list together consider skipping the condiments.

Making condiments

I’m not saying don’t have condiments on hand. However, I do believe it’s better to know how to make your own condiments. This way you’ll have them on hand fresh and tasty, plus you’ll avoid all the negative ingredients found in many condiments. And truthfully even those without too many harmful additives don’t last that long. By knowing how to make your own condiments and having a few simple, easy to store ingredients on hand you’ll always have delicious, nourishing condiments available.

You’ll need to remember that when fermented the condiments may have a slight bubble to them or may seem to separate slightly. They may also have a slightly tangy smell. Do not eat them if they are fuzzy, discolored, or smell really bad/moldy.  If you’ve done it right, this should not happen.

Needed ingredients

When making lacto-fermented condiments you start with a basic condiment recipe. Then you add some sort of liquid that helps with the fermentation process.  The two best options are whey, the liquid that’s left over from making yogurt, or the liquid you have when you make homemade sauerkraut.  You often have quite a bit of either of these left over after making the item. You can store it in a jar in the fridge until you need to use it to make recipes like these condiments below.

Lacto-fermented Ketchup
Print
Ingredients
  1. 6-ounces organic tomato paste (one small can)
  2. ½ c. whey (strained from yogurt or made from starter)
  3. 1-2 tablespoons whey
  4. 1/4 cup apple cider vinegar (raw & unfiltered)
  5. 1 tablespoon honey
  6. 2 teaspoons molasses
  7. ½ teaspoon of sea salt
  8. ½  teaspoon onion powder
  9. ½ teaspoon garlic powder
  10. generous pinch each allspice, cloves, and nutmeg
Instructions
  1. Blend all ingredients (except 1-2 T. whey) together in a food processor until well combined
  2. Place in a jar and top with 1-2 tablespoons of whey to cover completely
  3. Cover jar and let sit at room temperature for 2-3 days
  4. After fermenting store in the refrigerator
The Ingredient Guru, Mira Dessy https://theingredientguru.com/


Quick and Easy BBQ Sauce
Print
Ingredients
  1. 1 cup ketchup (see above)
  2. 2 tablespoons mustard (see below)
  3. ½ cup honey
  4. 1 ½ tablespoons molasses
  5. ½ teaspoon sea salt
Instructions
  1. Mix all ingredients together in a sauce pan and heat gently until just under a boil
  2. Remove from heat, cool and jar
  3. Store in the refrigerator
The Ingredient Guru, Mira Dessy https://theingredientguru.com/
Lacto-fermented Mustard
Print
Ingredients
  1. ½ cup mustard seeds
  2. ½ cup sauerkraut brine (leftover/filtered from live kraut)
  3. 2 tablespoons apple cider vinegar (raw & unfiltered)
  4. 1 clove garlic, minced
  5. 1 tablespoon honey
  6. ½ teaspoon sea salt
Instructions
  1. Blend all ingredients in a food processor
  2. Place in a jar, cover, and let sit at room temperature 1-2 days
  3. Store in the refrigerator
The Ingredient Guru, Mira Dessy https://theingredientguru.com/


Lacto-fermented Mayonnaise
Print
Ingredients
  1. 1 egg
  2. 1 cup olive oil, divided
  3. 11⁄2 teaspoons mustard powder
  4. 1 teaspoon sea salt
  5. 3 tablespoons tarragon vinegar (can substitute white wine vinegar and a few fresh tarragon leaves)
  6. 1 tablespoon whey
Instructions
  1. Place the egg, 1⁄4 cup oil, mustard, and salt into a container
  2. Blend well. (A stick blender is the best tool for this.)
  3. When well blended, drizzle in another 1⁄4 cup olive oil and blend well again.
  4. Add the tarragon vinegar; blend well
  5. Slowly add the remaining olive oil and blend well
  6. Gentle blend in whey until completely incorporated
  7. Place in a jar, cover and let sit at room temperature for 8 hours
  8. Store in refrigerator
The Ingredient Guru, Mira Dessy https://theingredientguru.com/
Olive Oil Dressing/Marinade
Print
Ingredients
  1. 3 cups organic extra virgin olive oil
  2. 1/4 Cup  apple cider vinegar  (raw & unfiltered)
  3. 3 tablespoons dry oregano
  4. 2 tablespoon dry basil
  5. 2 tablespoons dry parsley
  6. 2 teaspoons sea salt
  7. 1 teaspoon garlic salt
Instructions
  1. Blend well in a blender
  2. Store in the refrigerator
Variations
  1. Add ½ cup mayonnaise to make a creamy dressing
  2. Add ¼ cup mustard and substitute 1 clove fresh garlic for the dried
  3. Add ½ cup ketchup, 1 teaspoon paprika and substitute red wine vinegar for the apple cider vinegar to make a Catalina dressing
The Ingredient Guru, Mira Dessy https://theingredientguru.com/

Holistic Remedies for Headache

6 Holistic Remedies For Headache Relief

A headache can often be uncomfortable. In some cases, such as migraines, they can be painful and even debilitating. Whether it’s frequent and chronic headaches or an occasional bout of acute pain, it can interfere with your life, making it difficult to do the things you want to do. Although there are prescription medications and OTC options to help you deal with migraines, try some of these holistic remedies before you reach for the pharmaceuticals.

While there can be any number of reasons for a headache it’s important that you track them in order to be more aware of what your triggers are.  Keeping a headache or migraine journal, in combination with the holistic strategies below, may help reduce you reduce the frequency and/or severity of your headaches.

Food-based issues

Sometimes your headache may be due to specific foods or sensitivity to ingredients. It could even be due to a deficiency of certain vitamins, minerals, and amino acids.  If any of these appear to be contributing to your headaches you’ll want to work with a doctor or nutrition professional who can help you identify some of these triggers and support you through the necessary changes to your diet.  Beyond food-based changes, there are a number of other strategies that you can use to help you with your headaches:

Hydration

Many people who experience headaches may be chronically dehydrated.  According to the literature, water-deprivation headache was resolved in as little as 30 minutes by drinking an average of 2 cups of water.  In addition to headaches, dehydration can cause a number of other symptoms such as dizziness, rapid heartbeat, dry skin, and fatigue.  Proper hydration can help relieve these symptoms as well as boosting circulation in order to help with detoxification. In addition to drinking more water, choose hydrating foods for a healthy boost to your diet.

Stress Management

One very common cause of chronic headaches is stress. Whether your stress is caused by work, relationship issues, anxiety, or the habit of overanalyzing everything, stress can be a significant factor when it comes to headaches.  Managing your stress means looking at those factors that are, well, giving you a headache, and finding ways to either avoid them or reduce their impact on your life.  Some top tips for reducing your stress include:

    • Spending time with friends and family
    • Getting enough rest (sleep deprivation can be a significant  factor in stress)
    • Participate in some form of regular exercise
    • Find a fun activity that you enjoy such as art, gardening, or music
    • Meditate

Some studies found that meditation was helpful in reducing both pain and tension. The participants in the study were new to meditation and were only given one 20-minute guided session to learn from. 

Massage

Massage is helpful for relaxing the muscles and can improve the circulation of both blood and lymphatic fluid. According to one study in the Journal of Headache Pain, massage and physiotherapy (which includes massage plus heat and exercise treatment) were effective options for treatment. 

In combination with massage, it may be helpful to apply either hot or cold compresses to help further stimulate blood flow and reduce the headache.  Cold compresses are generally applied to the forehead and temples while hot compresses are often applied to the back of the neck or head.  People tend to respond differently to either hot or cold so you’ll need to experiment with both to see which works best for you.

Some people also find applying weight over the eyes or to the forehead can be helpful and like to use a rolled up towel or an eye-pillow similar to those used in yoga practice.

Acupuncture/Acupressure

This ancient Chinese therapy uses small needles to stimulate certain points or meridians on the body and in doing so balance your Qi or energy. The use of acupuncture has been found to trigger the body so that it produces endorphins, brain chemicals which help reduce pain. One study, in particular, found acupuncture to be similar in effectiveness to preventative pharmacological therapies. Acupuncture can be beneficial for other pain issues as well.

In addition to acupuncture, there’s always the use of self-administered acupressure. Acupressure doesn’t use needles but still applies pressure to certain areas to help relieve the pain of a headache. There are three acupressure points that are most supportive.  GB 20 is the pressure point at the base of the skull, LI 4 is the web in between the thumb and forefinger, and there are four points on the feet.

Herbs

Herbal therapy can be very powerful and there are a number of herbs that are specifically beneficial for headaches. Most people tend to use herbal teas for their headaches. These can be made by adding 1 teaspoon of dry herb to 8 ounces of boiling water and letting it steep for 4-5 minutes.  Strain and serve, if needed you can add a little honey or stevia as a sweetener.

    • Basil
    • Butterbur
    • Catnip
    • Chamomile
    • Fennel
    • Feverfew
    • Ginger
    • Lavender
    • Rosemary
    • Spearmint/Peppermint

Essential Oils

Essential oils have been used for various health issues for thousands of years. Two, in particular, seem to be very helpful for dealing with headaches.

Lavender

Lavender essential oil is often used for its calming effect. In one study participants used the lavender essential oil by inhaling it every 15 minutes for two hours. Results showed that a majority of the test subjects responded positively to inhaling the lavender. Another study looked at using lavender essential oil proactively as a preventative. In that study, both the number and the intensity of the migraines were reduced.

Peppermint

The other beneficial essential oil is peppermint. A cooling, soothing oil, it has been shown to help reduce the pain and sensitivity that often comes with headaches. Peppermint oil also appears to help improve blood flow to the forehead when applied there.

When using essential oils it’s important to note that they are so powerful that they should not be taken internally. Applying essential oils directly to the area, either neat or diluted, or inhaling them using a diffuser or inhaler is all you need. Because essential oils are so potent it may be necessary to dilute with a carrier oil such as coconut oil, sweet almond oil, or jojoba oil.

Dilution Chart (based on 1 tsp. of carrier oil)
1% – 1 drop (best for children and the elderly)
2% – 2 drops
3 % – 3 drops (for specific issues, as directed)
10 % – 10 drops


[expand title=”Resources“]

  • Blau, JN, et al. Water-deprivation headache: a new headache with two variants. Headache. 2004 Jan;44(1):79-83.
  • Chaibi, A and Russel, MB. Manual therapies for primary chronic headaches: a systematic review of randomized controlled trials. J Headache Pain. 2014 Oct 2;15:67.
  • DaSilva, AN. Acupuncture for migraine prevention. Headache.2015 Mar;55(3):470-3.
  • Göbel H, et al. Essential plant oils and headache mechanisms. Phytomedicine. 1995 Oct;2(2):93-102
  • Rafie, S, et al. Effect of lavender essential oil as prophylactic therapy for migraine: A randomized controlled clinical trial. Journal of Herbal Medicine. Volume 6, Issue 1. March 2016. Pages 18-23.
  • Sasannejad P, et al.Lavender essential oil in the treatment of migraine headache: a placebo-controlled clinical trial. Eur Neurol. 2012;67(5):288-91
  • Tonelli, ME and Wachholtz, AB. Meditation-based treatment yielding immediate relief for meditation-naïve migraineurs. Pain Manag Nurs. 2014 Mar;15(1):36-40.
  • [/expand]

    Photo by Aiony Haust on Unsplash