Category Archives: recipes


Crockpot Snack Mix

I recently made a batch of Christine's Crockpot Granola.  I really like making it as it's very easy and it tastes great.  While my overnight crockpot cereal is a huge hit you can only make enough for a couple of days.  With the granola I can make enough for a week or more (depending on how fast we eat it).  I posted the fact that I was making a batch of granola on FaceBook and got a comment from Sandy who didn't know that you could make that in a crockpot.  Well folks, yes you can.  You can actually make a lot of things in a crockpot, one of the reasons I love mine so much.

My crockpot history

I own two.  A small 2 quart and a larger 5 quart.  I've considered getting a 6 quart but have no idea where I would store it in my rather small kitchen.  First things first, let's clear up the terminology.  A crockpot is the same thing as a slow cooker.  Crockpot is simply a brand name from the Rival Corporation.  Slow cooker is what everyone else calls it because crockpot is trademarked.  I call mine a crockpot because I happen to own a Rival brand and that's what I've been calling it for 30 years.

I got my first crockpot, which is my 5 quart when I was in college  (and yes, I'm still using it all these years later, that sucker works like a charm).  I went to a college where you needed to feed yourself on the weekends because the kitchen closed down. After a couple of weeks as a freshman I called my Mom and told her that I needed a hotpot and would she please buy me one.  She asked me what I wanted it for.  I said to make soup, sauces and things like that.  I came home a few weeks later and there was a crockpot sitting on my bed.  I was, needless to say, thrilled.  She asked if that was what I wanted.  I replied that I had been looking for a hotpot which cost about $6.  She offered to return the crockpot and buy me a hotpot (better deal for her). I hugged the box to my chest and announced that I would definitely be able to use this.  And indeed I did.  For four years I was very popular on the weekend as several of us would pool our food and make soups or a huge pot of spaghetti sauce and eat together.  It was great.

After I got married I learned that a crockpot is a lifesaver when you have two working professionals. You come home and dinner is ready.  It became one of our most used kitchen appliances.  Then we started having kids and it became even more important to plan meals that would be simple, easy and fit into our increasingly busy schedule. Now we're empty nesters but our crockpots still get used regularly and are one of my favorite time saving tools. 

Dry cooking in a crockpot

Dry cooking in a crockpot can be tricky. That's because the point of a crockpot is to seal in moisture. This reduces the amount of moisture you need to cook with and creates a slow braising effect. You need to adjust for dry/low moisture recipes; one trick is to leave a wooden spoon in the crock propping the lid open.  You also need to make things that won't burn or stick.  Snack mixes are a good choice.  You get a tasty, crunchy treat where you control the salt, sugar, fat and flavor content without all of the chemicals, preservatives and artificial colors of store bought snack mixes.  Although I use cereals as the base for these mixes I tend to buy only cereals that do not have any objectionable ingredients.  I also use raw or soaked nuts and add sea salt as needed for flavor.  I prefer not to use roasted nuts because they are not as healthy for you.

Here are our favorites:

Crockpot Tropical Snack Mix
Print
Ingredients
  1. 3 C. rice squares cereal
  2. 2 C. oat squares cereal (look for gluten free)
  3. 1 C. dried banana chips, unsulfured
  4. 1 C. dried pineapple, unsulfured
  5. 1 C. macadamia nuts, raw and unsalted
  6. 1 C. shredded coconut, unsulfured and unsweeteend
  7. 1/2 C. coconut oil, organic, melted
  8. 1 T. honey, raw and local preferred
  9. 1 t. cinnamon
  10. 1 T. sucanat
  11. 1/2 t. sea salt
Instructions
  1. Mix all ingredients into the crockpot
  2. Turn it on low for 3-4 hours, propping the lid open with a wooden spoon
  3. Stir every 30-40 minutes
  4. When it is done (the mixture seems very dry), turn off the crockpot, uncover and let the mixture cool completely in the crockpot
  5. Store in an airtight container
The Ingredient Guru, Mira Dessy https://theingredientguru.com/
Crockpot Tex Mex Snack Mix
Print
Ingredients
  1. 3 C. corn squares (organic and low sugar)
  2. 2 C. rice squares
  3. 2 C. corn chips (organic)
  4. 1 C. pecans or walnuts, raw
  5. 1 stick melted butter (organic)
  6. 1/2 t. hot sauce
  7. 1 T. Penzey's Taco seasoning
Instructions
  1. Mix all ingredients into the crockpot
  2. Turn on low for 3-4 hours, propping the lid open with a wooden spoon
  3. Stir every 30-40 minutes
  4. When done (the mixture seems dry), turn off, uncover, and let cool completely in the crockpot
  5. Store in an airtight container.
The Ingredient Guru, Mira Dessy https://theingredientguru.com/
Crockpot Asian Snack Mix
Print
Ingredients
  1. 4 cups rice squares cereal
  2. 1½ cups sesame crackers
  3. 1 C. cashews
  4. 1 C. dried peas with no artificial color (these are hard to find)
  5. 1 stick melted organic unsalted butter
  6. 1 T. Tamari sauce
  7. 1 t. Chinese five spice
  8. 1/2 t. sea salt
Instructions
  1. Mix all ingredients into the crockpot
  2. Turn it on low for 3-4 hours, propping the lid open with a wooden spoon
  3. Stir every 30-40 minutes
  4. When it is done (the mix seems dry) turn off the crockpot, uncover and let the mix cool completely in the crockpot
  5. Store in an airtight container
The Ingredient Guru, Mira Dessy https://theingredientguru.com/
Crockpot Curried Snack Mix
Print
Ingredients
  1. 4 C. rice squares cereal
  2. 1 C. cashews, raw and unsalted
  3. 1/2 C. chopped walnuts, raw and unsalted
  4. 1/4 C. candied ginger, diced finely
  5. 1 C. shredded coconut, unsulfured and unsweetened
  6. 1 t. curry powder
  7. 1/2 C. ghee
  8. 2 t. Tamari sauce
  9. 1/2 t. sea salt
Instructions
  1. Mix all ingredients into the crockpot
  2. Turn it on low for 3-4 hours, propping the lid open with a wooden spoon
  3. Stir every 30-40 minutes
  4. When it is done (the mix seems dry) turn off the crockpot, uncover and let the mix cool completely in the crockpot
  5. Store in an airtight container
The Ingredient Guru, Mira Dessy https://theingredientguru.com/
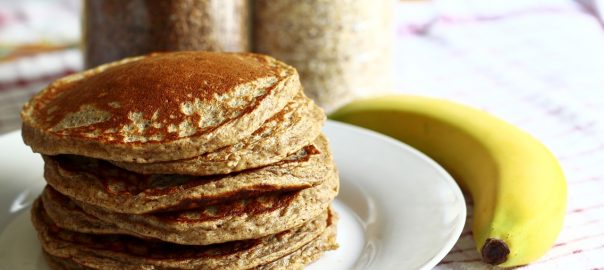
banana oat pancakes

Banana Oat Pancakes

Do you love pancakes?

We love pancakes in our house.  They are a great, easy to make, healthy, whole-grain breakfast.  Throw in some fresh fruit and maybe a little homemade Greek yogurt and it's the perfect meal to start your day…filling, nutritious, blood-sugar balancing, and, most importantly, delicious.  Of course, pancakes are also delicious at any time [breakfast for dinner anyone?].

Using whole grains

I love it when I find a recipe that is so perfect it doesn't need anything else.  This recipe is one of them.  From my King Arthur Flour Whole Grain Baking book, it's a recipe that is a consistent favorite.  I love the fact that it's made from whole grains.  Although I make my own oat flour by grinding oat groats you can easily make it at home by placing old fashioned oats in the food processor or blender and blending it until it reaches a fine consistency.  If that's more than you are willing to do you can also just buy it, both Arrowhead Mills and Bob's Red Mill sell oat flour or you can get certified gluten-free oat flour from Legacy Valley or Cream Hill Estates.

As a quick side note, because oats tend to be grown near, stored with or transported with other glutinous grains, most specifically wheat, if you're following a gluten-free diet you'll need to make sure you're getting certified gluten-free oats.  Certified producers grow and process only oats, guaranteeing that there is no cross-contamination.

This recipe is simple and delicious. One of the things that my family likes so much about it is that the pancakes are very fluffy.  You don't realize that these are whole grain oat pancakes they are that light and airy.  The bananas combined with the cinnamon and nutmeg make it a delicious way to start your day.  I also like having another great recipe that allows me to use up any almost over-ripe bananas.

King Arthur Flour's Banana-Oat Pancakes
Print
Ingredients
  1. 3 small bananas mashed
  2. 2 T. unsalted butter melted (use organic)
  3. 1 T. lemon juice
  4. 1 T. sugar (I reduce this to 1 t. as the bananas when they are this ripe have a lot of natural sugars)
  5. 2 eggs
  6. 1 C. oat flour
  7. 1/2 t. baking soda
  8. 1/2 t. salt
  9. 1/2 t. ground cinnamon
  10. 1/2 t. ground nutmeg
Instructions
  1. Stir together the mashed bananas, butter, lemon juice and sugar in a medium bowl.
  2. Beat in the eggs.
  3. Whisk together the oat flour, baking soda, salt and spices in a small bowl.
  4. Form a well in the center of the dry ingredients and pour in the wet ingredients.
  5. Stir the batter just until the dry ingredients are thoroughly moistened.
  6. Check to be sure the batter is thin enough for your pancakes; you may need to add a touch of milk or water (I never do)
  7. Let the batter sit 10 minutes before using.
  8. Heat a nonstick griddle or heavy skillet.
  9. If your surface is not non-stick brush it lightly with vegetable oil.
  10. When the surface is ready spoon batter 1/4 C. at a time into the pan.
  11. Let the pancakes cook on the first side until bubbles begin to for around the edges, 3-4 minutes.
  12. When the pancakes are just beginning to set flip then and let them cook on the second side, about 1 1/2 minutes more.
  13. You can sprinkle toasted walnuts over the batter just before cooking as an extra treat.
The Ingredient Guru, Mira Dessy https://theingredientguru.com/


Cottage Loaf


Over on my Facebook Fan Page I wrote about a recent experiment in bread making.  I took one of my favorite quick rise bread recipes and used the baking method from no-knead bread.  The bread rose really well.  At first I was sort of disappointed because it rose REALLY well, I was making it in 2 quart pyrex containers (I don't own a 5 quart cast iron dutch oven as called for in no-knead bread) and I wound up with 2 quart-casserole-dish-shaped bread.  However, as you can see from the picture, once turned out of it's container I realized it looked beautiful.    I got a fabulous rise and the crumb is very even and beautiful. 


Helayne asked for the recipe so here it is:


Cottage Loaf
[makes one loaf but doubles very well]


5-6 C. bread flour
2 T. yeast
2 T. evaporated cane juice crystals
1 T. sea salt
1 t. ground ginger
2 C. hot water


In a large bowl mix together 2 C. flour, the yeast, salt, sugar and ground ginger
Add hot water and stir well
Add flour 1 C. at a time until dough is no longer sticky
Knead for 8 minutes until dough is ready (I have a really big bowl and I just knead directly in the bowl)
Oil dough and return to the bowl
Cover with a dishtowel and let rise in a draft free place for one hour
Punch down, shape dough into a ball and place in a bowl lined with a well-floured towel
Recover dough
Take 2 quart covered casserole dish and place in the oven
Set oven to 475
When oven is done preheating open dish, slide dough into dish, place lid back on casserole
Bake 30 minutes then remove lid and bake another 20-25 minutes until bread is done
Remove bread from casserole and cool on wire rack completely before cutting 


The waiting part is very difficult to accomplish as the smell of freshly baked bread permeates the house like nothing else and draws hungry folk in a hurry.


I made this bread using King Arthur Bread Flour.  Although I bake a lot of bread using whole grain or fresh ground flours occasionally I will use unbleached all-purpose or bread flour.  Then I experiment from there to see how much I can modify it and change to less processed grains.  The next experiment with this loaf will be to see if I can substitute 1/2 of the flour for whole wheat and what happens from there.  


I'll keep you posted.

Curried Carrot Sprout Salad

In the tastes-better-than-the-picture category we have today's lunch offering.  A conversation earlier in the day with my friend Blujay about ways to use sprouts brought up the idea of putting them into a curried carrot salad.  


Salads are so wonderful in the warmer months, keeping a couple on hand in the fridge means you always have something for lunch or dinner.  I love the idea of assembling a bunch of different salads for a composed plate as a refreshing way to make a meal.  If you don't happen to have fresh sprouts on hand you many grocery stores now carry them although they're certainly easy to make and I think it's better to get them fresh, it's certainly easy to do.


Curried Carrot Sprout Salad


6 large carrots, topped and shredded
1 C. fresh bean sprouts
1/4 C. dried currants
1/4 C. raw sunflower seeds
1/4 C. chopped walnuts
1/2 C. mayonnaise
1 t. curry powder
salt to taste


Mix all ingredients together
Let sit in fridge for at least two hours to chill and for flavor to settle


Bean sprouts are very healthy.  The act of sprouting forces the bean to convert some of it's starches, this makes it more easily digestible.  Many of the nutrients are increased by sprouting as well, especially vitamin A, vitamin C and some of the B vitamins.  They can be made year round using very simple equipment, just a pot, a sieve and an insulated space.


I use mine in salads, green smoothies, blended into soups and sometimes just as a snack.  They are delicious


Homemade Bean Sprouts


1/2 C. assorted dried beans (I like adzuki, mung, lentil and black beans)
Sort through beans and rinse
Put in a metal pot, cover with water and set in the oven overnight (oven is off)
In the morning drain and rinse the beans well
Return to the oven
Repeat until beans have 1/2″ long tails


Rinse and eat
May be stored in the fridge but make sure they are fully dry before you do that to avoid spoilage


Note:  when making your sprouts it is helpful to put a note stating “sprouts” on the oven door so that people don't preheat the oven without looking and accidentally cook your sprouts.  Just saying…

Tre Colori

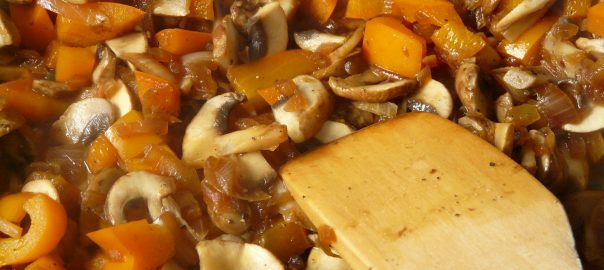
This could more accurately be called “Fridge Rummage” as that's how all of these ingredients came together but tre colori (three colors in Italian) sounds better.

I had a lonely little eggplant that needed to be cooked.  Looking into my fridge for inspiration I found a half a red pepper, half of a large Spanish onion, 2 medium portabella mushrooms and about six leaves of kale.

Adding two cloves of garlic, olive oil, basil, oregano (both from the herb garden), salt and pepper I turned it into the tastes-better-than-the-picture-looks image to the left.

All the vegetables are cut to a medium dice and the kale is done chiffonade style; the herbs are minced.

Dice the eggplant, salt and set aside to drain while cutting other veggies
Heat 2 T. of olive oil, add onions and stir until soft and golden
Add garlic and saute for one minute
Add red peppers and kale and saute until kale begins to wilt
Rinse and add eggplant, add 1-2 more T. of olive oil and saute until eggplant is starting to soften
Then add the mushrooms and herbs and cook until mushrooms and eggplant are done (5-7 minutes)
Salt and pepper to taste

Served over whole grain penne pasta it was delicious!

making ghee

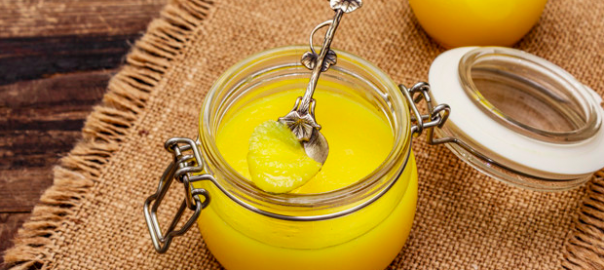
Making Ghee

Cooking with ghee

When looking for healthy fats to cook with my favorite choices are olive oil, coconut oil, avocado oil, butter, and ghee. I really like using ghee because it has a wonderful sweet flavor and it's easy to use.  

Originating in India, ghee is simply clarified butter. In other words, butter that has been gently cooked to a point where the moisture evaporates and you can separate out the milk solids. Because it doesn't have the milk solids to go rancid, ghee can last for a very long time at room temperature (a good thing here in Texas where butter left on the counter would turn liquid and then go bad in very short order).  Ghee also has a higher smoke point than butter (485 F for ghee vs. 350 F for butter) making it a really good all-around fat for sauteeing, baking, and roasting.

Nutrition facts 

  • Ghee can be a healthy choice for many people lactose intolerance. This is because all of the milk-fat solids have been separated out. 
  • Grass-fed dairy has higher levels of Conjugated Linoleic Acid (CLA). This means when using grass-fed butter to make ghee, it also has higher levels of CLA. Studies have shown that CLA 
  • Ghee, especially when made from grass-fed butter, is very high in the fat-soluble vitamins A, E, and K. These vitamins are important for the immune system, supportive for your metabolism, and beneficial for teeth and bones.
  • CLA is very helpful for reducing inflammation, making it a good choice to add it to your diet. 
  • CLA appears to be cardioprotective with results showing “improved aortic sinus atherosclerosis
  • Studies have shown CLA to be helpful for weight loss
  • Studies have also indicated that it can be anticarcinogenic

How to make ghee

The better the quality of your butter the better flavor your ghee will have. My recommendation is to use unsalted butter from pastured or free-range cows that have been grass-fed (in other words, no grains in their diet). 16 ounces of butter will yield approximately 12 ounces of ghee.  The most important thing to remember is that you need to watch it the entire time because it goes from being done to burnt in a snap.  

  • Put your unsalted butter into a thick bottom pan and cook on medium heat until it starts to boil 
  • It will start to foam and crackle as the milk solids condense and the water boils off. If you want you can turn it down just a smidge at this point
  • I scrape off the milk solids foam because I save it as a treat for my dogs but most folks just leave them because they will eventually settle to the bottom of the pot  
  • After approximately 15-20 minutes you will see that the ghee is a clear golden color and the dark brown milk solids are on the bottom of the pot.  This is where you need to be careful. You want to make sure all the ghee is clarified and you can see all the way to the bottom of the pot
  • Remove the ghee from the heat and strain. I use a fine-mesh strainer lined with two paper coffee filters into a measuring cup
  • Let the ghee sit for about 10 minutes and then pour it into a clean glass jar to finish cooling
  • It can be stored at room temperature for the softest, best use consistency

While it is possible to make ghee using your oven or your slow cooker, those both take significantly more time. This is such a simple process and doesn't take very long. In my opinion, it's worth it to simply do the traditional stovetop method

How to use ghee

There are any number of delicious ways to add ghee to your diet. Here are a few of my favorites. If you want to temper the flavor of the ghee a little you can mix it half and half with coconut oil. Once you start using ghee you'll discover how much you enjoy it. You may even find yourself adding it to almost everything. 

  • A teaspoon in a cup of tea or coffee for a wonderful flavor and energy boost. Ghee is also a-maz-ing when you put a dollop into a cup of hot chocolate. 
  • If you love a hearty breakfast with overnight oats or some other grain, ghee can be a wonderful topping with a little cinnamon and some chopped nuts
  • Add just a little to cooked vegetables to give them a delicious finish. I find it's best to add the ghee before any last seasonings or herbs
  • It's also great for mashed vegetables like sweet potatoes, turnips, or other root vegetables
  • Amazing on a muffin or a slice of zucchini bread, I find the caramel-y flavor of ghee better than butter for these snacks
  • Speaking of snacks, ghee is amazing on popcorn
  • When baking you can substitute equal parts ghee for any recipe calling for butter

Given the health benefits, and the delicious nutty flavor, it makes sense to add ghee to your real food diet as an option for a nourishing fat.

[expand title=”Sources”] 

Ha, YL, et al.Anticarcinogens from fried ground beef: heat-altered derivatives of linoleic acid. Carcinogenesis. 1987 Dec;8(12):1881-7

Kanter, JE, et al. 10,12 Conjugated Linoleic Acid-Driven Weight Loss Is Protective against Atherosclerosis in Mice and Is Associated with Alternative Macrophage Enrichment in Perivascular Adipose Tissue. Nutrients. 2018 Oct 3;10(10). 

Zulet, MA, et al. Inflammation and conjugated linoleic acid: mechanisms of action and implications for human health. J Physiol Biochem. 2005 Sep;61(3):483-94

[/expand]

.

How to use Leftovers - Mira Dessy, The Ingredient Guru

Top Tips For Sequential Eating Or How To Use Leftovers

Although I am a fan of leftovers others in the house are less excited by the repetition of certain dishes. Being a big fan of not wasting food, and a new fan of Jonathan Bloom's blog Wasted Food I try to look for creative ways to repackage if you will, the offerings at the dinner table.

One way to do this is to take a moment and plan your menu, seeing what can be re-created from what you have already made. Here are a couple of examples of planning meals so that you are using leftovers for the next meal. I should note, by the way, that my favorite method is to turn dinner foods into breakfast foods as it makes food prep in the morning – a typically hectic time – a little easier.
 
The best and easiest sequential plan is to roast a chicken.  Leftovers can be turned into a different dish, such as a pot pie. And the bones, of course, get turned into a delicious nourishing broth.
 
Making Tuscan Stew with polenta for dinner typically means there is leftover polenta. I take that polenta, pan fry it, top it with an over easy egg, top that with some homemade mushroom marinara and it becomes breakfast. Since polenta is made with stoneground, or fresh ground, corn meal, it's a delicious way to add some fiber to your morning and help get you off to a good start. Pan frying the polenta gives a nice change to the texture and provides a tasty base to the egg and sauce. And in case you're wondering, the Tuscan Stew by itself is delicious as leftovers and I typically have it for lunch the next day.
 
One of my favorite dinners is from my Fast Fun Freezer Meals. It's sauteed sausage, onions, and peppers. The leftovers usually get turned into an omelet in the morning. Adding leftover veggies or dinner dishes into omelets, frittatas, or an egg scramble of some kind is a great way to utilize them. All the prep and cooking is done, which makes breakfast cooking a snap. 
 
For dinnertime leftover usage we can get creative by rummaging through the fridge. Soup and/or chili is a great way to incorporate a lot of little-bit leftovers. Adding fresh sauteed onions, a tasty broth or sauce, and making sure the spice combinations go together well (in the case of soup, curry does not pair well with Italian spice, I'm just saying…) you can hide almost anything. Add in a salad and it's a whole new meal.
 
Last but not least is the shepherd's pie trick; you can hide almost anything under that crust. Taking your leftovers, combining them with added vegetables, if needed, under a mashed potato or sweet potato crust which is then baked in the oven, you've got a new meal that doesn't take a lot of time, saves money (because you're not throwing out ingredients) and keeps everyone from getting bored with the same old leftovers.
 
Taking a few minutes to plan your meals will save you time and money while still allowing you to provide delicious and nutritious meals for your family.

Dried Fruit Compote With Vegetarian Panna Cotta

My friend Naomi and I were discussing how difficult it is to find preservative free dried plums (also known as prunes). Typical dried plums in the grocery store are made with potassium sorbate. According to my Food Additives Dictionary potassium sorbate is a “white crystalline powder used as a preservative; a mold and yeast inhibitor; and a fungistat…low oral toxicity but may cause irritation of the skin…PAFA is currently searching the toxicology literature concerning this additive.” Many people who are sensitive to preservatives and additives try to avoid these ingredients, especially as they can cause allergic reactions such as nausea, diarrhea, and possible rash. For a complete list of additives to avoid check out the excellent Fed Up With Food Additives Site run by Sue Dengate.

Prunes are simply another name for dried plums. They are high in beta-carotene, an important anti-oxidant, potassium, and fiber. Prunes also help increase how well your body can absorb iron. Sweet and easy to prepare they are good to eat either plain, cooked, stewed, and can be baked into a variety of dishes as well.

Naomi lives in California and is fortunate enough to have a plum tree. She harvested her plums and dried them herself. Unfortunately she left the pits in them which makes them more difficult to eat and use. Thinking about this reminded me of a dish that I make, usually in the winter, as a treat; dried fruit compote served over panna cotta. Taking dried fruits and turning them into a compote is a delicious way to rehydrate and use them. Although typically made with pitted fruits I would think that the rehydration process would make it okay to use these pitted prunes and remove the pits while you eat it.

The compote is so good it can actually be served by itself put the panna cotta makes it a special dessert. I am fond of this Vegetarian Panna Cotta recipe from Enlightened Cooking but feel free to use your favorite in it's place.

Dried Fruit Compote, serves 4

Take 1 C. each dried prunes, apricots and raisins (I prefer Thompsons)*
apple juice to cover fruit
zest of 1/2 orange
1/4 c. evaporated cane juice sugar
1 cinnamon stick
2 cloves
1/4 t. fresh nutmeg

Put fruit and apple juice into a sauce pan
bring to a boil
cover and reduce to a simmer
add sugar and flavorings
simmer another 20-30 minutes (compote will thicken as fruit softens), stirring occasionally
remove rind, cinnamon and cloves
set aside to cool completely before serving

* Apricots and Thompson's raisins are easy to find without preservatives both in the grocery stores (usually marked either “organic” or “unsulfured”)

As a side note it turns out that Trader Joe's and Earthbound Farms both have preservative free dried plums. My friend Jodi shared that they can also be ordered online from Nuts Online and Amazon.


Photo courtesy of Glysiak | Wikimedia Commons

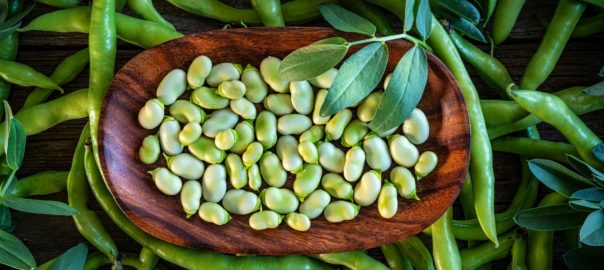
Luscious Limas

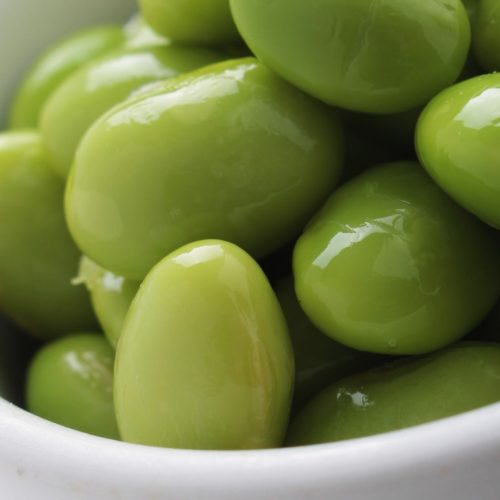
Recently we had a our friend Eric over for dinner. As part of the meal we served this lima bean dish which is one that everyone likes. Eric not only had seconds, he asked for the recipe. I figure anytime you have a teenaged boy willingly eating lima beans and asking for more you've got a recipe that is a definite keeper.

 
Lima beans cannot be eaten raw as they contain a compound which turns into cyanide, however once cooked this compound is inactivated.  Lima beans are a good source of soluble fiber, with 13 grams in a one cup service.  This, coupled with their low glycemic index, make lima beans a good food for anyone looking to support more balanced blood sugars. 
 
Other benefits include:
 
  • An excellent source of iron, one cup offers nearly 25% of the daily recommended intake
  • Protein - one cup of lima beans can provide 15 grams of protein
  • A wonderful source of folate which is an important B vitamin that is vital for DNA synthesis and repair while also supporting cellular and tissue growth
  • Rich in isoflavones which have been shown to be anti carcinogenic for breast cancer 
  • A good source of potassium which supports protein synthesis and carbohydrate metabolism as well as supporting nerve and muscle function
  • There’s a good amount of manganese in lima beans; this co-enzyme supports metabolic activity as well as bone health
  • Also a good source of magnesium which is required for over 300 enzymatic functions in the body
 
Lima beans are tasty and versatile. They can be added to soups, stews, are delicious creamed, turned into a mash, and can be wonderful either baked or slow cooked.  This recipe is one of our favorites, especially when we can get fresh lima beans from the farmer’s market.
 

Luscious Limas

Ingredients
  

  • 1 med. red onion diced
  • 2 ribs celery diced
  • 2 C. lima beans
  • 1/2 C. vegetable broth
  • olive oil
  • 1 t. nutritional yeast
  • salt and pepper

Instructions
 

  • Saute the onion in the olive oil until just starting to soften
  • Add the celery and saute 2 more minutes
  • Add the lima beans and vegetable and cook on med-low until limas are cooked through
  • Add extra broth if needed
  • Sprinkle with nutritional yeast
  • Add salt and pepper to taste


Diana’s Delights

I brought a batch of cookies to my book club meeting last night and they were a big hit. Everyone enjoyed them and I came home with only my plate and a few crumbs.

The recipe is one that I created for my daughter, Diana, it is her favorite cookie. This is a recipe that I give out freely in my cooking classes and I thought I would share it here for those who read the blog. There are two changes in the recipe below from what I hand out in class. The original uses fresh ground wheat and I've changed it to King Arthur Whole Wheat for those who don't grind their own flour. I also substituted evaporated cane juice sugar for the sucanat. To learn more about grain substitutions you can read this post and my notes about sugar substitutions can be found here.

Diana's Delights

½ C. butter
1 C. evaporated cane juice crystals
1 egg
½ t. vanilla
1 C. + 2 T. sifted whole wheat flour
½ t. salt
½ t. baking soda
1 C. rolled oats
½ C. chocolate chips
½ C. shredded coconut

preheat oven to 375º
cream butter and sucanat together
add egg and vanilla and mix well
add flour, salt and baking soda and mix well
add oats, chocolate chips and coconut and mix well

scoop 1 tsp balls of dough, roll into rounds and place on greased cookie sheet
bake 10 minutes
let cool 2 minutes on cookie sheet before moving to wire rack

Enjoy!